First and foremost, we'd like to state that any and all of what we're about to discuss can be harmful to your camera if done improperly. Having said that, you should not attempt any of the following repairs unless you are confident in your ability to properly do so. Also, It should go without saying that your camera should be disconnected from power before attempting any of this. Please feel free to leave any comments and/or questions in the comments section.
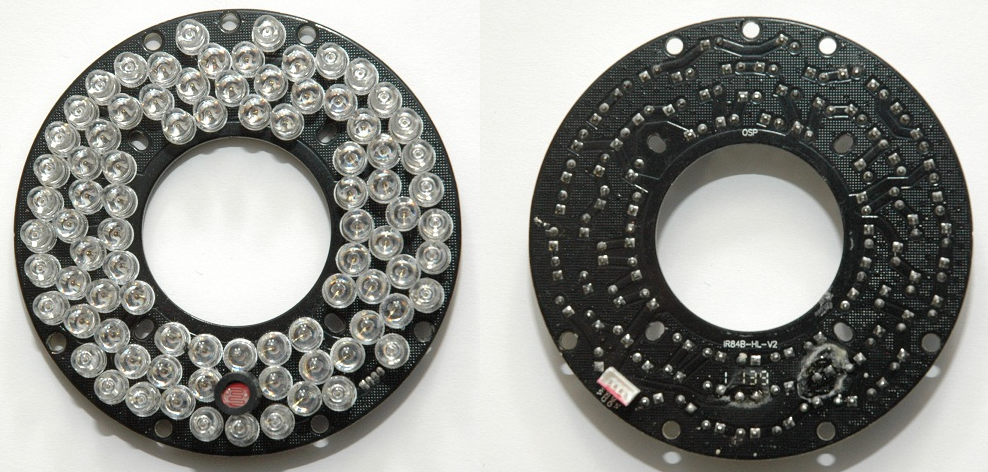
Replacing the Infrared LED Board
Replacing an Infrared (IR) LED board is not terribly complicated. Often times, it will be the easiest to access of all internal components of the whole camera. After determining and then removing the portion of the camera body that needs to come off in order to access the IR board, you'll need to detach the IR board from the rest of the housing. This is done easily by removing the screws that secure the IR board to the camera body and the remaining "guts" inside the camera. You can expect find between two and seven retaining screws. After this, you'll notice that you're able to pull the board away from the remaining components, but the black/red colored power cable will still be attached to a white colored socket on the back of the IR board. While pulling from the base of the connector, remove the power cable from the IR board. At this time you're free to dispose of the damaged board and drop in the new one in reverse order.
Replacing the Lens inside a security camera
From here on out, don't be surprised if you find yourself needing to nearly completely disassemble the camera in order to gain access to the components you need. Your lens, whether it's a fixed or adjustable type lens, is no exception to this. Your IR board will likely become your first hurdle; in almost all cases it will need to removed entirely. In the case of fixed lenses, this will probably be the only thing in your way. From here, you'll likely be able to loosen a single set screw and the lens will thread right off it's mount. 
The manually adjustable lenses can be significantly more complicated if this is your first rodeo. In certain cases, manually adjustable lenses have gear "sleeves" that tighten down around the zoom and focus portion of the lens. They work alongside another set of gears that are connected to your cameras external adjustment knobs. When replacing a lens with this type of configuration, those sleeves will need to be removed and placed on your new lens. Proper gear alignment is crucial as your camera will no longer be able to be adjusted until you get this step right. Manually adjustable lenses that contain no external adjustment knobs, and are instead adjusted by turning the lens itself with the use of small set screws, can be removed just as easily and in the same fashion as a fixed lens.
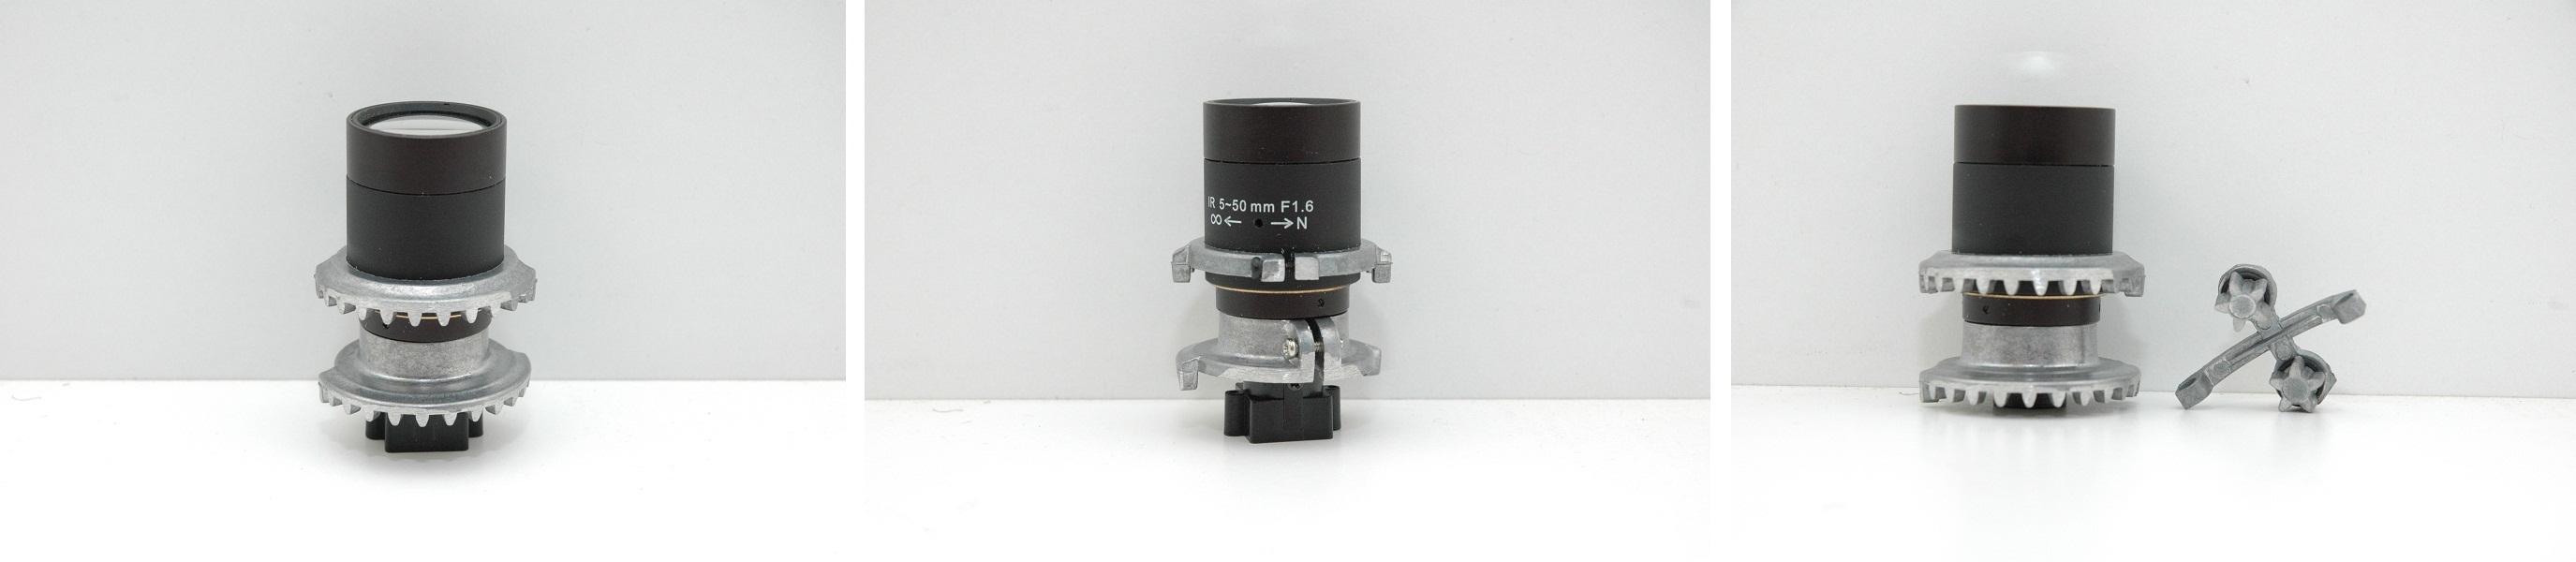
*Your lens may have a foam ring seated around it. As unlikely as it may seem, this ring is crucial to camera performance. Be sure to put this foam ring back into its proper place.
Replacing the CCD or CMOS Image Sensor
An image sensor is easy enough to locate in a security camera. It will be directly attached to your lens and will also always contain a square, or rectangular, piece of glass directly in the center of the board. It should go without saying then that your lens will obviously need to be removed; this will most commonly mean removing your IR board again as well. Once the other components have been removed, you'll either need to detach your image sensor from the body of the camera, and/or from the camera's power board if it contains one. Any cables will also need to be detached from the image sensor at this time.
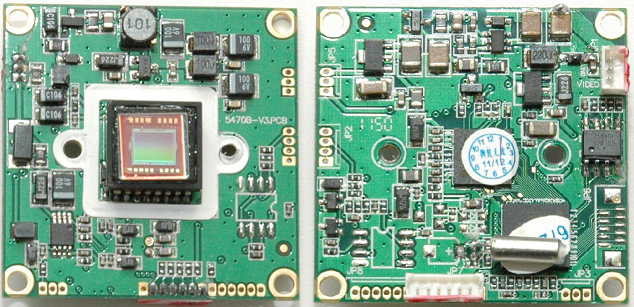
*While installing your new image sensor, be extremely careful not to jar or smudge the glass piece located in the center of the board.
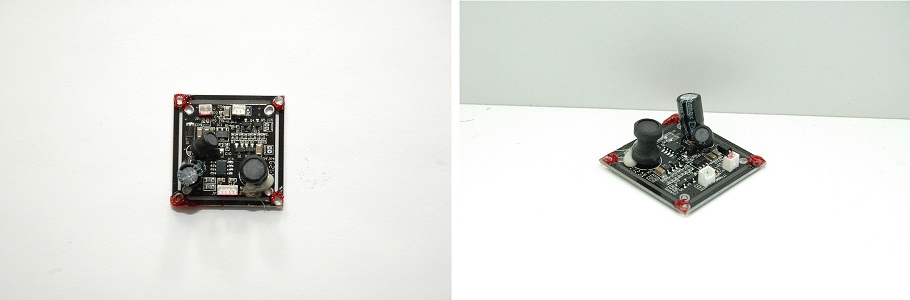
Power Board
Replacing your power board can be very hit or miss. It's usually positioned in a sort of "caboose" fashion at the back of the camera. When this is easy, you're able to pull out all of the internal pieces of the camera at once after disconnecting them from the cables coming from the pigtail. This will expose the power board at the rear of the assembly making it very easy to disconnect and swap with your replacement. Things can easily go the other way; it's not uncommon for internal components not to be connected together or not in this way. These scenarios will mean removing every component between you and the power board. This can quickly turn into a game of Legos without an instruction booklet. For that reason, we'd recommend taking a video or pictures of your disassembly process to make reassembly easier. Also, be sure to take note of which cables are connected to where on these boards and how they're configured on the pins.