If you want to view your cameras remotely and are not familiar with networking, then you might be stuck wondering why you time out all of the time. Don't worry, you're not alone. This is due to ports on your network being closed and unavailable for network packets to travel through on layer 4 of the OSI model. You might ask, "Well, how do I open it up?" The answer is port forwarding. Creating rules for a specific port on your network to get piped over to a specific device will direct the traffic and keep you from getting those "time out" errors or "unable to connect to host". Networking can be very complex, and getting your feet wet can be difficult. There are tons of anagrams standards and specs to remember, but we're going to simplify all of that for you today. We have another port forwarding article to ease your mind. Those of you with a Bell Hub 1000, you're in luck.
If you've already read Port Forwarding for your Security DVR and NVR then you already have the information needed from your DVR/NVR. Let's get started.
Configuring the Router
Step 1: Access Your Router
Enter the address of your router into your browsers URL bar. The address for this device is:
192.168.2.1
Your device may differ from this. A good way to know the IP of the router you're connected to is to take a look at your default gateway. This is the device you're connected to for routing. Please make sure your computer is connected to the first device on your network when doing this. Creating rules behind another router blocking the traffic is not going to allow you to monitor your security camera system remotely.
When accessing this device you are not prompted with a username/password screen. You get dropped right on the landing page.
Step2: Navigate to Port Forwarding
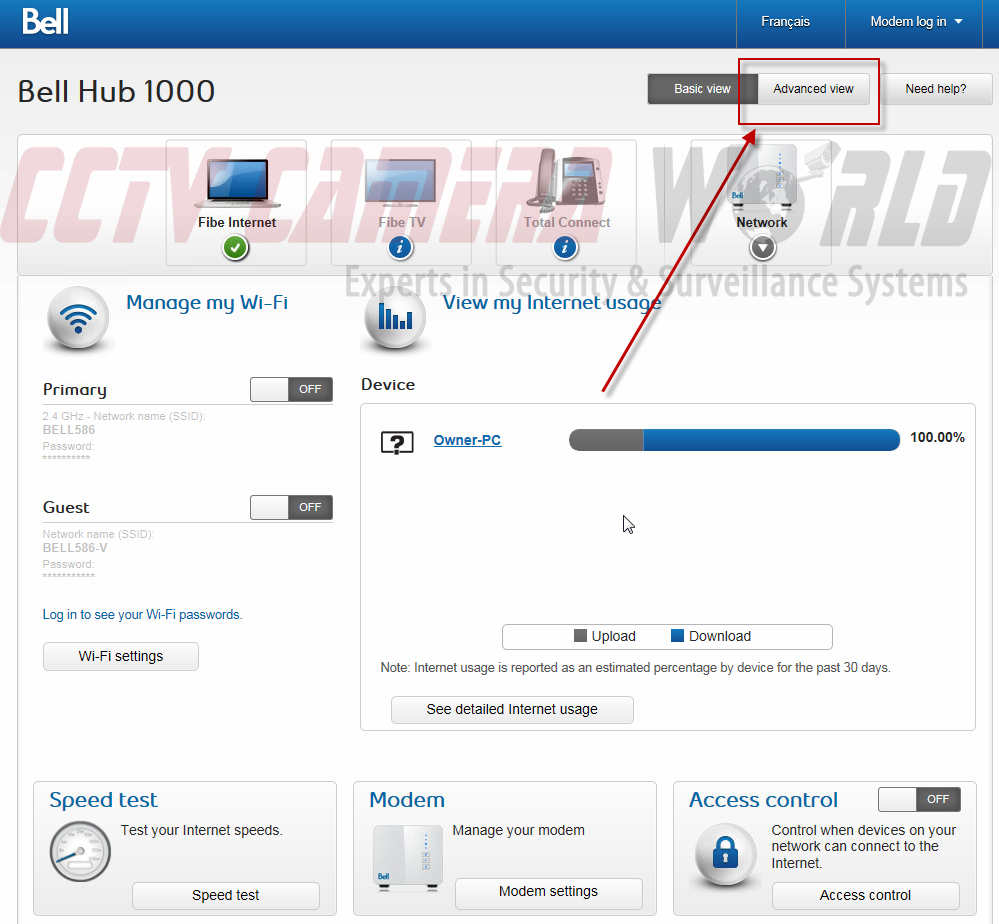
Once you're on the landing page click "Advanced View" in the top right corner of the screen.

Now click on Network Settings at the bottom of the page in the Modem "bubble."

Once you've clicked on Network Settings you should be prompted for a password. The default password is admin. After entering your password click "Log In."
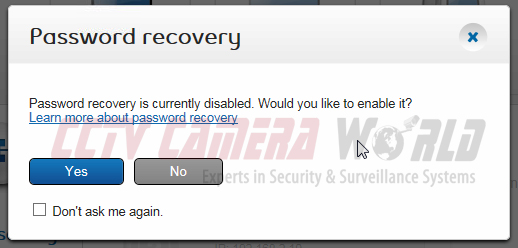
If you have not set up password recovery you may want to do so. If you've already set it up you shouldn't see the pop up above. I clicked on the x to move forward.
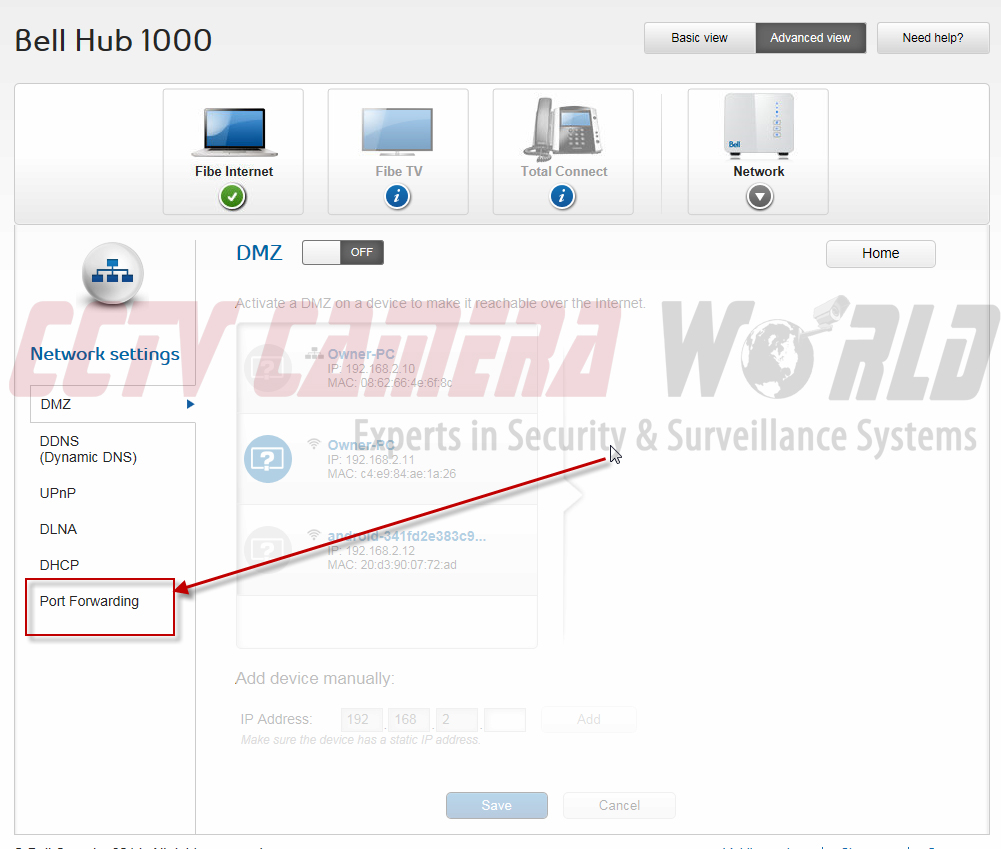
We've almost navigated to the right page. Click on "Port Forwarding" on the left menu at the bottom.
Step 3: Create the Rules
Now that we're on the correct page it's time to create the port forwarding rules so the DVR/NVR can send the camera feed to the outside world.
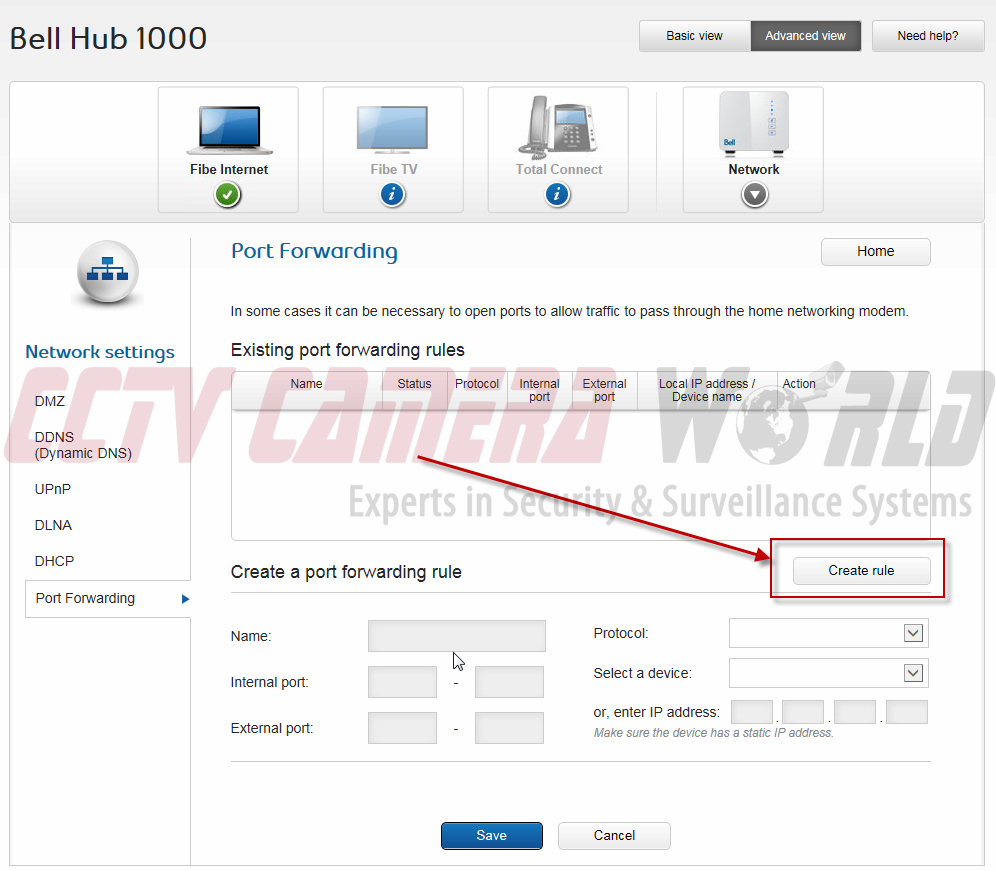
Click on "Create rule" to the right in order to make the text boxes accessable.

Here you will create a rule for each of the ports that you want to be opened so that network traffic can pass through freely to the device over these ports.
- Name your rule so that you can identify it later. I name them using the following format ([Device], [port number]).
- Enter the port number that you want to use for internal port and external port. Leave the boxes after the hyphen blank as we are not creating a range. Our systems by default require 37777 TCP for data and 80 TCP for HTTP. We'll have to create a rule for each of them.
- Click the drop-down box next to protocol and select TCP.
- Manually enter the static IP of your device. By default, ours are 192.168.1.108. This one was altered to fit the scope of the network.
- Review your rule and click Save.
- Repeat these steps for the additional ports using their port number and protocol. Remember, there should be one rule for 37777 TCP pointing to your device, and another for 80 TCP also pointing to the same device.
Default IP address: 192.168.1.108
Default Data Port: 37777
Default HTTP Port: 80
The rules are in place. You should see them under Existing Port Forwarding Rules. Check to make sure they look right. You can compare it to the picture above with port 80. Let's move on to the next step.
Check Your Work
Always double check your work. I'll repeat this it's important. Always double check your work.
- Go to https://www.grc.com/shieldsup
- Click on the button labeled "Proceed"
- Enter the port numbers separated by a comma in the text field
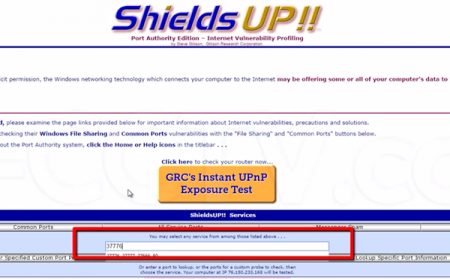
- Click on "User Specified Custom Port Probe"
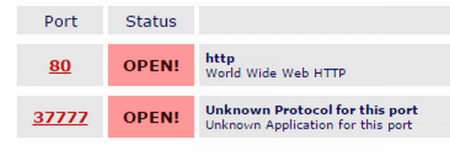
They should display as "OPEN!". If it doesn't display this way for these two ports, go back and take a look at the rules. If you still can't figure it out, contact your ISP for support.
In order to view your cameras remotely, you'll need to have a constant pointer from the outside world back to your home network. Unless you pay for a static IP address you'll need a way to point to the network when your IP changes after its lease is up. What we use is DDNS. For instructions on configuring DDNS on your own follow this link: Configuring DDNS for Remote DVR Viewing
If you have finished port forwarding and DDNS and need help accessing your DVR/NVR click HERE for a helpful guide.