
Configuring one of the CCTV Camera World Pro Series IP cameras for use with an external PoE Swtich rather than an integrated PoE NVR is the same for the most part as the steps discussed in the previous article Configuring ONVIF IP Cameras For Use With A PoE NVR. If you haven't set time, enabled audio (if needed), enabled motion detection (if needed), or configured video settings (optional) follow this link to work through Step 1 thru 7. When you're done follow the step outlined below for configuring network settings for this ONVIF compatible IP camera to work with your network switch or external PoE switch.
Network Configuration for Network Attached IP Cameras
Now that you have configured the camera settings on your network cameras, let's get down to business and get these cameras their IP addresses so you can start recording on your very own NVR camera system. The default IP address of the Pro Series IP camera is 192.168.1.88. If you have only one of these cameras that you plan to connect to your network, the scope of your network is 192.168.1.x, and the camera's default IP address is unused go ahead and install it after you've finished configuring the items mentioned above. Otherwise, you need to change its address.
If two or more devices on a network are configured to have the same IP address and are connected to the network, all of the devices with that IP address will turn off their NIC and stop communications until the problem is resolved. Therefore, to avoid an IP Conflict the address of each device will have to be configured by connecting them one at a time, configuring the IP address to something that matches your scope and is unused, then connecting the next camera, configuring its address, etc until you are finished.
Step 1: Finding the Scope of Your Network
If you're placing an IP camera on your network you will need to match the scope of your network. Follow the instructions located under the header Find Your Computer's IP Address in this article to find the scope of your network. You'll need the first three octets, the Subnet, and the Default Gateway. Most private networks use a Class A or Class C private address. For example:
| Private Address | Subnet | Type |
|---|---|---|
| 192.168.1.1 | 255.255.255.0 | Class C |
| 192.168.0.1 | 255.255.255.0 | Class C |
| 10.0.0.1 | 255.0.0.0 | Class A |
| 10.1.1.1 | 255.0.0.0 | Class A |
Each octet is separated by a period. Your subnet may differ from the most common. For instance, the switch within one of our PoE NVR's has an address of 10.1.1.1 but its subnet mask is 255.255.255.0. Make sure you're checking your network for the settings not just copying from the table above.
Step 2: Configure the Network Settings on Your Pro Series Camera
[+] Click to enlarge
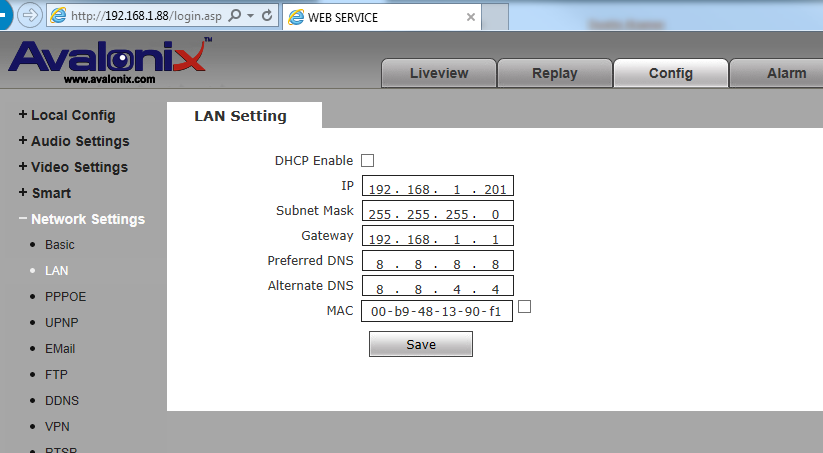
Now that you have the necessary information to configure the camera's network settings, navigate to Network > LAN on the camera's web interface. If you don't already know how to access the camera's web interface, please see our previous guide and follow Steps 1-3 . Set the IP address to a unique address within the network. Our camera was set to 192.168.1.201 as show in the picture above. Set the Subnet and default Gateway, as well as the DNS settings. Make sure to increase the last octet by one for each camera you configure. Meaning, the IP address for our next camera will be 192.168.1.202, while the Subnet and Gateway stay constant.
Step 3: Attach the Cameras to Your NVR
- Connect the camera to a PoE switch or a regular network switch along with an AC adaptor to power it. It will take up to 2 minutes for the camera to boot up and become accessible
- Go to your NVR and log in as an admin. The default user/pass on our NVRs is admin/admin.
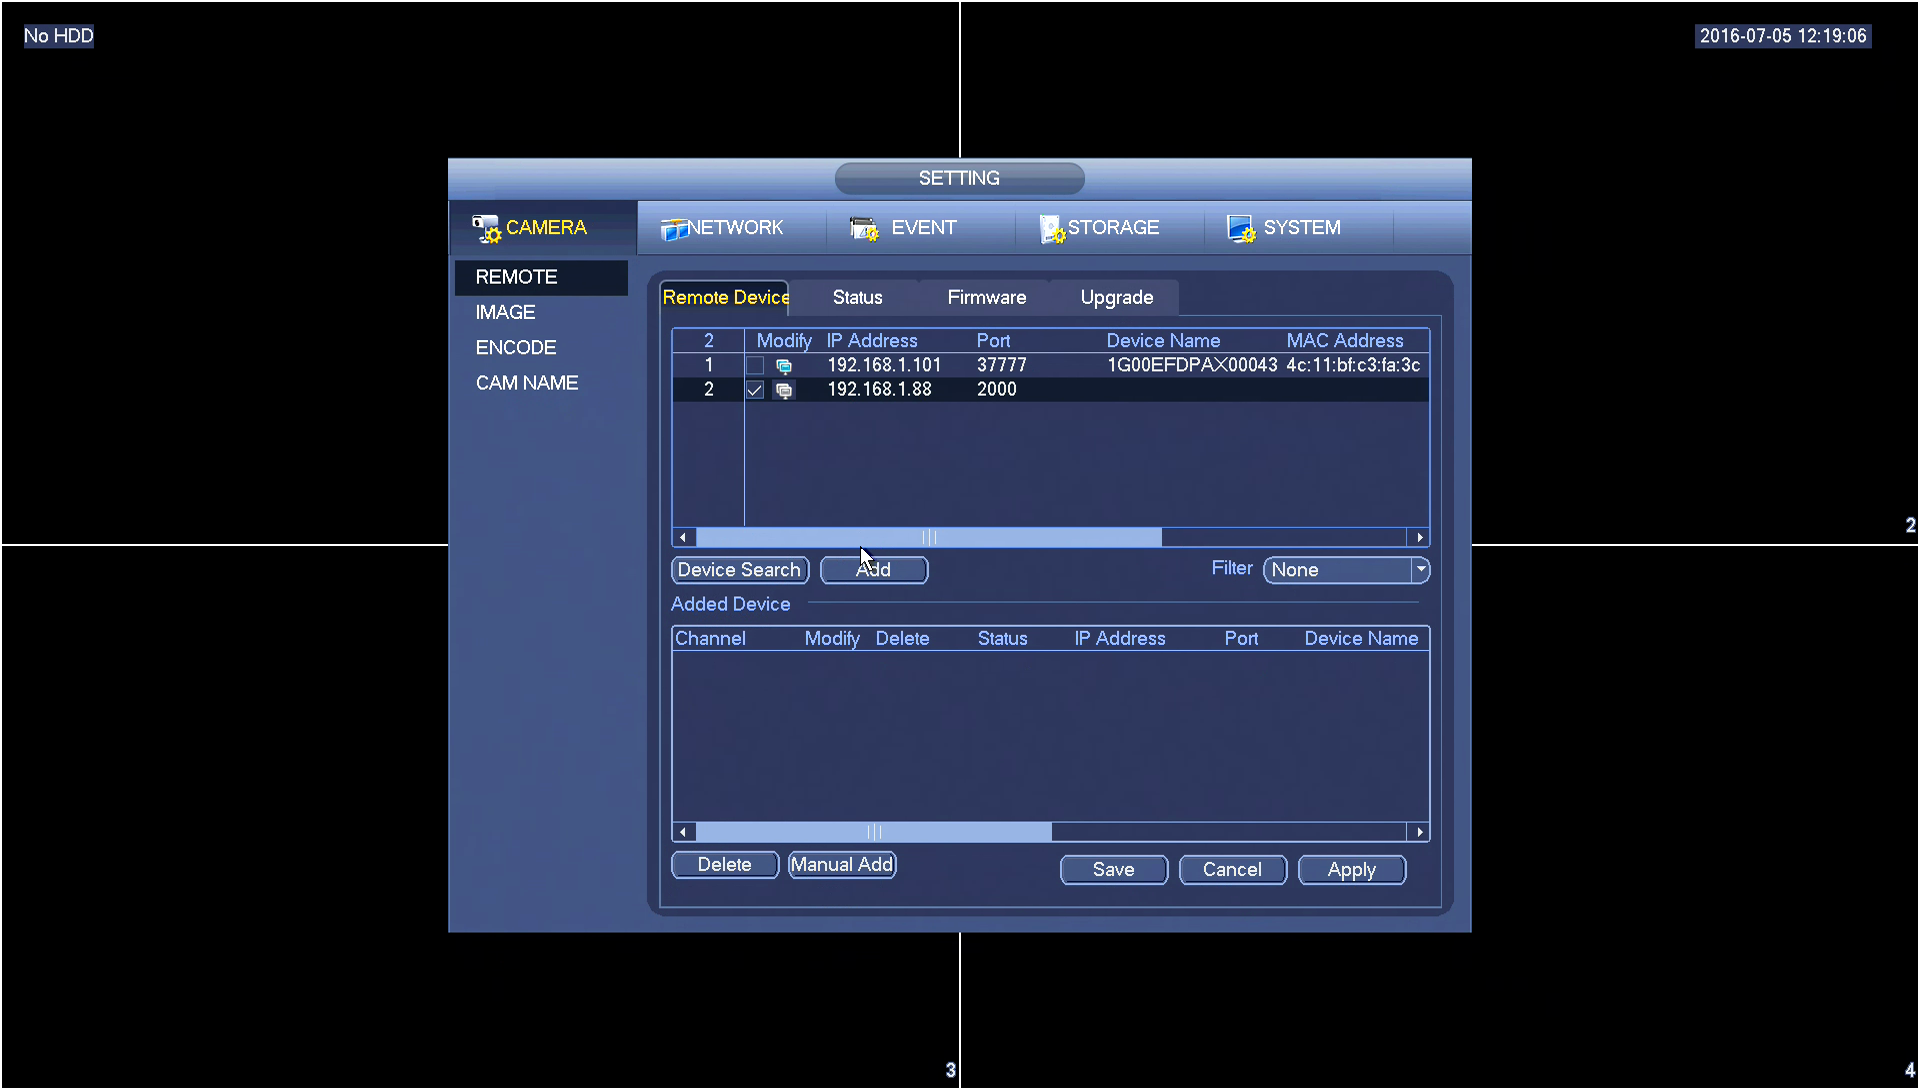
- Right-click anywhere on the screen and select MAIN MENU
- Select Camera from the list
- Select Device Search to fetch a list of cameras on your network
- Highlight the check box next to the camera you want to add and select Add. **
**Note: If you have changed the password on the cameras, then you will have to use the Manual Add option, and enter the user credentials you set on your camera.
[+] Click to enlarge
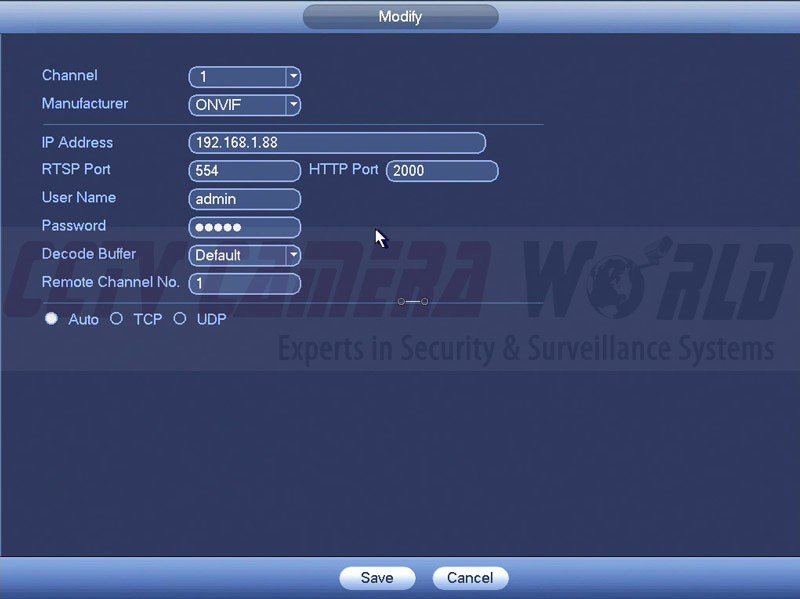
Troubleshooting and Manual Add
If you're running into issues connecting the camera using device search try clicking on Manual Add. Enter it's information into the fields. Under http port make sure the camera is set to 2000.
If you're having trouble bringing up the camera at all try using the config tool that came with the camera to locate it on the network. Make sure you're adding the right IP address, and that the scope matches your network.
If you can't even reach the web address and the tool can't find it, make sure it's camera is powered on. You can tell if the camera is powered on by checking to see if the infrared LEDs on the camera glow red in darkness.