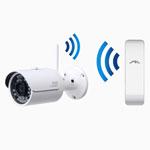
This How To guide discusses the steps necessary to setup a wireless camera system for long range transmission that can be used indoors or outdoors. We show how our wireless security cameras with built-in WiFi radios can be used with professional 2.4GHz WiFi access points to establish reliable signals for transmission up to 300ft. Clear line of sight is recommended as obstructions can cause signal degradation depending on the density of the obstruction. This setup is great for outdoors where you can mount a radio on the exterior surface of a building and broadcast WiFi to cameras mounted in the signal path, for example, a parking lot, apartment complex, factories, warehouses, lumber yard, sanitation processing, mining operations, cranes, and other industrial applications. Since the signal is WiFi, the transmitting radio can also be placed indoors inside the home or business to broadcast a signal, however the signal strength will vary as explained above. You can also use indoor access points or your own router which are compact and aesthetically pleasing to connect to these WiFi wireless security cameras. The applications are countless in indoor business applications such as hospitals, offices, retail stores, warehouses, restaurants, and manufacturing plants. You simply connect the camera to electricity using a 12V power adapter and mount the camera to a wall or ceiling, and you are done. If you don't have a outlet nearby you can use a 18awg 2-lead wire with a male power terminal and a female power terminal.
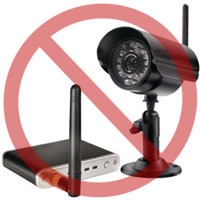 If you've encountered difficulty with wireless camera systems where the recorder has a built-in wireless receiver, then this guide is also for you. Most wireless camera kits such as the one illustrated in this article have low power receivers/transmitters and cannot be used in a home where there are more than 2-3 walls between the signal path of the camera and the receiver. The same goes for wireless cameras with mated receivers using either 2.4GHz or 5.8GHz analog or digital wireless signals. They are home consumer cameras and very limited in their transmission range, resolution, and other capabilities like bandwidth control which allow optimization of the video feed to reach longer distances.
What equipment is needed?
Here is a list of the major components you will need, including extension wire for the power supply in case your power outlet is farther than 3ft from the camera.
WiFi Security Camera
You can choose from our wireless IP cameras that come in dome, bullet or for indoor use with microphone.
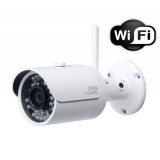
Wireless IP Security Camera 1080P
- Item WC2MP
- 1080P Resolution
- 3.6mm Lens, 80° View
- 100ft IR Range
- IP66 Weather Proof
- Wall/Ceiling Mount
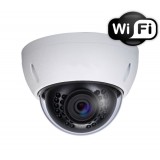
Wireless Dome IP Camera 1080P HD
- Item WD2MP
- 1080P Resolution
- 3.6mm Lens, 72° View
- 100ft IR Range
- IP66 Weather Proof
- Vandal Resistant Dome
- Wall/Ceiling Mount
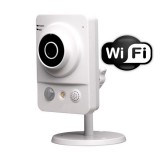
720P Wireless IP Camera with Audio
- Item IP100CM
- 720P Resolution
- 3.6mm Lens, 70° View
- 30ft IR Range
- Built-in Mic & Speaker
- For Indoor Use
- Wall/Ceiling Mount
2.4GHz Wireless Access Point or Router
The cameras we are using have integrated 2.4GHz 802.11 b/g/n WiFi radios that serves as client radios to catch on to a WiFi signal being broadcast. To broadcast the signal we need a 2.4GHz Access Point for our long range wireless security camera setup. You could also use a powerful WiFi router but we stay away from those as recent routers that boast amazingly strong WiFi with multiple antennas are in reality very reliable because of heat issues. So for solid performance and reliability, we recommend using one of the following access points or something similar like a Cisco AP.
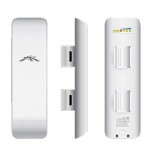
2.4GHz Wireless Outdoor Access Point
- Item NB24
- Strong integrated 11dbi antenna
- Weather Proof construction for outdoor applications
- Also great for indoor industrial applications where there are obstructions
- Up to 300ft Range (clear line of sight) when used with WiFi cameras with integrated radio
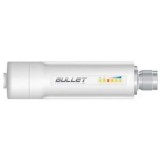
2.4GHz Wireless WiFi Bullet Access Point
- Item IPB24
- Small Size Wireless AP
- Great for indoor applications where space is limited
- Up to 300ft Range
- Requires wireless antenna
NVR or Router
You will need to connect the wireless AP to a network router or switch if you would like to view the camera using a computer, mobile device, or to stream the feed to one of our network video recorders. Just like using a wired IP camera, you can plug the AP in to the network or the DVR/NVR, and the AP will act as a transparent bridge between the camera and the network.
Alternatively, if you do not have a router or switch, you can plug the AP directly in to the NVR recorder. Some of our NVR recorders have two network ports on the back, which makes it convenient to integrate wireless AP in to the system. You can also use one of our Tribrid DVRs which support varying number of IP cameras in addition to analog CCTV and HDCVI cameras.
Other required hardware
You will need other miscellaneous hardware including the following:
- 12V DC Power Supply - You will need at least a 1amp 12V DC power supply to power the camera.
- 18awg 2-lead wire - to extend power to camera from the power adaptor. Only needed if you don't have a 110v AC outlet within 3ft of the camera.
- male power terminal - to tip the power wire
- female power terminal - to tip the power wire
- PVC Pipe - to serve as mast for the wireless AP if you are mounting inside
- Screws
- Zip Ties
- Electrical tape
Setup Diagram
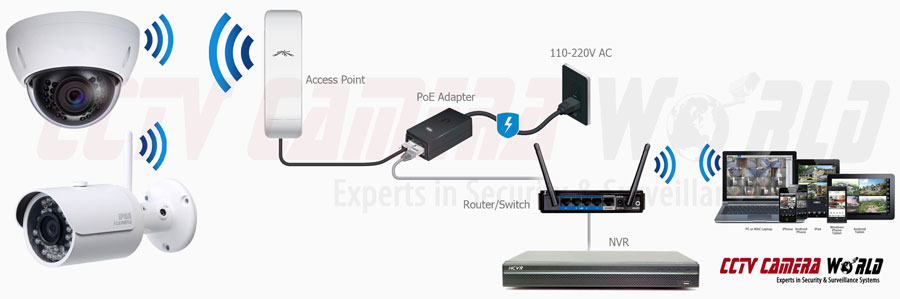
It is important to understand how all this works. The 2.4GHz Access Point is required to transmit a WiFi signal to which the client radio inside the wireless camera will log on to. The AP transmits a WiFi signal much stronger than a conventional router, hence you have Long Range Wireless Transmission. Both the wireless camera and the AP are 2.4GHz.
The camera sends video, audio, data over WiFi to the AP, then the AP sends the signal to your network router via the network cable attached to it. Once the data reaches your router it can be sent to your NVR, computer, or even be accessed over WiFi from a mobile device or laptop; the router is basically acting as another relay for sending the video signal to other devices on the network. If you use a NVR, you can even record the camera feed on it along with wired IP cameras. If you use our Tribrid DVR you can record wired ip cameras, wireless ip cameras, analog cctv cameras, and HDCVI hd over coax cameras. Using the NVR or Tribrid DVR you can serve the video to multiple clients (20 to be exact) using any variety of wired or wireless devices as long as they are on the same network.
You can even do port forwarding and make your camera or NVR accessible for remote viewing from the outside world.
Let's begin with the setup of configuring one Wireless IP Security Camera 1080P to piggy back on to a 2.4GHz Wireless Outdoor Access Point.
Step 1: Determine your computer IP address
Open up the command prompt. Click on the Start button, type cmd, and press enter. A command prompt like the following will appear.
Type ipconfig in the windows command prompt and press Enter.

Locate your computer IP address and router IP address in the output from the ipconfig command.

The ip address of the computer you are using will be listed under IPv4 Address, and the Router IP will be listed as the Default Gateway. In our network, the router address is 192.168.1.1 and our computer ip address is 192.168.1.4.
It is important to note that the default IP address for the AP and wireless camera are as noted below, which work perfectly with a network where the router is 192.168.1.1.
- Wireless camera: 192.168.1.108
- Wireless Ubiquiti AP: 192.168.1.20
You may need to change the the ip addresses of either or both if there is a ip address conflict or they don't fit your network. You can follow instructions provided in How to view IP Cameras from a web browser on how to change the camera IP address. You can also find instructions on how to change the ip address of the access point here.
Since the default IP for both devices works for us, let's proceed.
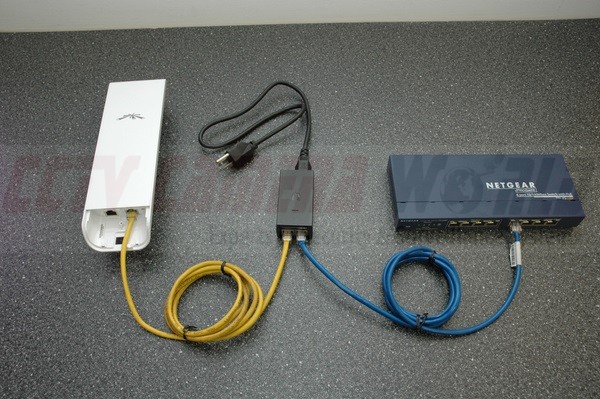
Step 2: Connect the AP to your network
To configure the AP you need to first connect it to your network so you can access it's internal web-based settings page. Each access point comes with a PoE injector. Connect the AP to the power injector using the MAIN (PoE) port, and the power injector to your switch or router using the SECONDARY (LAN) port as pictured below.
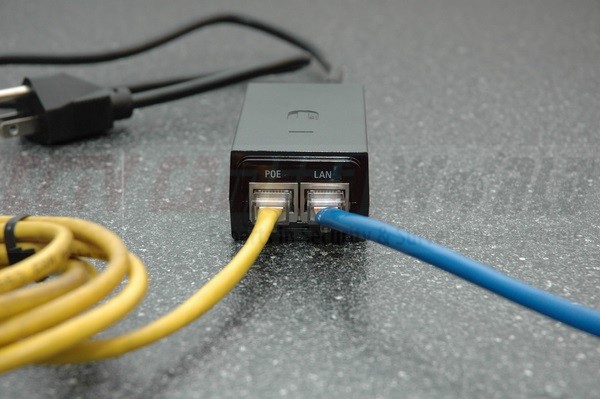
Here is a close-up view of the PoE injector:
Step 3: Login to the AP
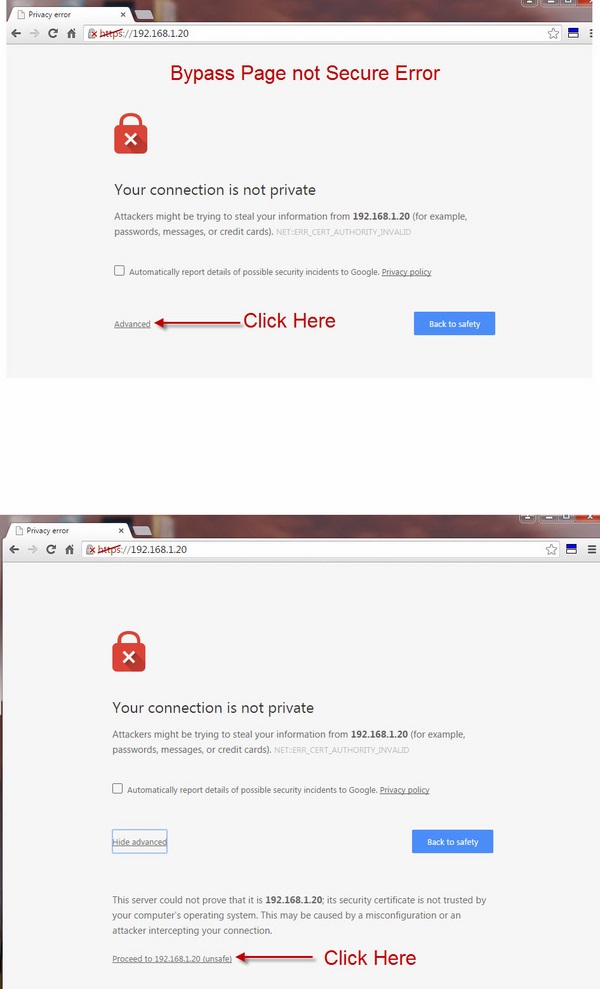
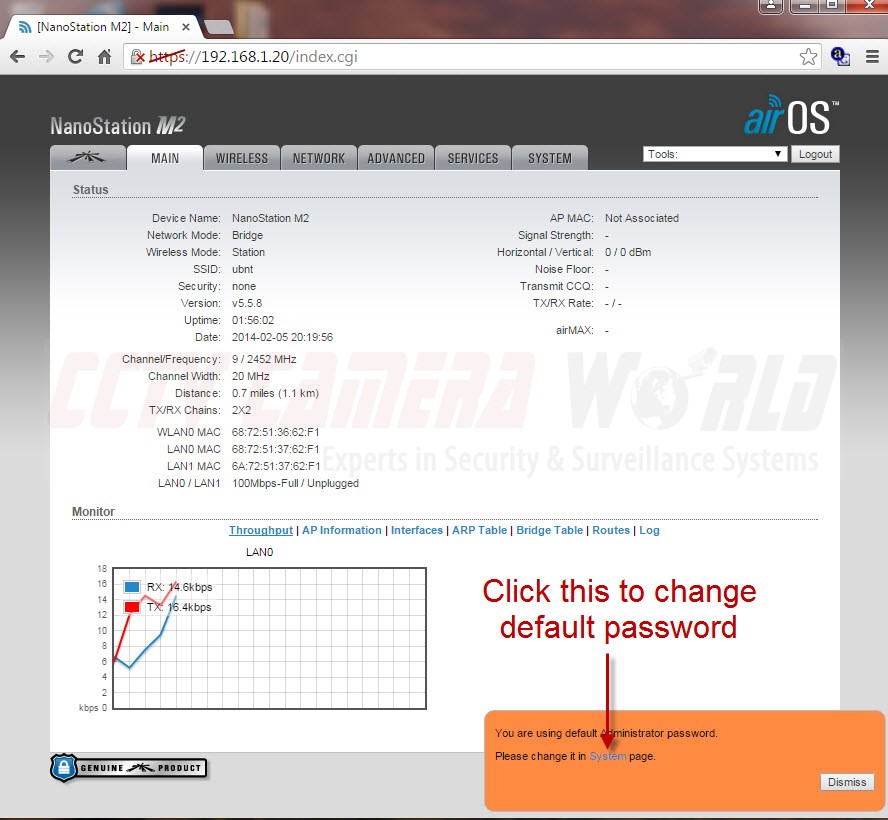
The default ip address of Ubiquiti radios is 192.168.1.20. Be sure you are using a compatible network, and enter this ip address in to the address bar of your web browser. If you do not see the login page, and get a security error message, follow the instructions provided in the image below. We are using Chrome as the browser in this case.
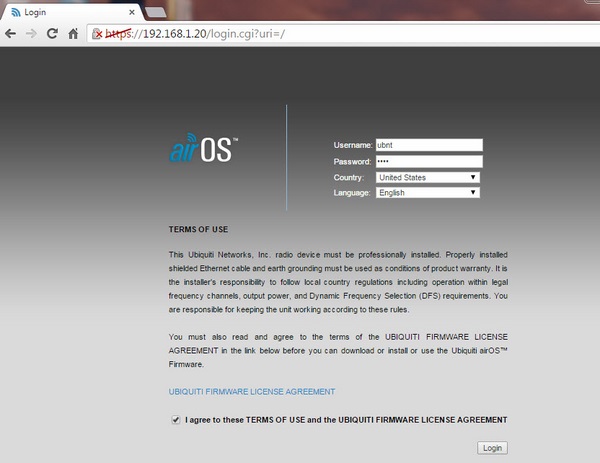
The login page should look like the one below. The default username and password are ubnt and click on the check box on the bottom of the page before pressing login.
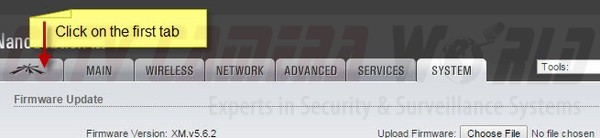
Step 4: Change default password
After you login for the first time you will be prompted to change the default password. On the bottom right side there will be a orange colored dialog bog. Click on "System" there to navigate to the page to change your password.
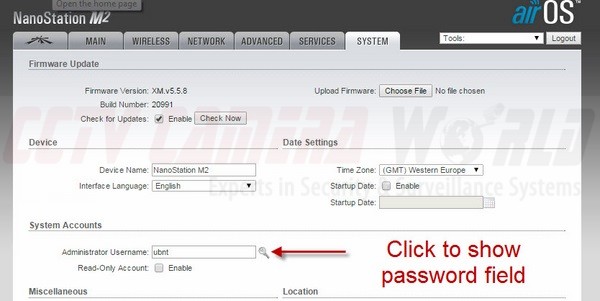
Once you are on the SYSTEM page, change the default password by clicking on the magnifying glass as pictured below to show a drop down section that lets you change the password.
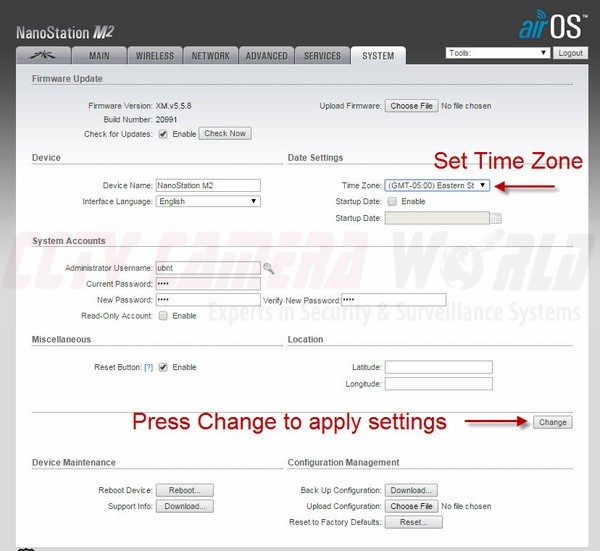
Enter the old password and the new password on this page now. In addition, before saving changes, set the Time Zone. When you're done click on the CHANGE button to save your changes.
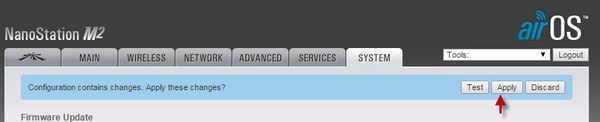
Once you click the CHANGE button look for a blue bar to appear on the top of the screen. Be sure to hit APPLY to save the changes.
You have now successfully done the following:
- Set a custom password and secured your Ubiquiti access point
- Set the correct Time Zone on the device
Step 5: Configure the AP to Access Point Mode
Since we don't have another device using the default IP address of the AP (192.168.1.20) we will no be changing it. We will proceed to configure the WiFi radio settings on this device.
Click on the WIRELESS tab located on the top of the admin page to navigate to the page that allows you to configure radio settings. Take a look at the image below to see how we have configure the radio.

Ubiquiti Wireless Access Point Configuration Settings for radio set as Access Point.
Here are how the settings must be configured for use with laptops and other devices which have predominantly 2.4GHz WiFi radios:
- Wireless Mode - Select Access Point
- SSID - This is the name of the WiFi radio you will see under network connections on your laptop
- Country Code - Choose the appropriate country you are located in
- IEEE 802.11 Mode - Select B/G/N mixed for the best compatibility
- Channel Width - Select 20mhz to minimize interference with other WiFi radios in the area
- Frequency - Set auto. If you have many other WiFi AP in the area, then you can select a channel to minimize interference
- Extension Channel - Select None
- Frequency List - leave this unchecked as we are not selecting specific transmission frequencies
- Calculate EIRP Limit - leave as is (checked)
- Antenna Gain - depending on the strength of the antenna on your AP, it can vary. In our AP there is a integrate antenna of 11 dBi strength
- Output Power - Put it as max
- Data Rate Module - leave as Default
- Max TX Rate, Mbps - unless you have more than 6 radios in close proximity you can leave this at its default settings as picture below
- Security - Select the type of encryption you would like for the WiFi signal emitted by this AP. If you are using a laptop from 2014 or later, you can set as WPA2-AES as it is a very secure encryption
- WPA Authentication - Select PSK
- WPA Preshared Key - this is the WiFi password that you would like to set
- MAC ACL - Leave unchecked
Once you have selected all the settings, click CHANGE on the bottom right, and then look for the blue bar on the top to appear and click APPLY; otherwise your settings will not be saved.
Step 6: Turn off MIMO signal transmission on Ubiquiti radios
As of December 2015, almost all of the wireless AP in the supply chain for new products are MIMO enabled. Which means you can only access them with another MIMO enabled access point or laptop. Laptops with MIMO support are scarce, so it is best to turn of MIMO signal transmission. If you are going to be using another identical AP to receive the signal, then of course you want to leave it on.
Here is how you turn MIMO off on Ubiquiti access points:
a) Click on the tab containing the Ubiquiti logo. This is the airMax section.
b) Uncheck the ENABLE box next to airMax, and click CHANGE. If a blue bar appears on the top of the page, be sure to click APPLY.
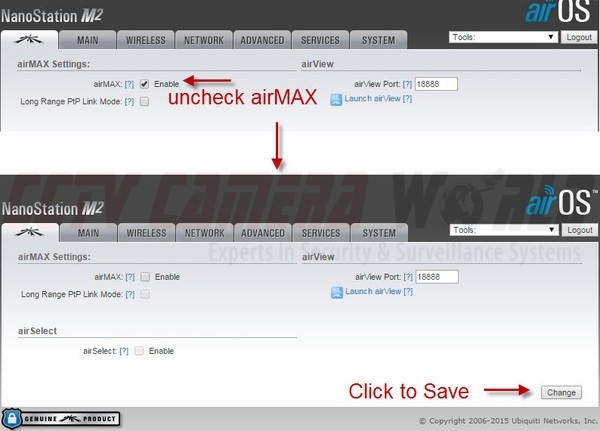
Now the AP is configured to be used as the WiFi signal on the camera. Let's proceed to configuring the wireless ip camera.
Step 7: Connect the camera to your router
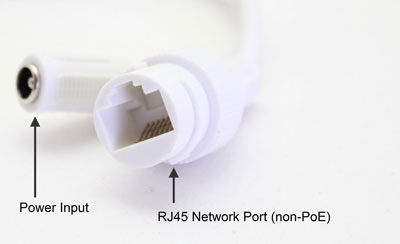
Connect the camera to your router, switch, or computer using a network cable from it's RJ45 jack. Wireless IP cameras are not PoE, so you will need to provide power using a 12V DC power adaptor that is at least 1Amp. The default ip address of the camera is 192.168.1.108.
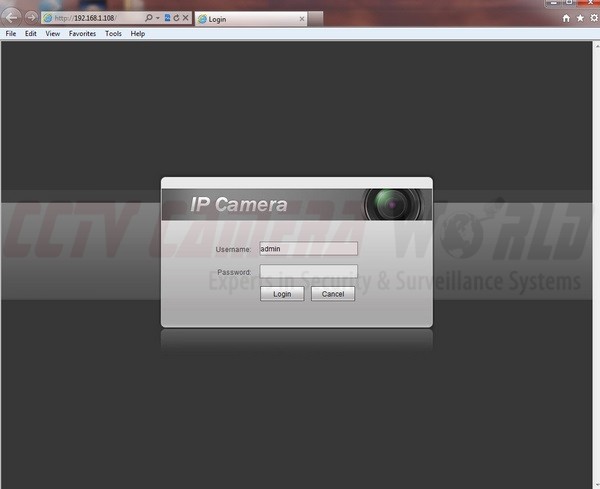
Simply enter the IP address of your camera (192.168.1.108) in to the address bar of your favorite web browser and you should see the web login page of the camera. If you don't see this page, you may need to find the camera on our network or change its ip address. We recommend using the latest version of Internet Explorer as most IP cameras use ActiveX to serve scriplets for their admin page. If you encounter trouble with ActiveX be sure to read our article Enabling ActiveX to view your IP Cameras and DVR over the web.
Step 8: Set the Camera's wired IP address to static
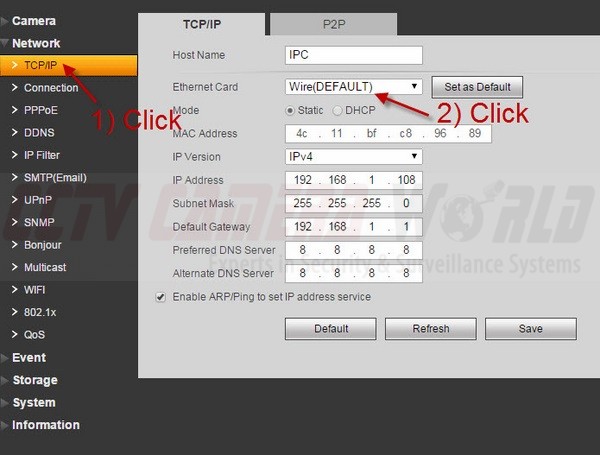
Find out the ip address scheme of your network and set the camera to an appropriate IP address. In our case our router ip address is 192.168.1.1 so we set our camera's address to 192.168.1.108, which also happens to be the default. The only thing we had to change on our camera is make sure the address was set to static and not DHCP; otherwise the address will change every time the camera or router power cycles. Please see below for a snapshot of the ip address settings found using the web portal built-in to our camera; the ip address settings page is very similar in all of our network cameras. It can be found under Setup -> TCP/IP.
Important: all wireless IP cameras have two network cards inside. One is for the wired network jack you plugged the network cable in to. We just set that to static. There is also a wireless network card inside the camera that needs to be set to a static IP address, which we will do in the following sections.
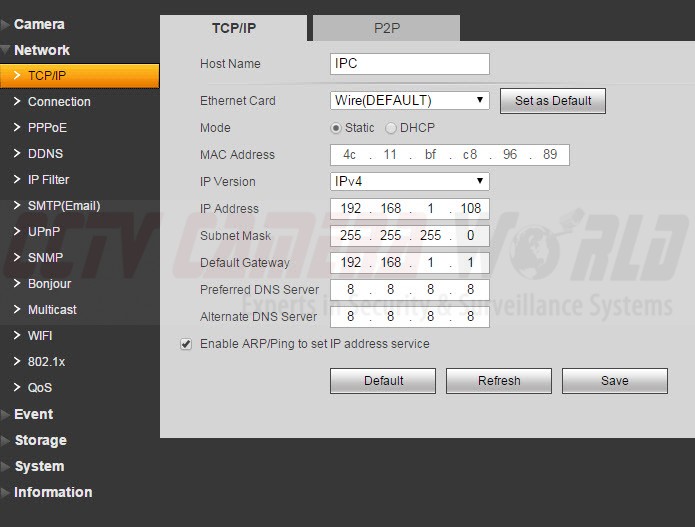
Make sure your IP address for the camera is set to static. Otherwise the address will change every time the camera or router power cycles.
Step 9: Connect the wireless camera to WiFi
We configured the AP to emit a WiFi signal in Step 5 and now we need to connect the wireless camera to this WiFi signal.
9a) Go to WiFi settings page
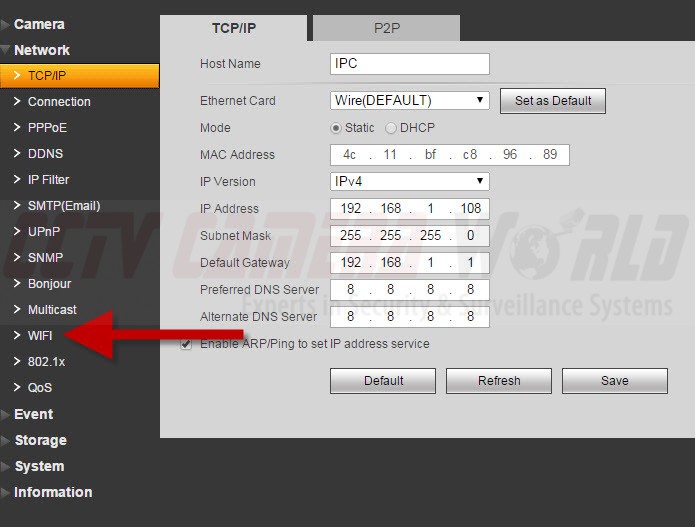
9b) Activate wireless network card on camera
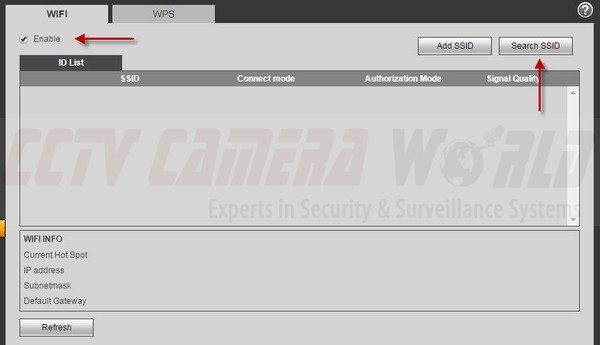
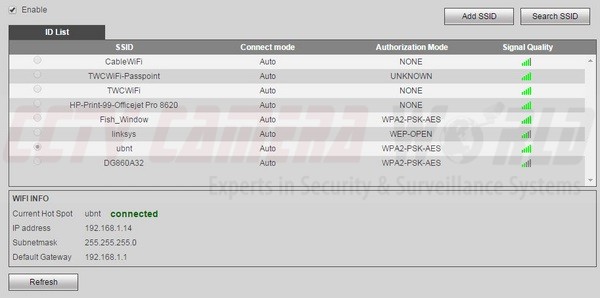
Under WiFi settings you will see a page similar to the one below.
- Click the checkbox next to enable to activate the wireless network card inside the camera
- Click on SEARCH SSID to search for nearby WiFi networks
9c) Connect to your AP
The camera will scan for available WiFi networks. Double click on the name of the WiFi network you configured in Step 5. We set our AP to broadcast a network with SSID ubnt so we double click on ubnt in the available networks.
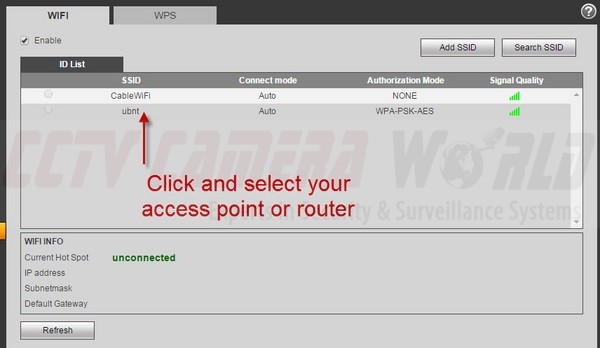
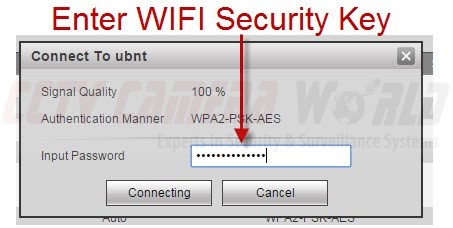
A prompt will ask for the WiFi security key you configured under the WPA Preshared Key on the AP. This is the WiFi password that you need to enter so the camera connects to the AP using a encrypted signal.
Wait up to 5 minutes for the camera to connect to the AP. Monitor the WIFI INFO section until it says connected for the current hot spot. This section will also display the camera's ip address and other info. This IP address listed under the WIFI INFO section is assigned to the wireless NIC, and needs to be set to static.
Step 10: Set your wireless IP address to static
a) Go back to Setup -> Network -> TCP/IP
b) Click on the drop down for Ethernet Card, and select Wireless to access settings for the wireless network card inside the camera
You will see a page like the following. Notice that DHCP is checked.
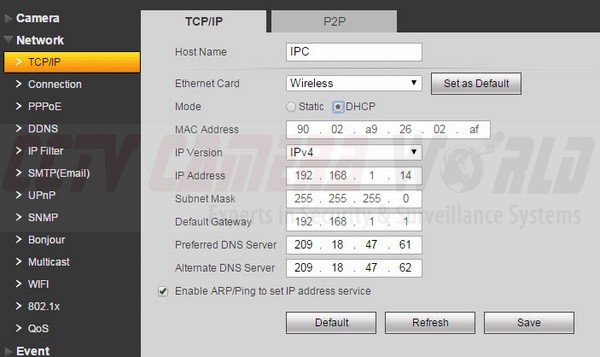
c) Simply select Static for the mode. This way the camera's wireless IP address will not change.
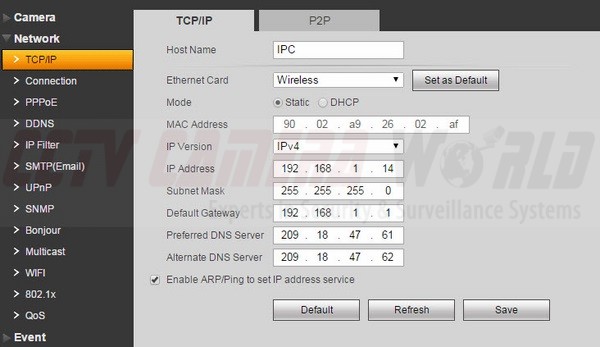
d) Go back to Setup -> Network -> WIFI and confirm the camera is still connected to the AP and note whether the IP address under WIFI INFO has changed. In our case it did not and the camera kept the IP address as static.
Note that the wireless and wired ip addresses will be different.
Step 11: Test the camera's WiFi connection
We've finished configuring the AP and our wireless IP security camera to talk to each other. It's time to test everything is working.
- Disconnect the power cable from the camera
- Disconnect the network cable from the camera
- Wait 10 seconds and reconnect only the power cable to the camera
- Type the wireless IP address from the WIFI INFO page in to your web browser to connect to the camera over WiFi. In our case it is 192.168.1.14.
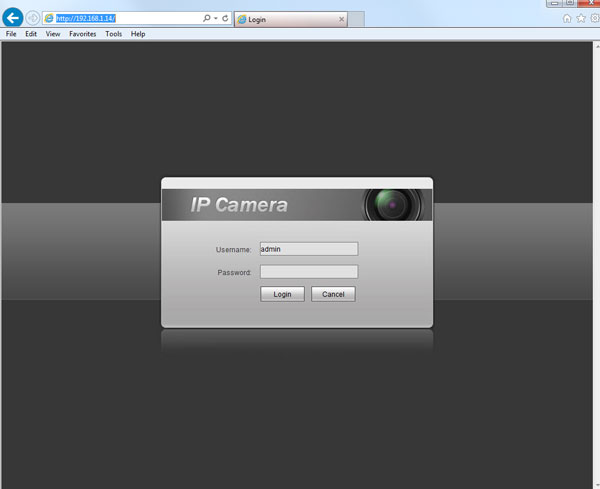
If all works well, then you should see the login page above. You can view the camera now using any device on your network. Here are the different devices and programs you can use:
- PC or Mac Computer
- Web browser: Internet Explorer, Chrome, Mozilla Firefox
- Smart PSS
- iOS devices or Google Android devices: IPTECNO PEGASO app available from the app store
- NVR or Tribrid DVR - follow this easy to follow guide for connecting ip cameras to your NVR or Tribrid DVR
You can now mount the camera and the access point in the desired locations as they are now connected to each other. Once AP can accommodate up to four wireless 1080p cameras. Simply repeat steps 7 thru 11 for each camera you would like to connect to the AP. To view cameras remotely over the web from another location, you will need to do port forwarding on your router. You can use our port forwarding guides for common routers to allow access from the internet thru your firewall.
When using multiple IP cameras we recommend using NVR to consolidate the cameras in to one device where they can be recorded, and viewed. Most importantly, port forwarding is much easier for one NVR versus several IP cameras.
We hope you find this self-help guide useful. We welcome any questions using the comments section below. If you are looking for a networking expert to help with your configuration, you can always ask for our paid networking tech support.