Dual Monitor Setup on Avalonix Premium NVR and DVR Recorders

Watching your security cameras from Avalonix Premium Series NVR and DVR recorders is convenient using a monitor or TV directly connected to the recorder. Most of the high capacity Avalonix 32 channel, 64 channel, and 128-channel models have two HDMI outputs, allowing the user to connect two computer monitors or televisions . These outputs are labeled HDMI1 and HDMI2, and inside the recorder's settings are called Main Screen and Sub Screen.
A Dual Monitor Setup allows you to see all of your cameras in larger views on two displays at once, providing a more detailed overview of your property. If you're interested in or have one of the Avalonix security camera recorders with 2 HDMI ports, keep reading and watch the video below to learn more about setting up your second display.
If you're interested in browsing through which recorder models offer dual monitor capability, please browse through our DVR and NVR recorder categories. Any of the Avalonix Premium Recorders with 4 or more hard drive capacity offer this capability.

Video Tutorial
If you like learning by watching videos, feel free to watch the video below of the steps outlined in the text below.
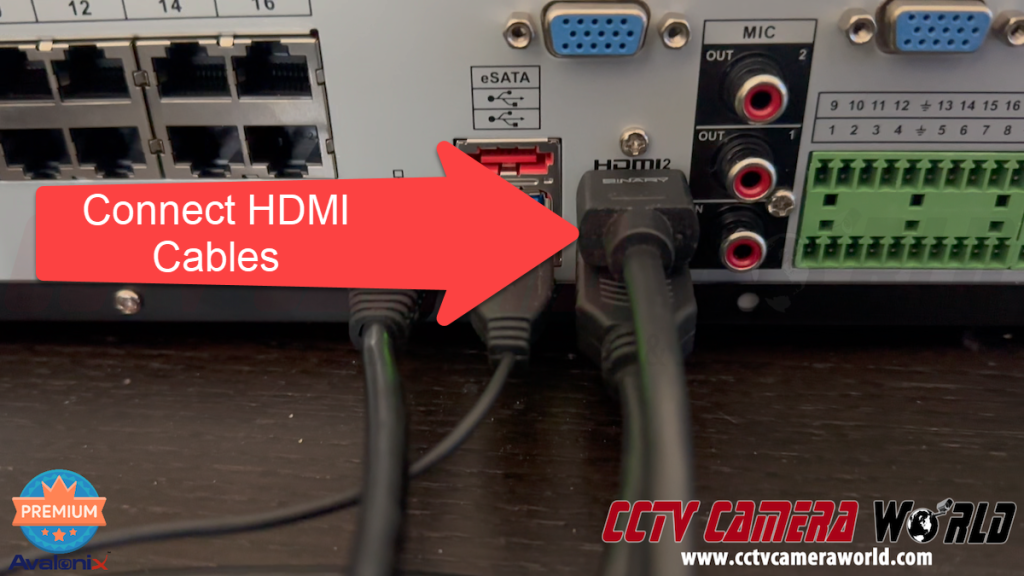
1. Connect your Monitors or TVs to the HDMI Ports
It's crucial to connect your displays to the HDMI ports on the back of the NVR or DVR before you begin the guide. Make sure that the recorder is powered off when connecting HDMI cables to avoid zapping the HDMI ports, and use HDMI cables that are of good quality with a thick gauge. If you're attempting to run a cable to another room or floor, be aware that connections that are longer than 6 feet can cause damage; instead, use an HDMI extender that has its own power supply and run the long connection from that.
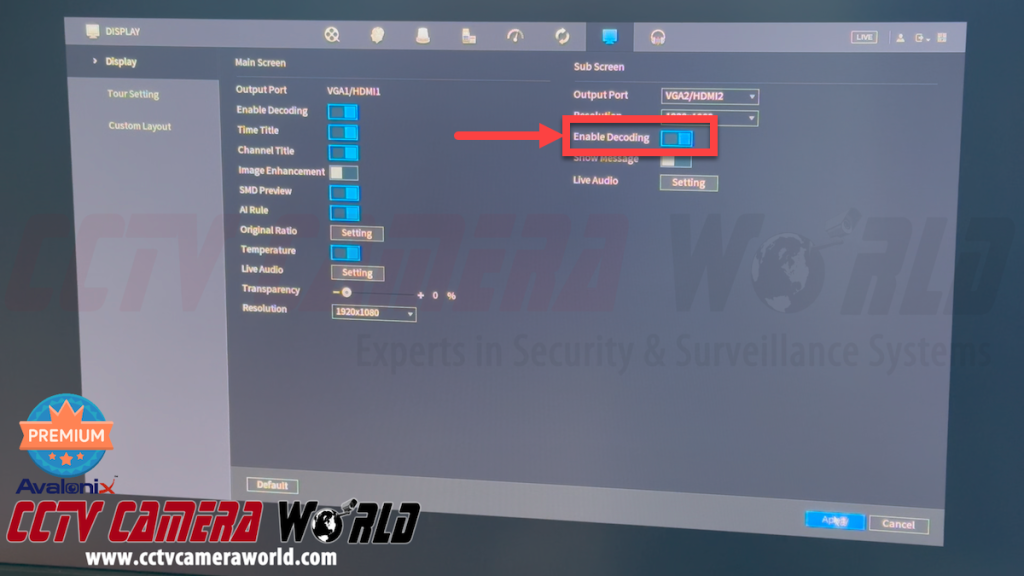
2. Navigate to the Display Settings and Enable Sub Screen Decoding
After you've got your displays connected, powered the NVR or DVR on, wait for it to boot up, and login to the admin user. A label on the top of your recorder contains the password. To access the menu, right-click on the camera grid, and then click the Main Menu button.
In the main menu, you can use the scroll wheel on the mouse or click the right arrow at the bottom of the pictographical menu options. The second page will have an option titled Display with a picture of a monitor; click it to get to the display settings.
In the Display settings, you can also adjust the recorder's output resolution to match your display. For example, if you have a 4K TV or monitor, you can set it to 3840x2160. Be sure to check the specifications of your display before changing the resolution. Do not set the resolution higher than your display supports, or you will lock yourself out of your recorder. It’s worth noting that the output resolution is independent of the recording resolution of the cameras, and the sub-screen (HDMI2) typically only supports 720P or 1080P output.
You must enable the main setting on this page, typically titled "Enable Decoding" or a similar name, under the Sub Screen section. Be sure to click Apply to save any settings changes you have made. Enabling decoding in the Display settings ensures that the cameras are streaming on your second monitor.
3. Switch the Mouse to the Sub Screen
By default, the second screen may only show a single camera or a view you don’t want. Changing cameras on the second monitor is simple but not obvious right away.
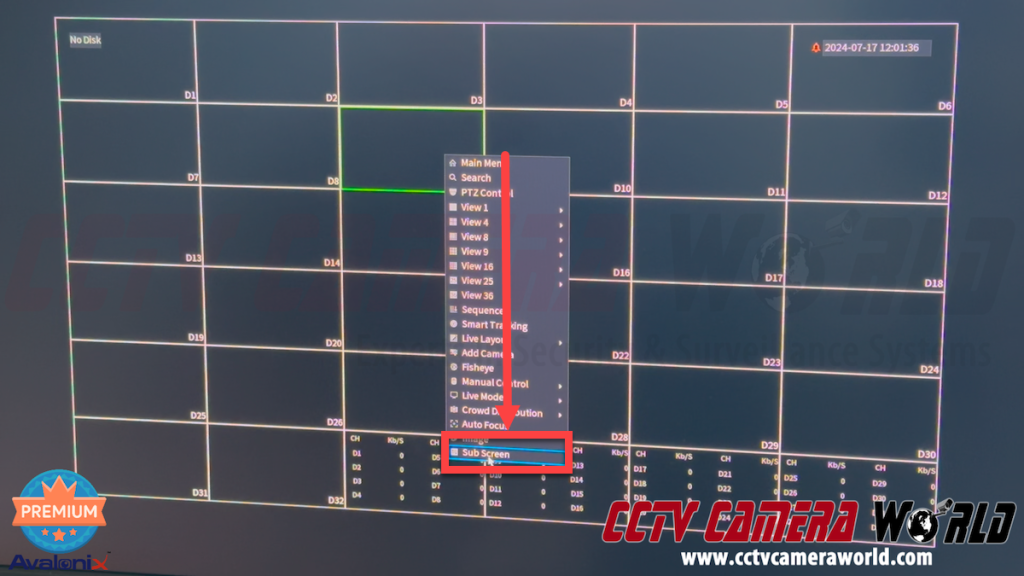
First, you’ll need to get the mouse cursor onto the second screen. To do this, right-click the mouse twice to exit the Display and Main menu screens, then return to the main grid screen. While on the grid screen, you will need to right-click again, but instead of clicking Main Menu, you will go to the bottom of the menu and click Sub Screen.
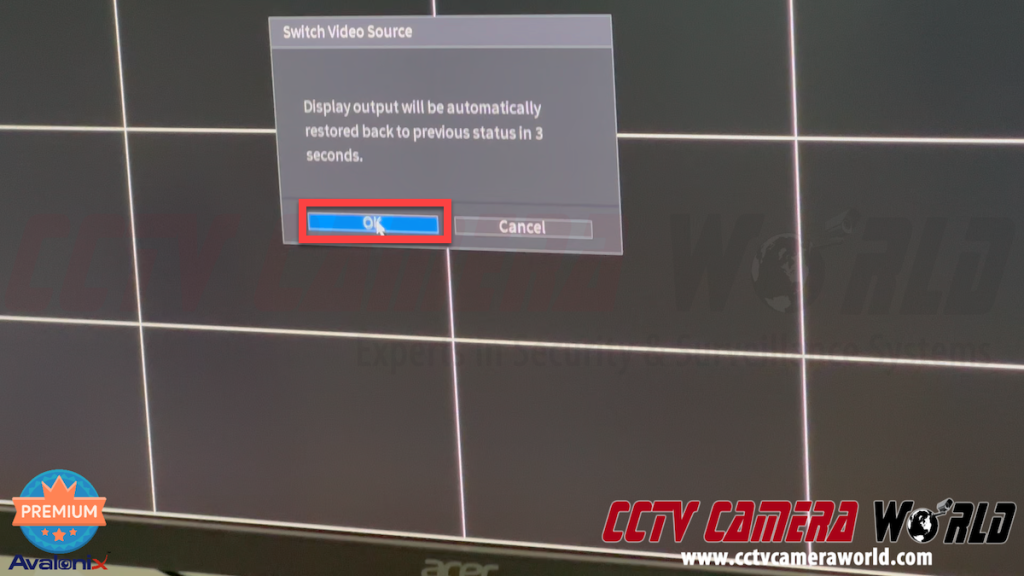
The mouse cursor will now be on the second screen, and a confirmation message will appear. You must click OK on the confirmation message within 15 seconds to keep the cursor on the second screen, or it may disappear. If your screens are in different locations, you may need to coordinate with another person to click the OK button.
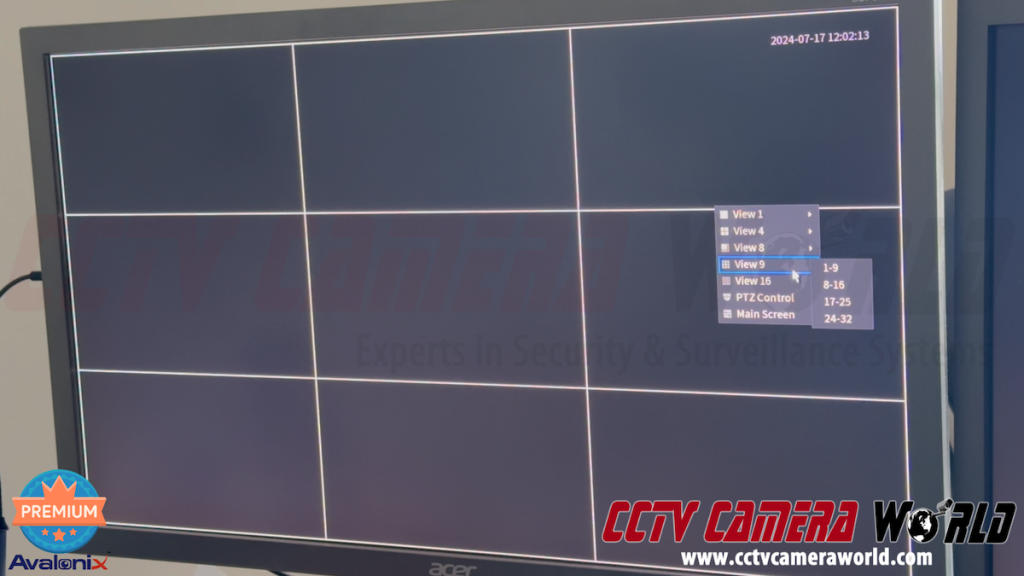
Now that the cursor is on the second screen, you can right-click to access the Sub Screen menu options. Depending on your recorder, you may have various options, including View 1, View 4, View 8, View 9, View 16, View 24, and View 36. These options allow you to change the cameras displayed on the second screen.
Lastly, you can also control PTZ and motorized zoom cameras from the sub screen by hovering over the grid for the channel that has a controllable camera, right-clicking, and then clicking the PTZ control option.
4. Switch the Mouse Back to the Main Screen
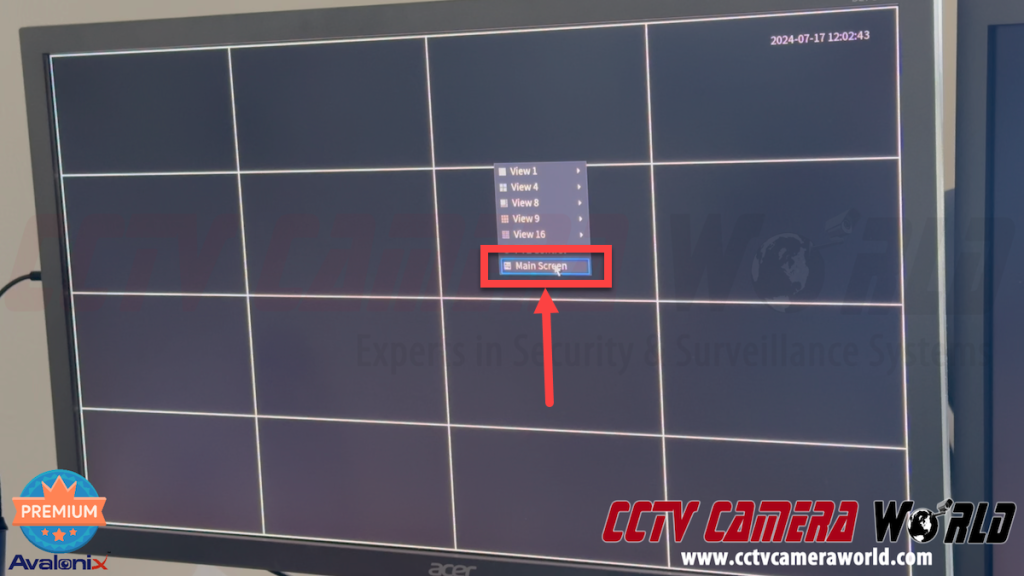
Before you finish, be sure to swap the mouse cursor back to the Main Screen to ensure you don’t forget where your mouse cursor is and so you can access and change settings in your recorder in the future. To do this, right-click on the Sub Screen and then click Main Screen. Once again, you will need to click the OK button on the confirmation message in the Main Screen to switch the cursor back.
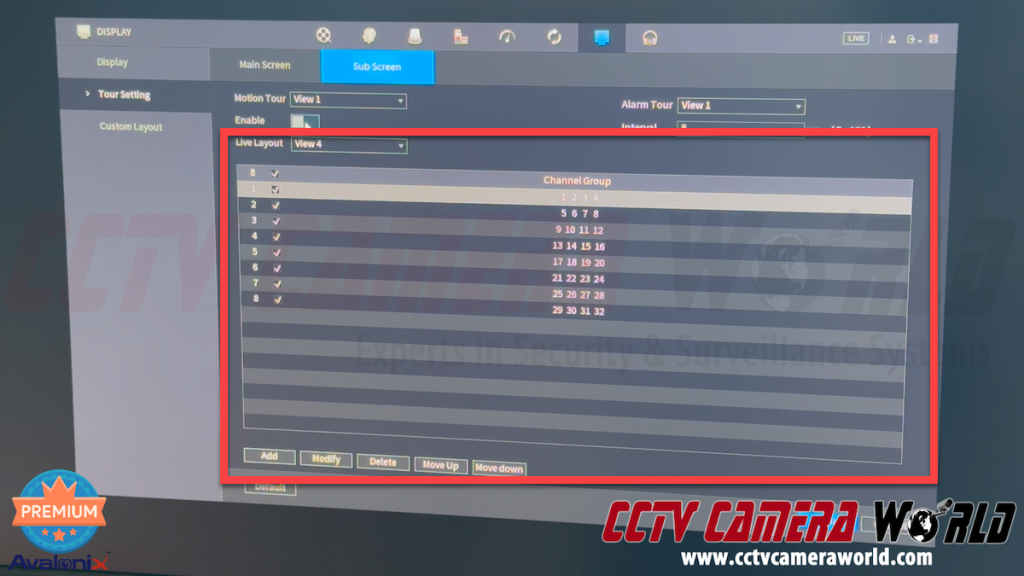
5. Customize the Live View Options
Although it’s not covered in the video at the top of this article, you can even customize the Live View options that are in the menus on the Display page in the Tour Setting tab. You can also customize the grid layouts in the Display page and Custom Layout tab for some recorders.