How to View No Monthly Fee Security Cameras with Cloud Access
How to View No Monthly Fee Security Cameras with Cloud Access
You can view IP cameras and NVRs from CCTV Camera World in a standard web browser with no monthly subscription. This guide shows how to enable the P2P cloud setting, add your device to the cloud server, and open the web interface in Firefox on Windows without needing any plugins. We even show how to use a Windows plugin to get access to all the features.
Whether you’re a homeowner who wants to check cameras from a laptop or a business owner looking to give staff secure access, this step-by-step article will help you get the most out of your AvaEye system.
AvaEye cloud security cameras provide free cloud remote viewing with local recording, so there are no monthly storage fees. They use a secure P2P link, so you do not need DDNS or port forwarding.
No monthly fee vs subscription cloud
Here is the difference in plain English:
No monthly fee: Your video saves to the NVR hard drive or the camera microSD. Remote viewing is free through Star4Live.
Subscription cloud: Your video uploads to the vendor. You pay every month to keep it there.
Why most buyers pick no monthly fee: lower cost over time, better quality on your local network, and no ports opened on your router.
If you'd like to jump directly to the products that offer cloud access without subscription costs, feel free to click on the link below.
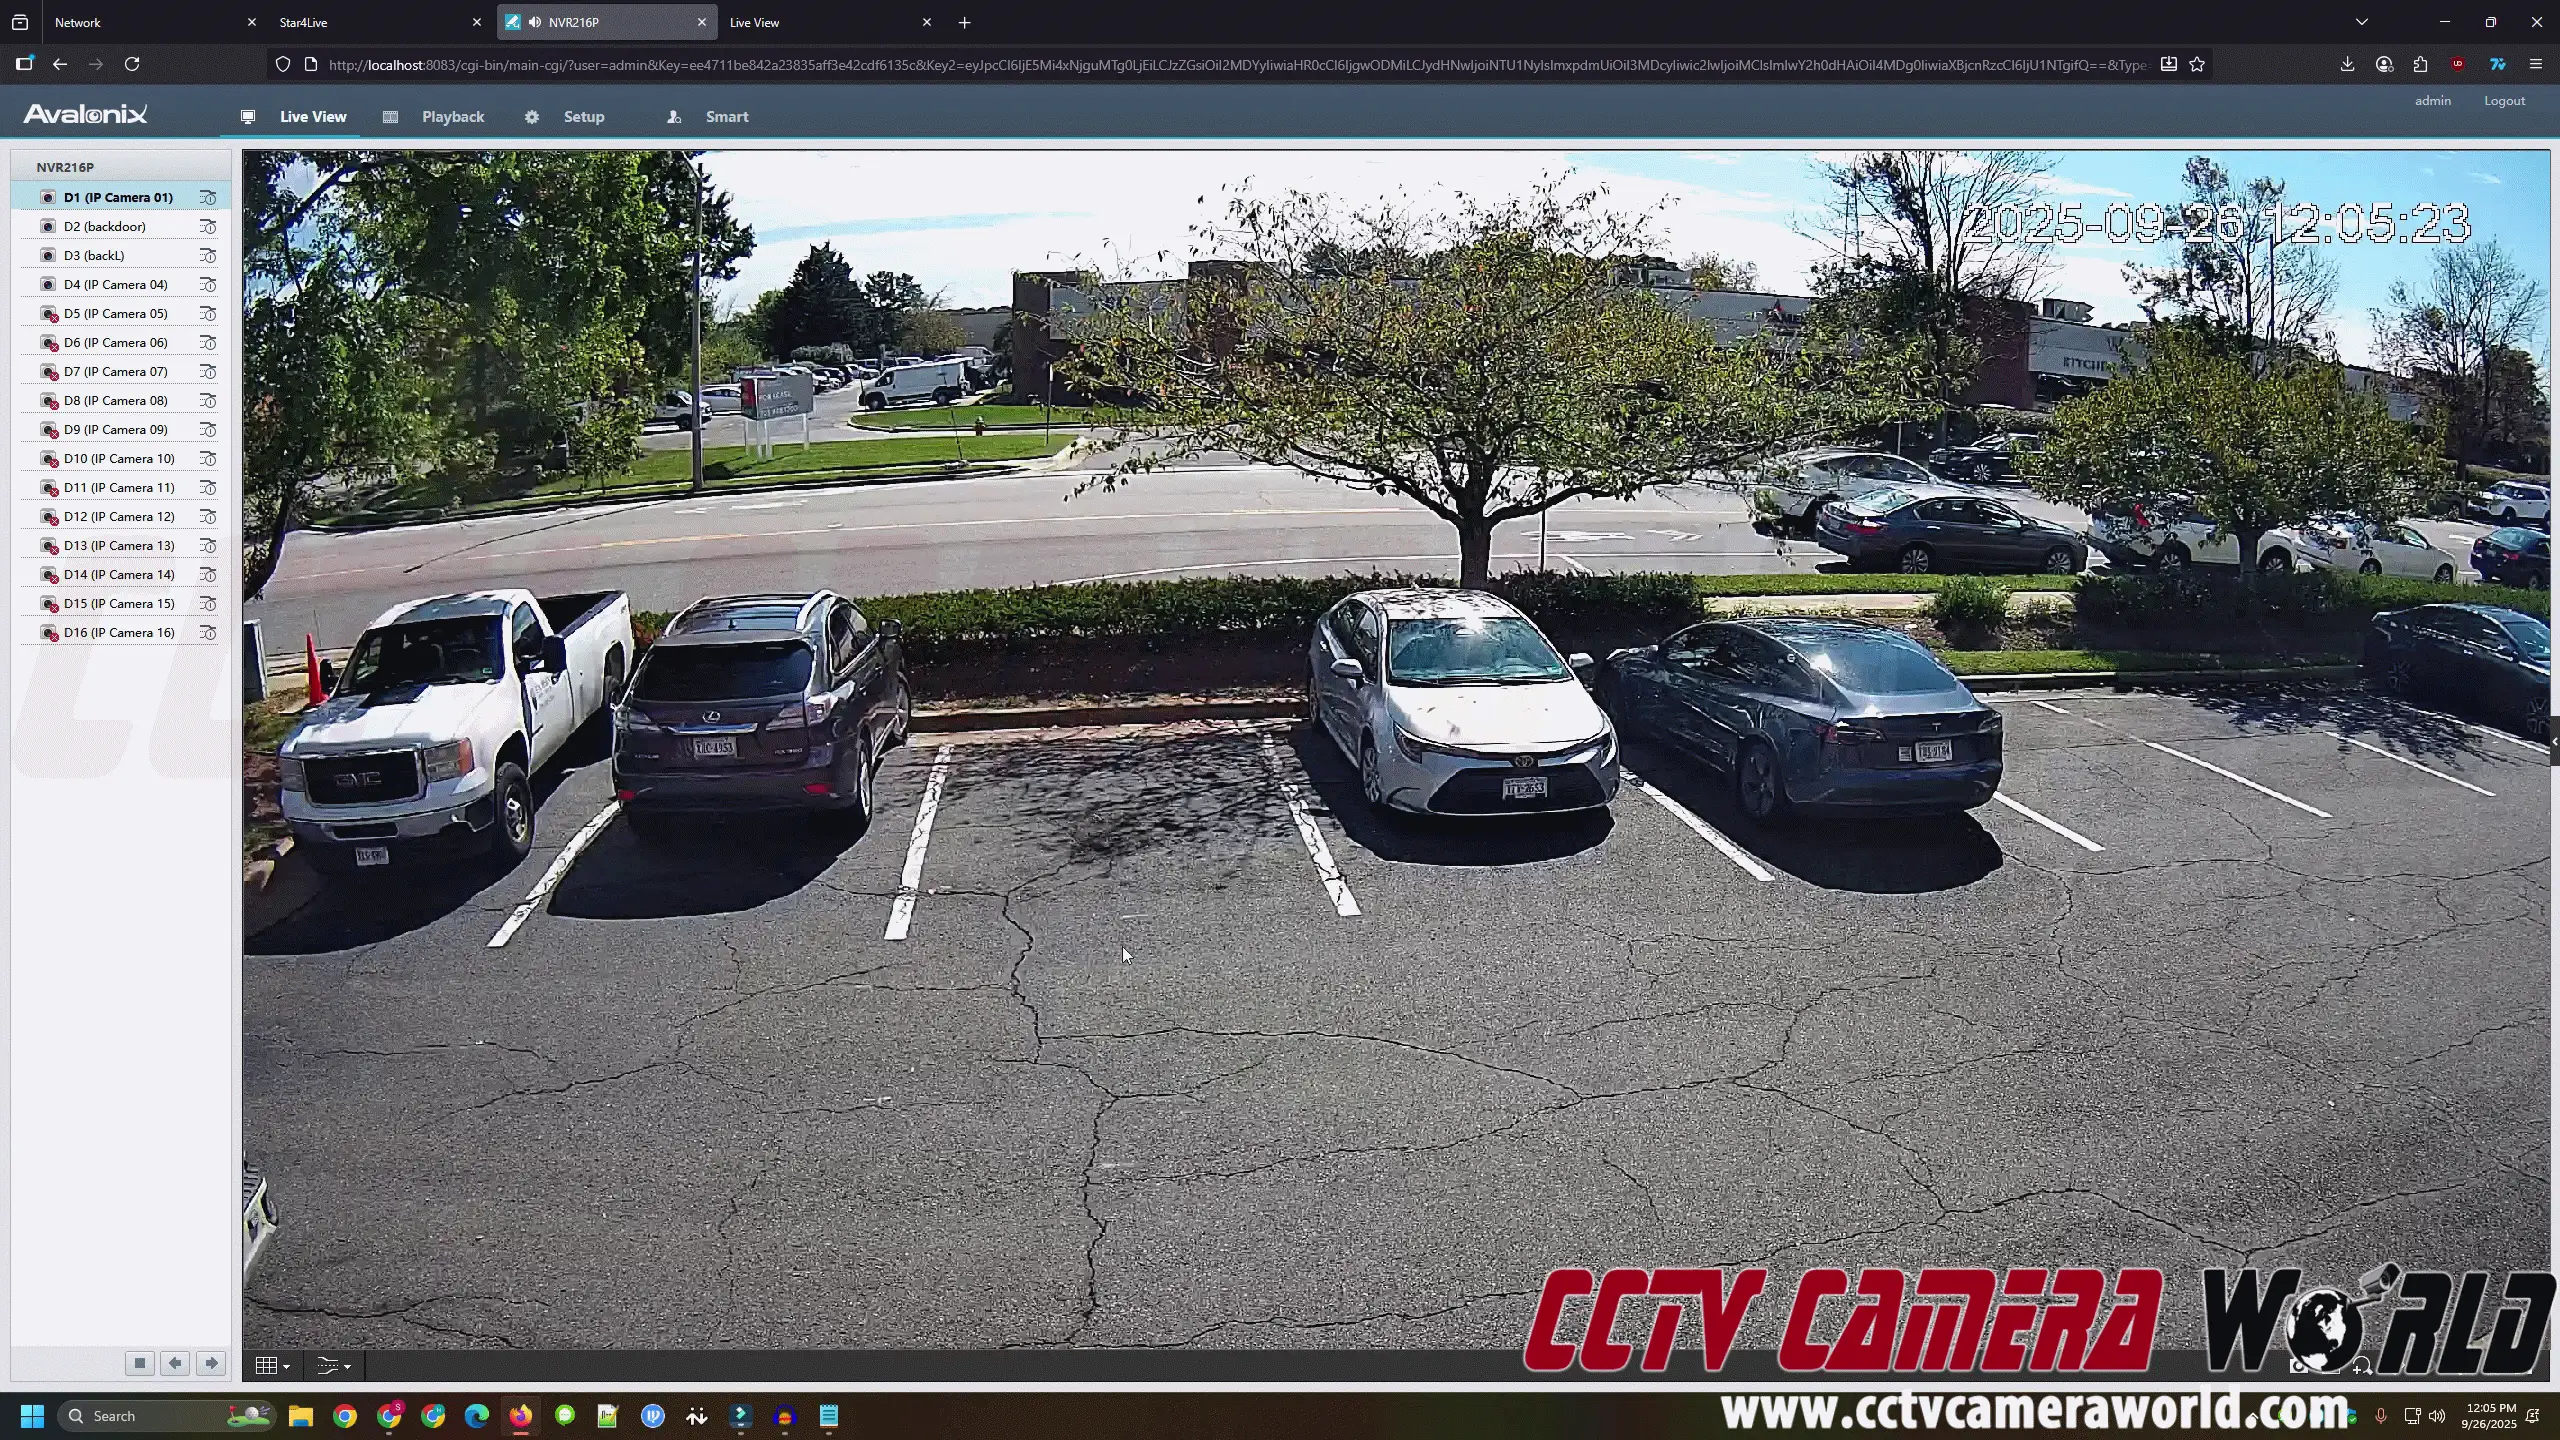
When most people think of remote access for a security camera system, they imagine downloading an app or tinkering with complicated router settings like port forwarding. AvaEye takes a different approach. With built-in cloud support, every AvaEye camera and recorder can be accessed directly from a web browser. This gives you added flexibility, security, and peace of mind whether you’re checking in from the office, from a laptop at home, or even from a borrowed computer while traveling.
Here are the key advantages we’ve confirmed while testing AvaEye’s browser-based cloud access:
Windows for cloud viewing: For cloud access from a web browser, use a Windows PC with Firefox (or Chrome/Edge with the helper). Some models may open locally on macOS or Linux, but this cloud method is for Windows PCs.
Multi-user convenience: Supervisors, IT staff, and property managers can log in from their devices without needing dedicated apps.
Professional use cases: Staff meetings, classrooms, and even legal proceedings, where quick live views are required, can benefit from quick browser access.
No network headaches: Because connections run through AvaEye’s secure cloud, there’s no need for port forwarding, DDNS services, or static IP addresses.
Adaptable to IT Policy: Universal browser access means IT departments don’t have to deploy or vet third-party software.
Requirements Before You Start
Before logging into your AvaEye system remotely with a browser, verify that the following requirements are met. These ensure your cloud connection is reliable and secure.
While some AvaEye products work in Mac or Linux browsers over the local network, a Windows PC with Firefox is required to view over the web using the cloud portal described in this post.
Certain camera or NVR models may require a browser plugin that’s only available on Windows for Chrome, Edge, or Firefox.
Browser Compatibility
Chrome, Microsoft Edge, or Firefox. Firefox is recommended, as it offered the most compatibility.
Use the latest version of your browser. Older releases may not load the video player correctly.
Internet Connection at the Site
The NVR or camera must have a stable internet connection with outbound access to the cloud.
Most networks allow this by default, but restrictive firewalls can block access.
At least 2 Mbps upload bandwidth per camera stream is recommended for smooth remote playback.
If the device loses internet, the cloud portal will not detect it even if it works fine on the local network.
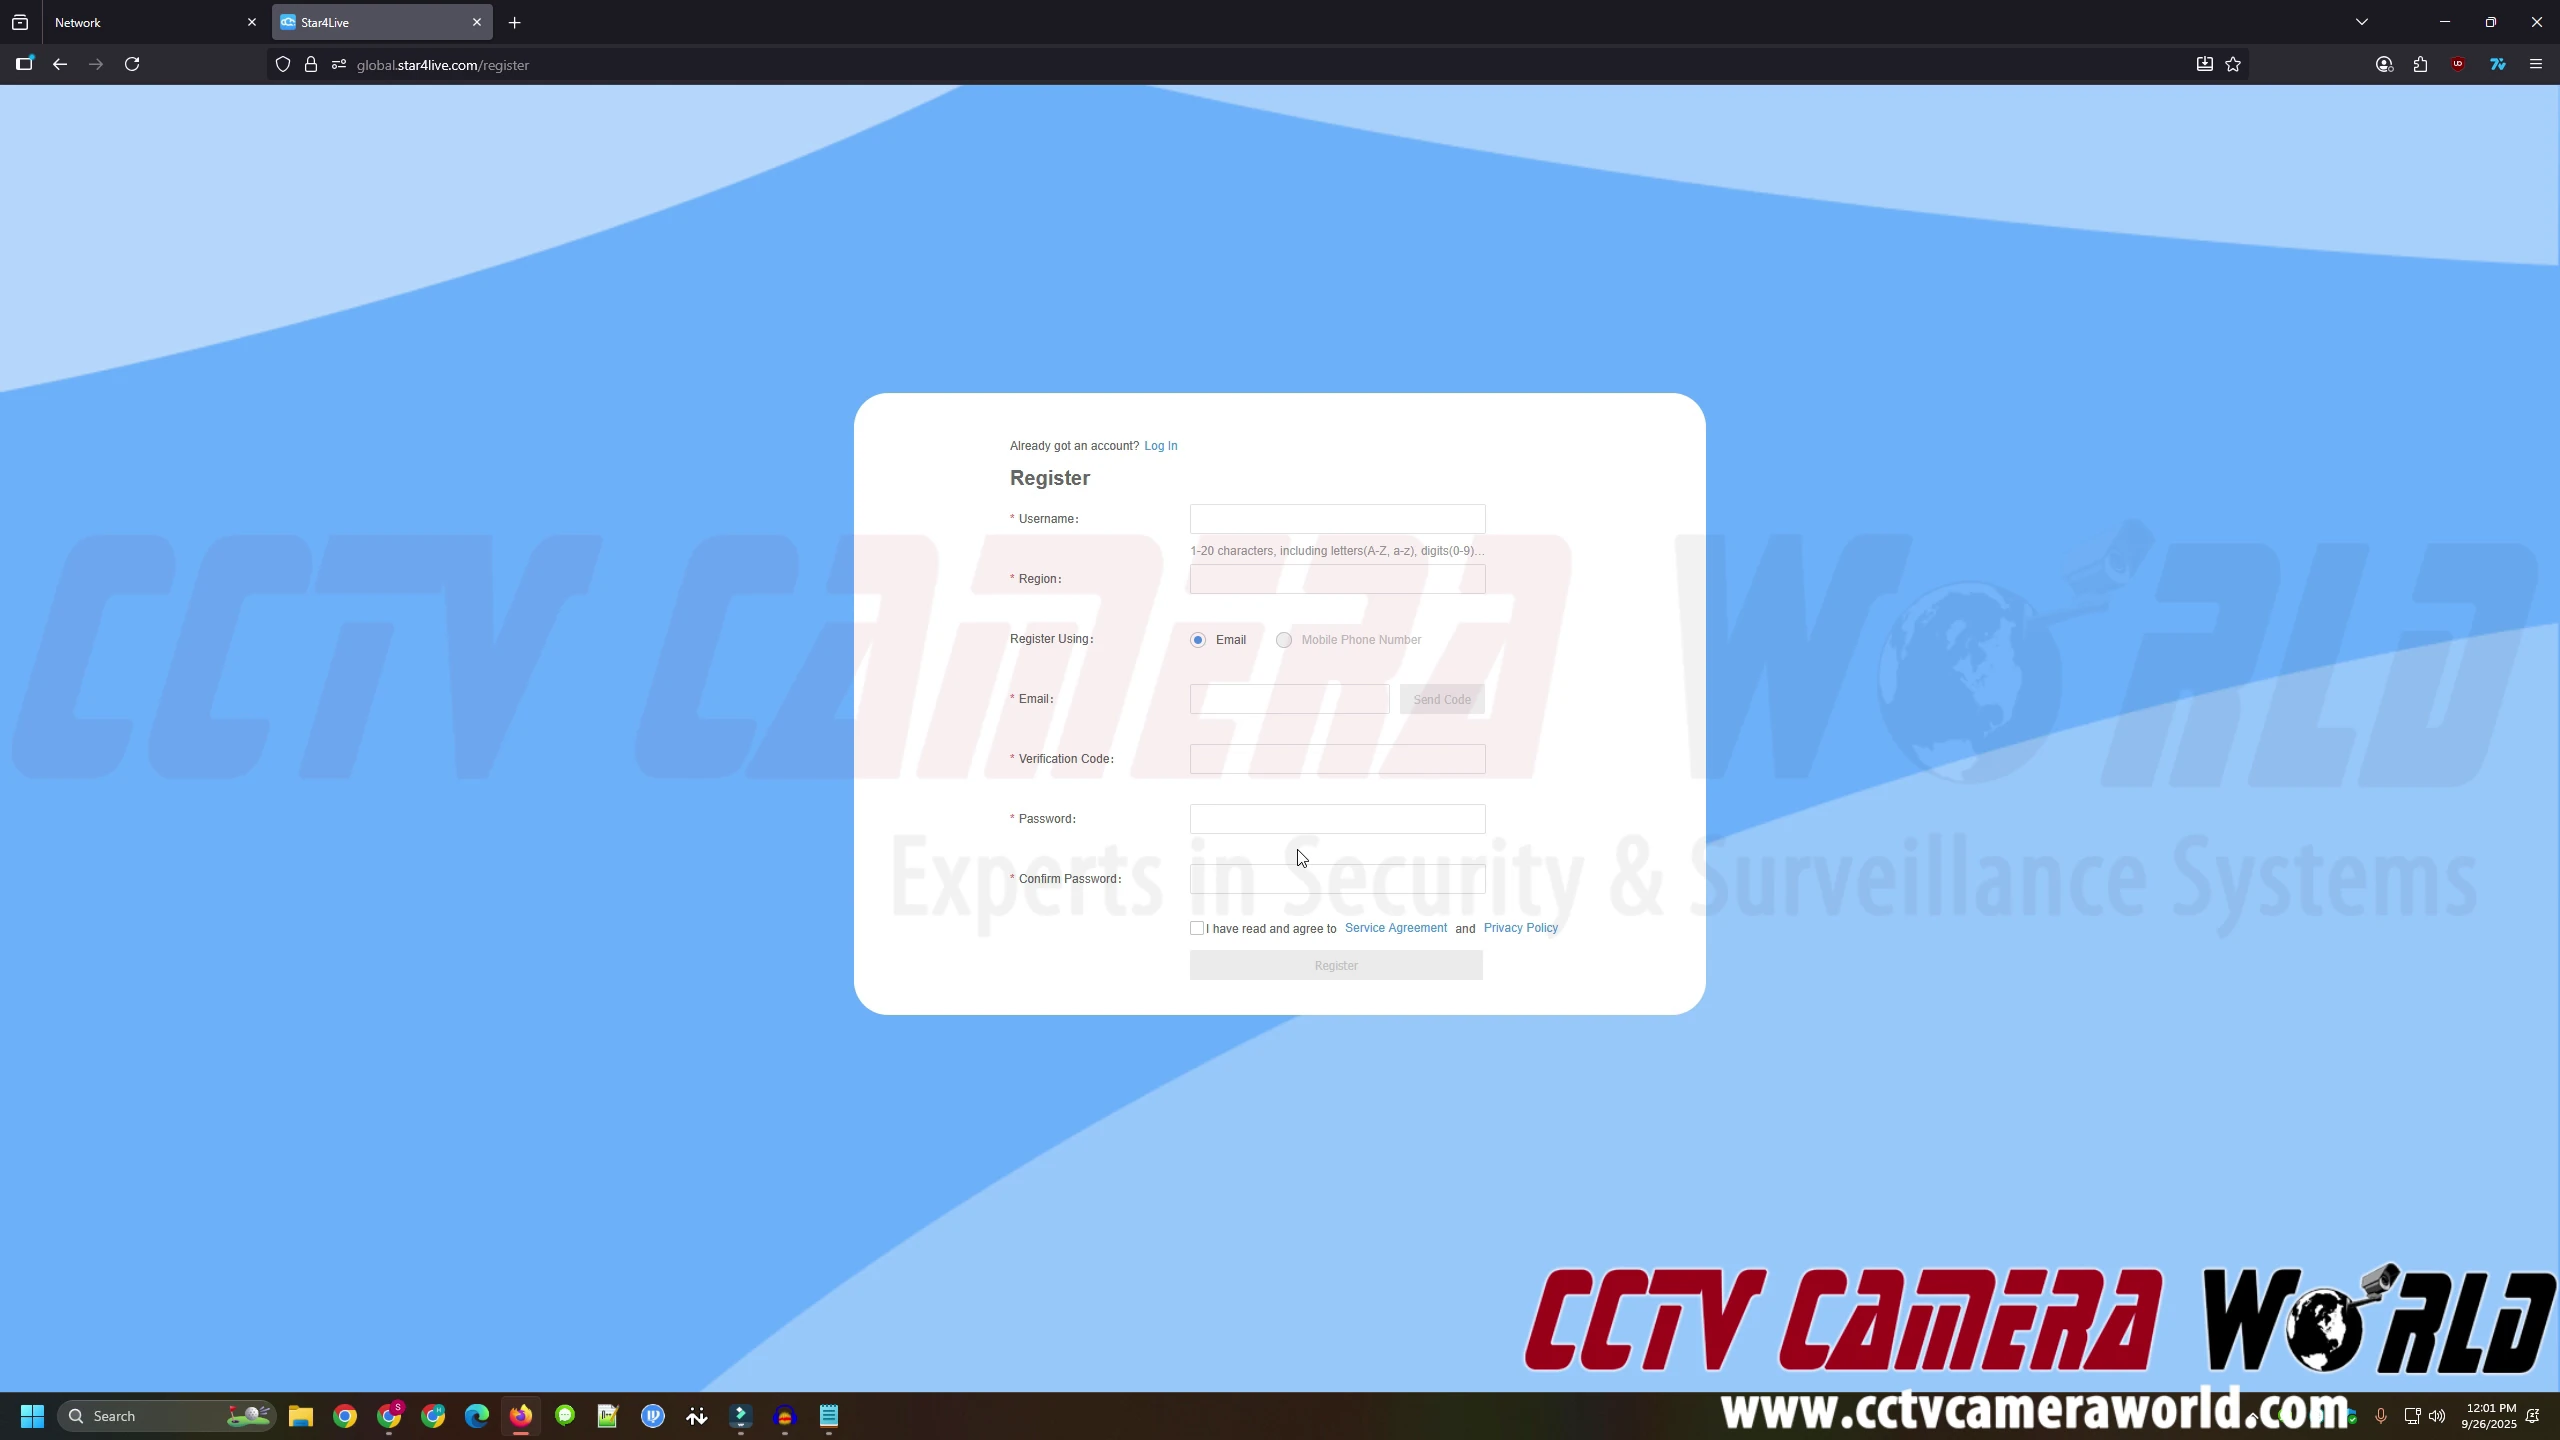
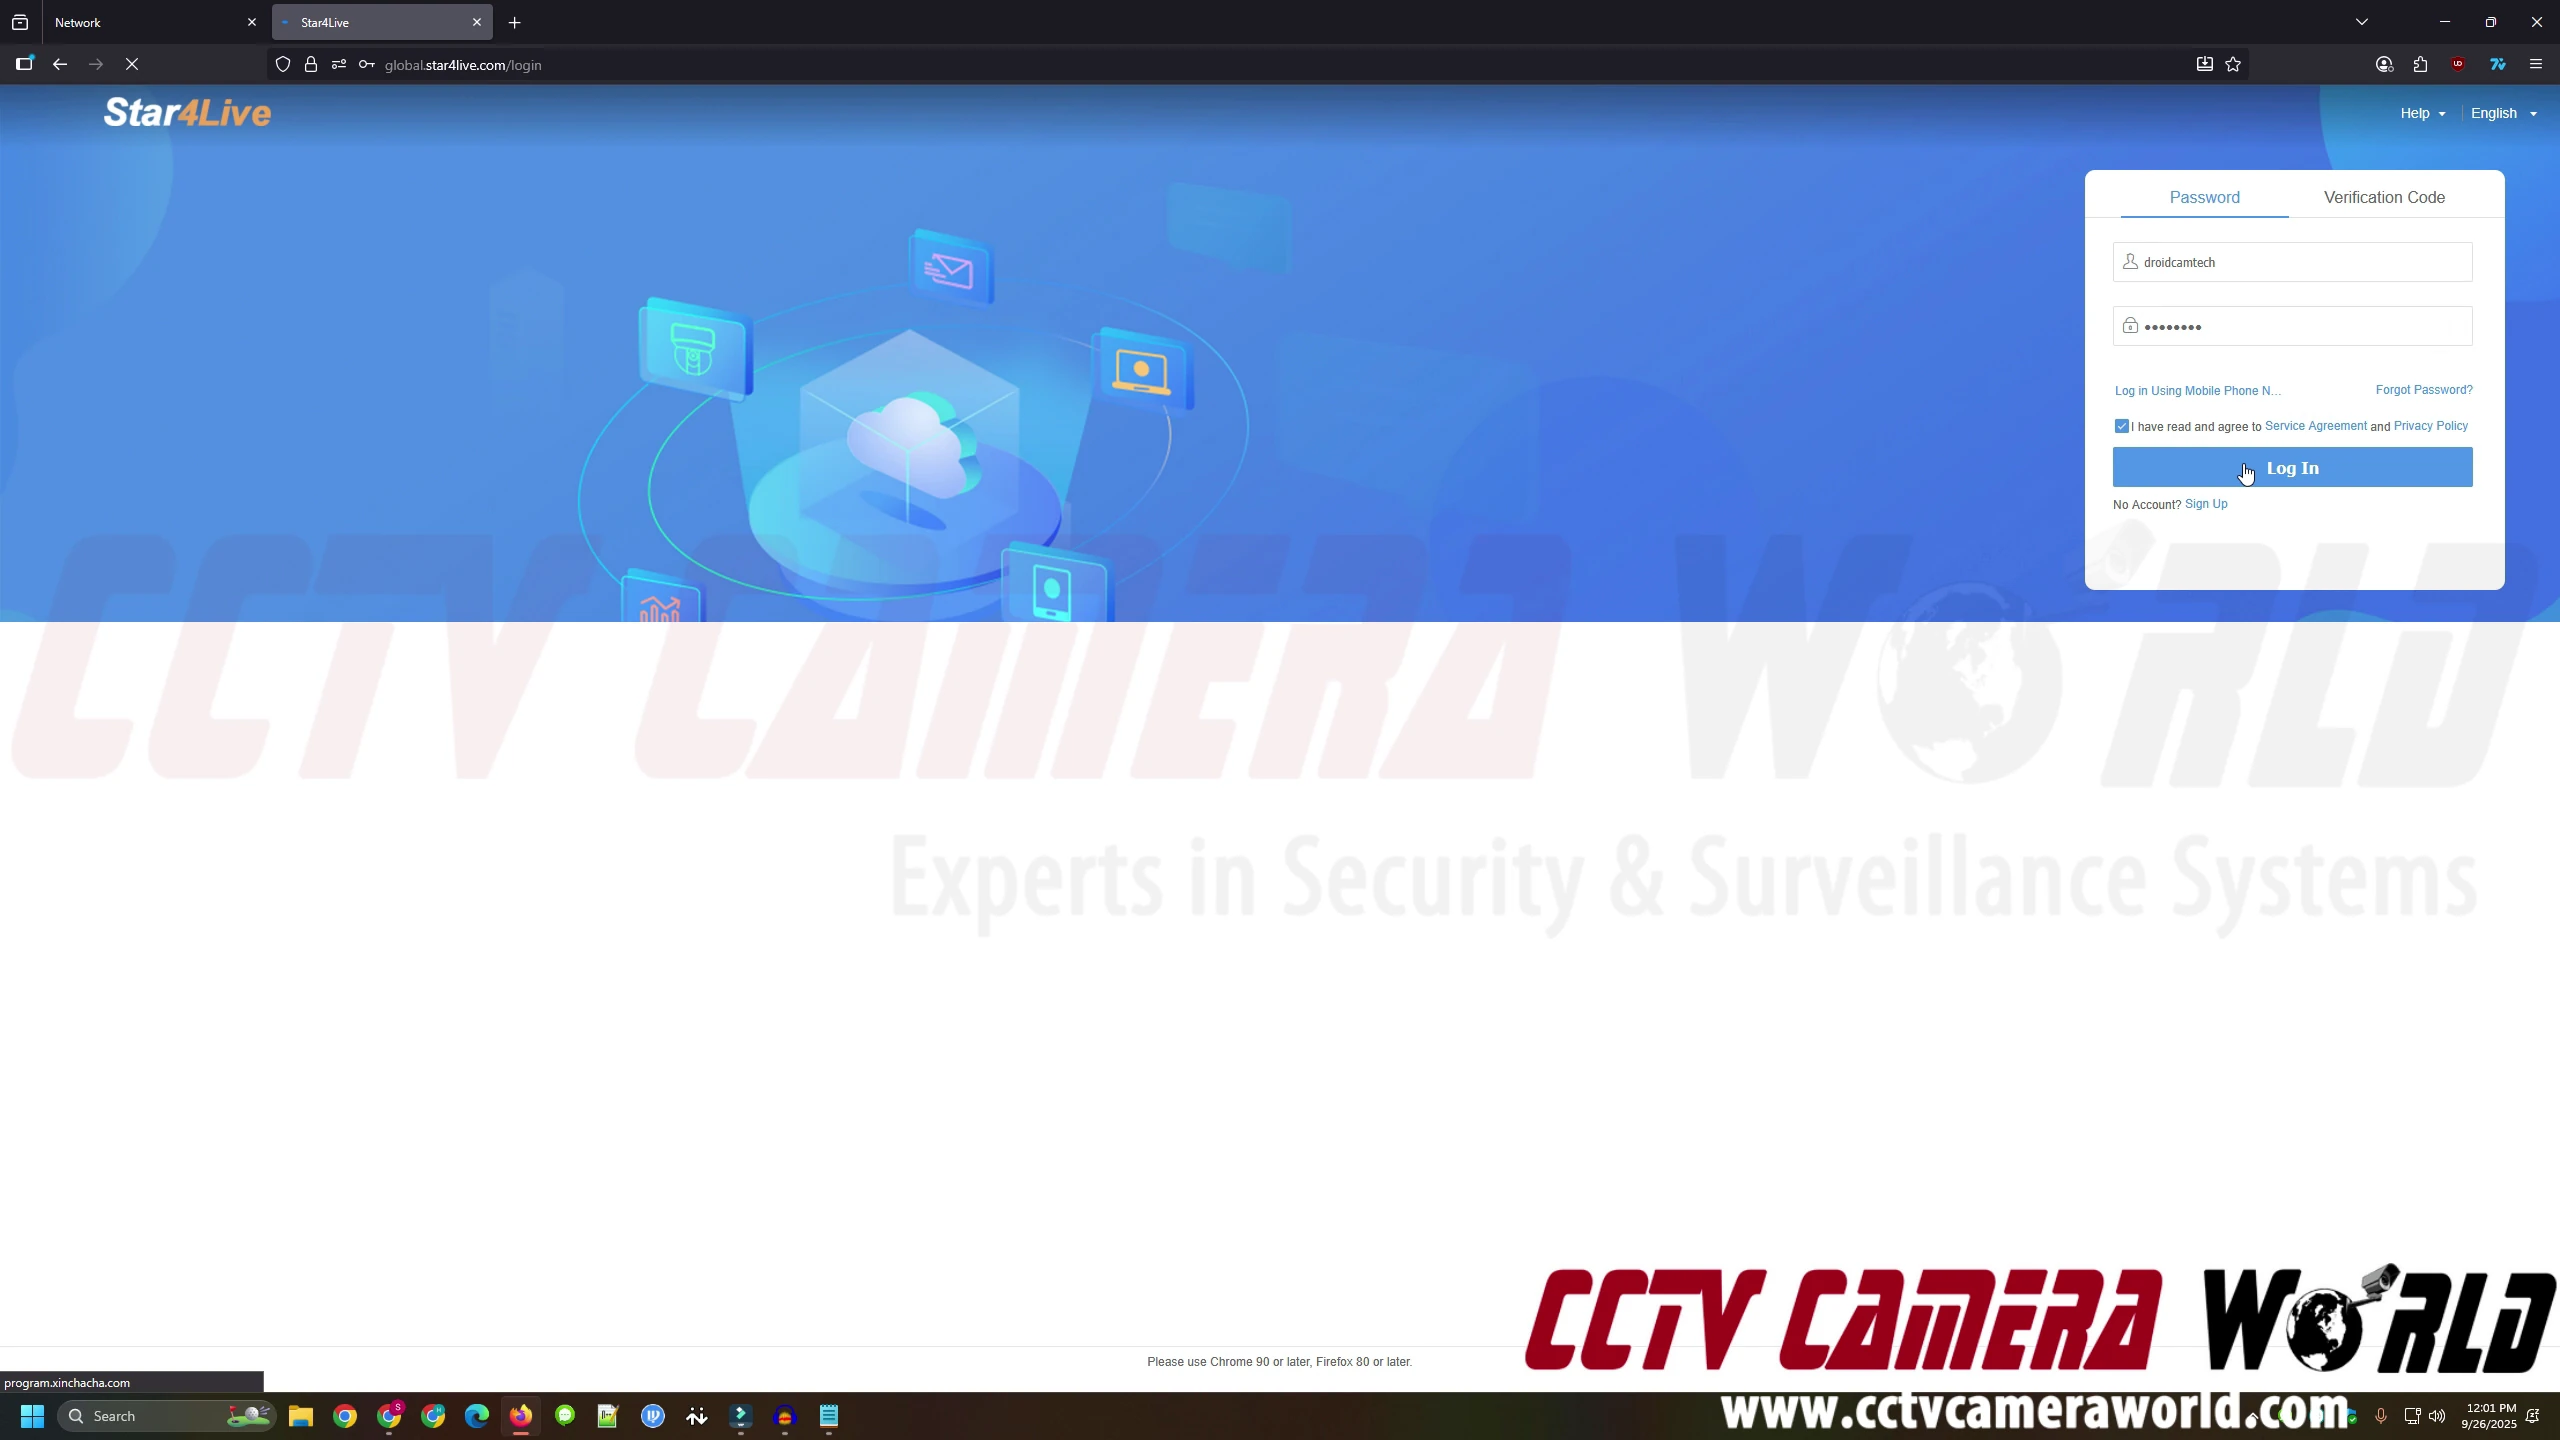
AvaEye Cloud Account
Create an account in the AvaEye app using your email and a password.
These credentials are used later to log in via a browser.
Refer to Step 2 below and watch the video for more information on creating an account
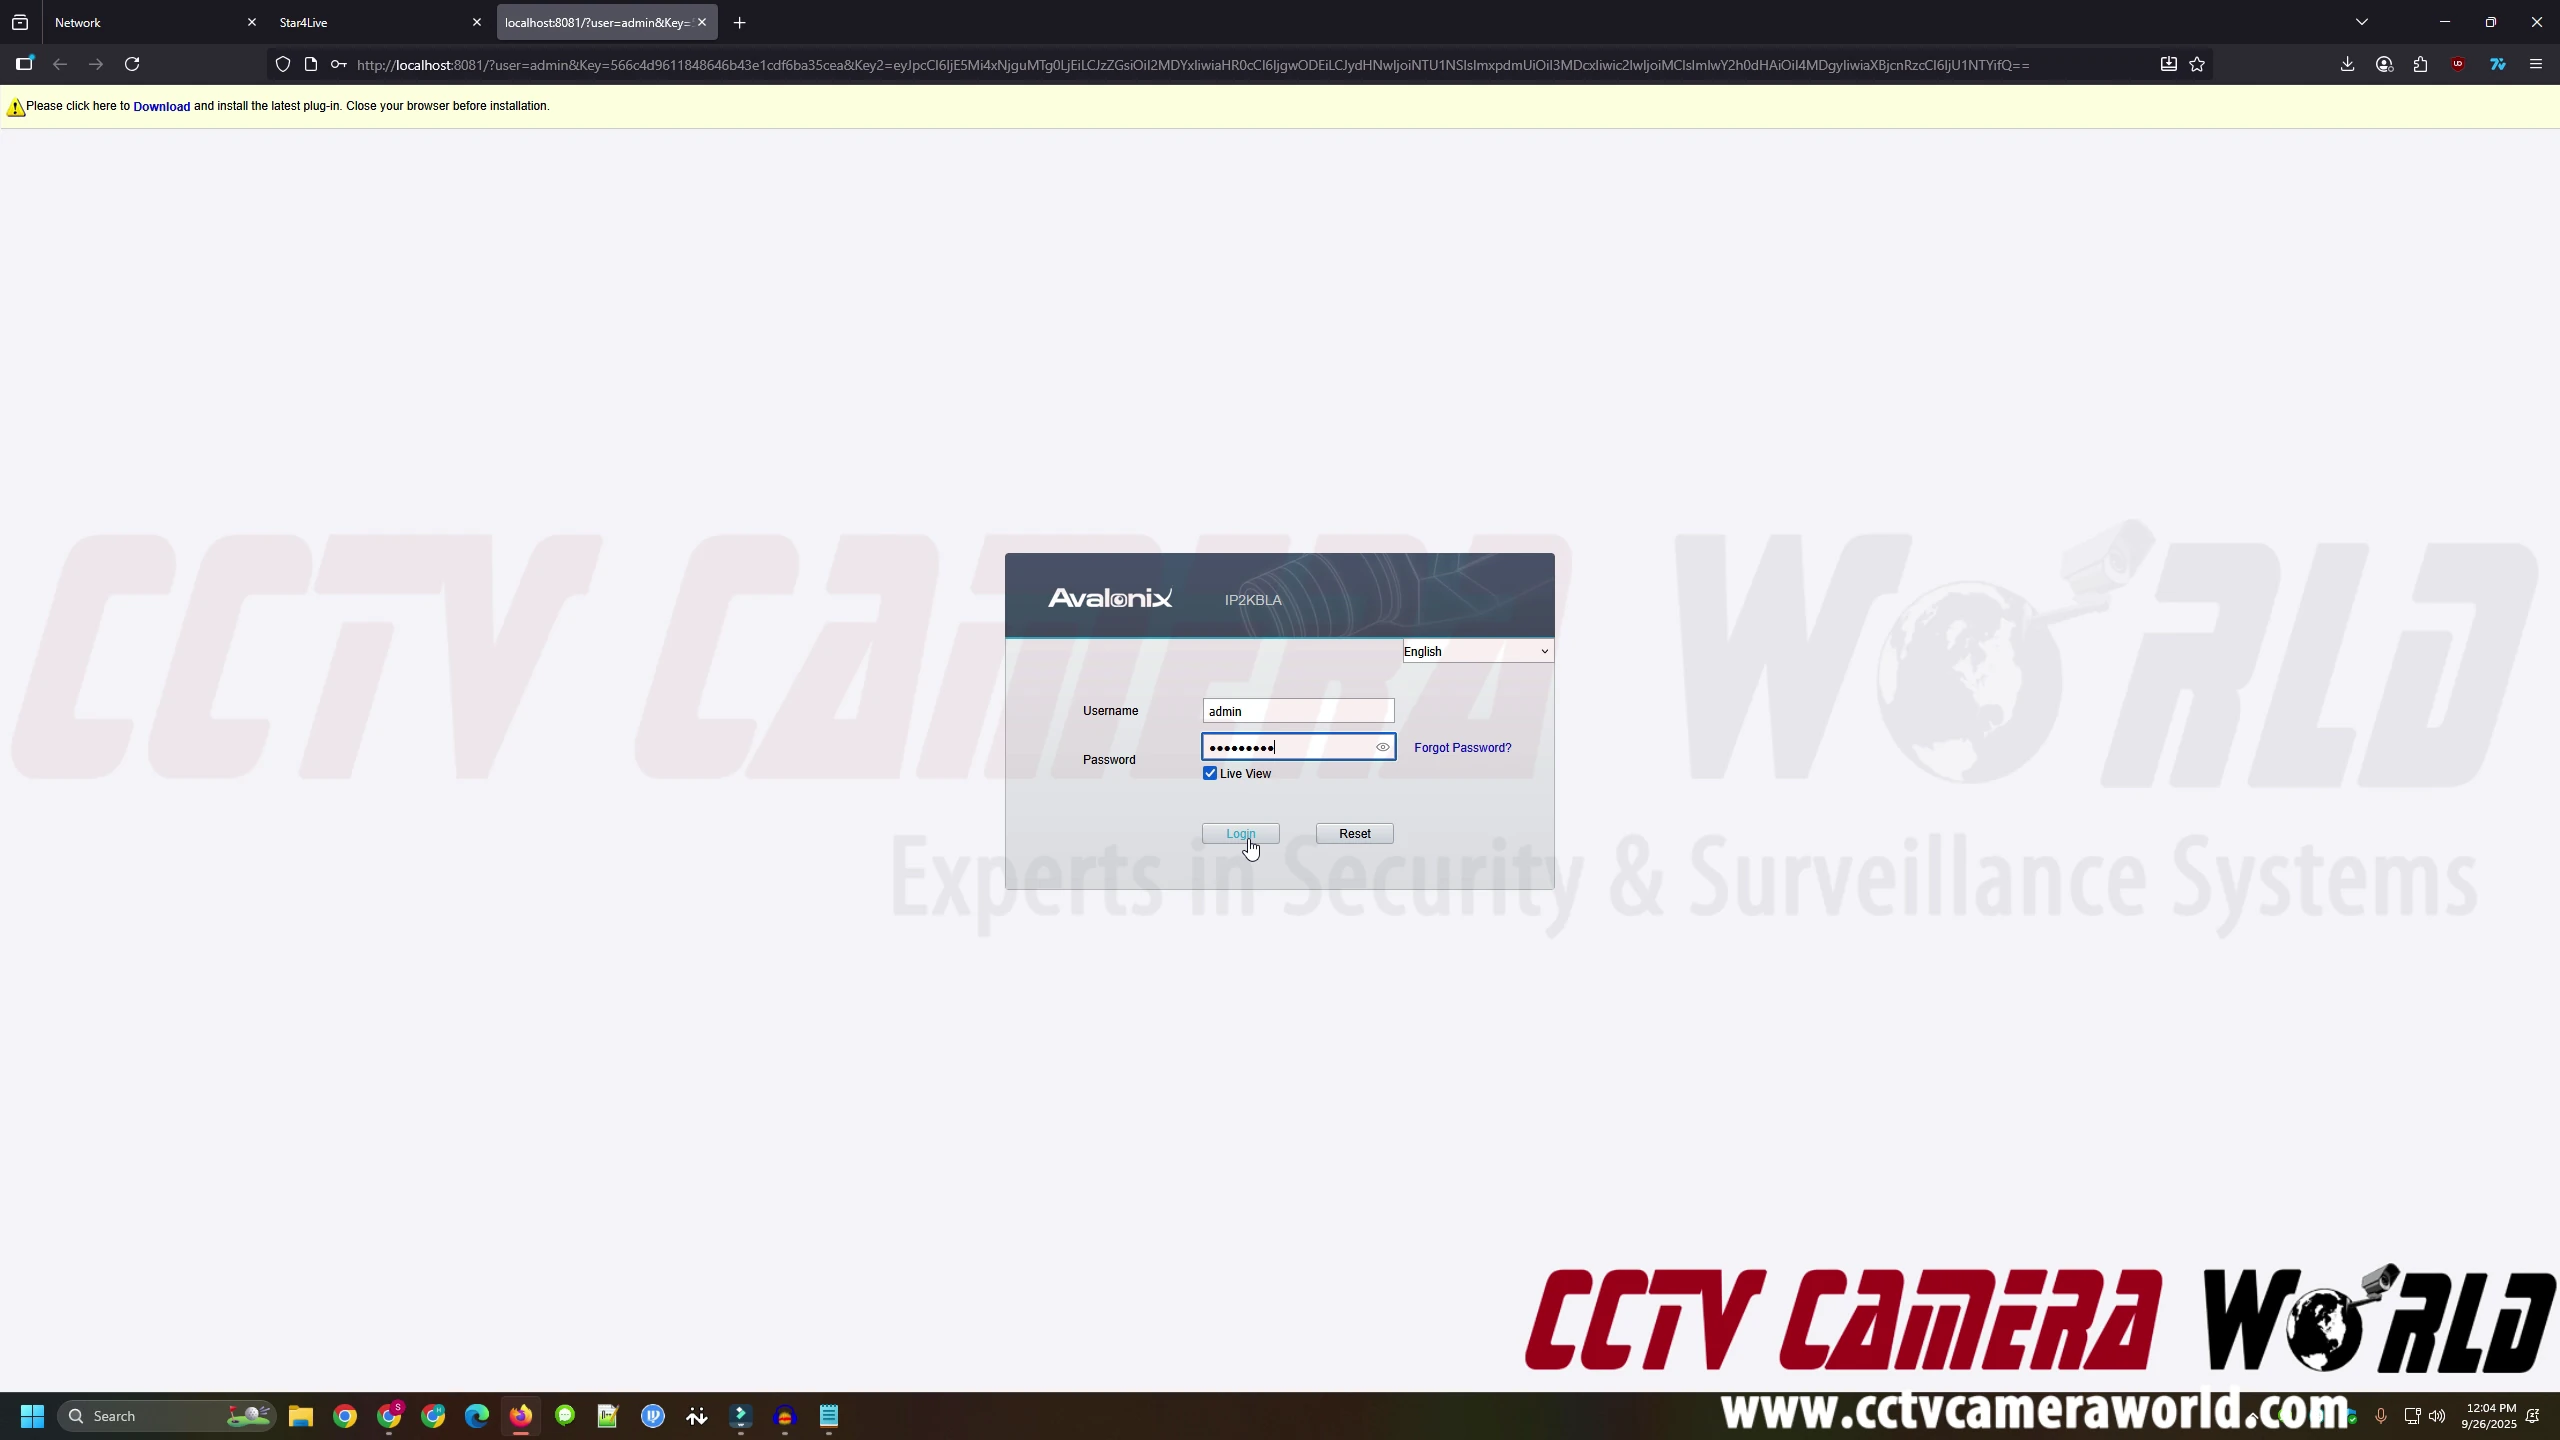
NVR or Camera User Credentials
Every AvaEye device ships with a default username and password printed on a label on the product box.
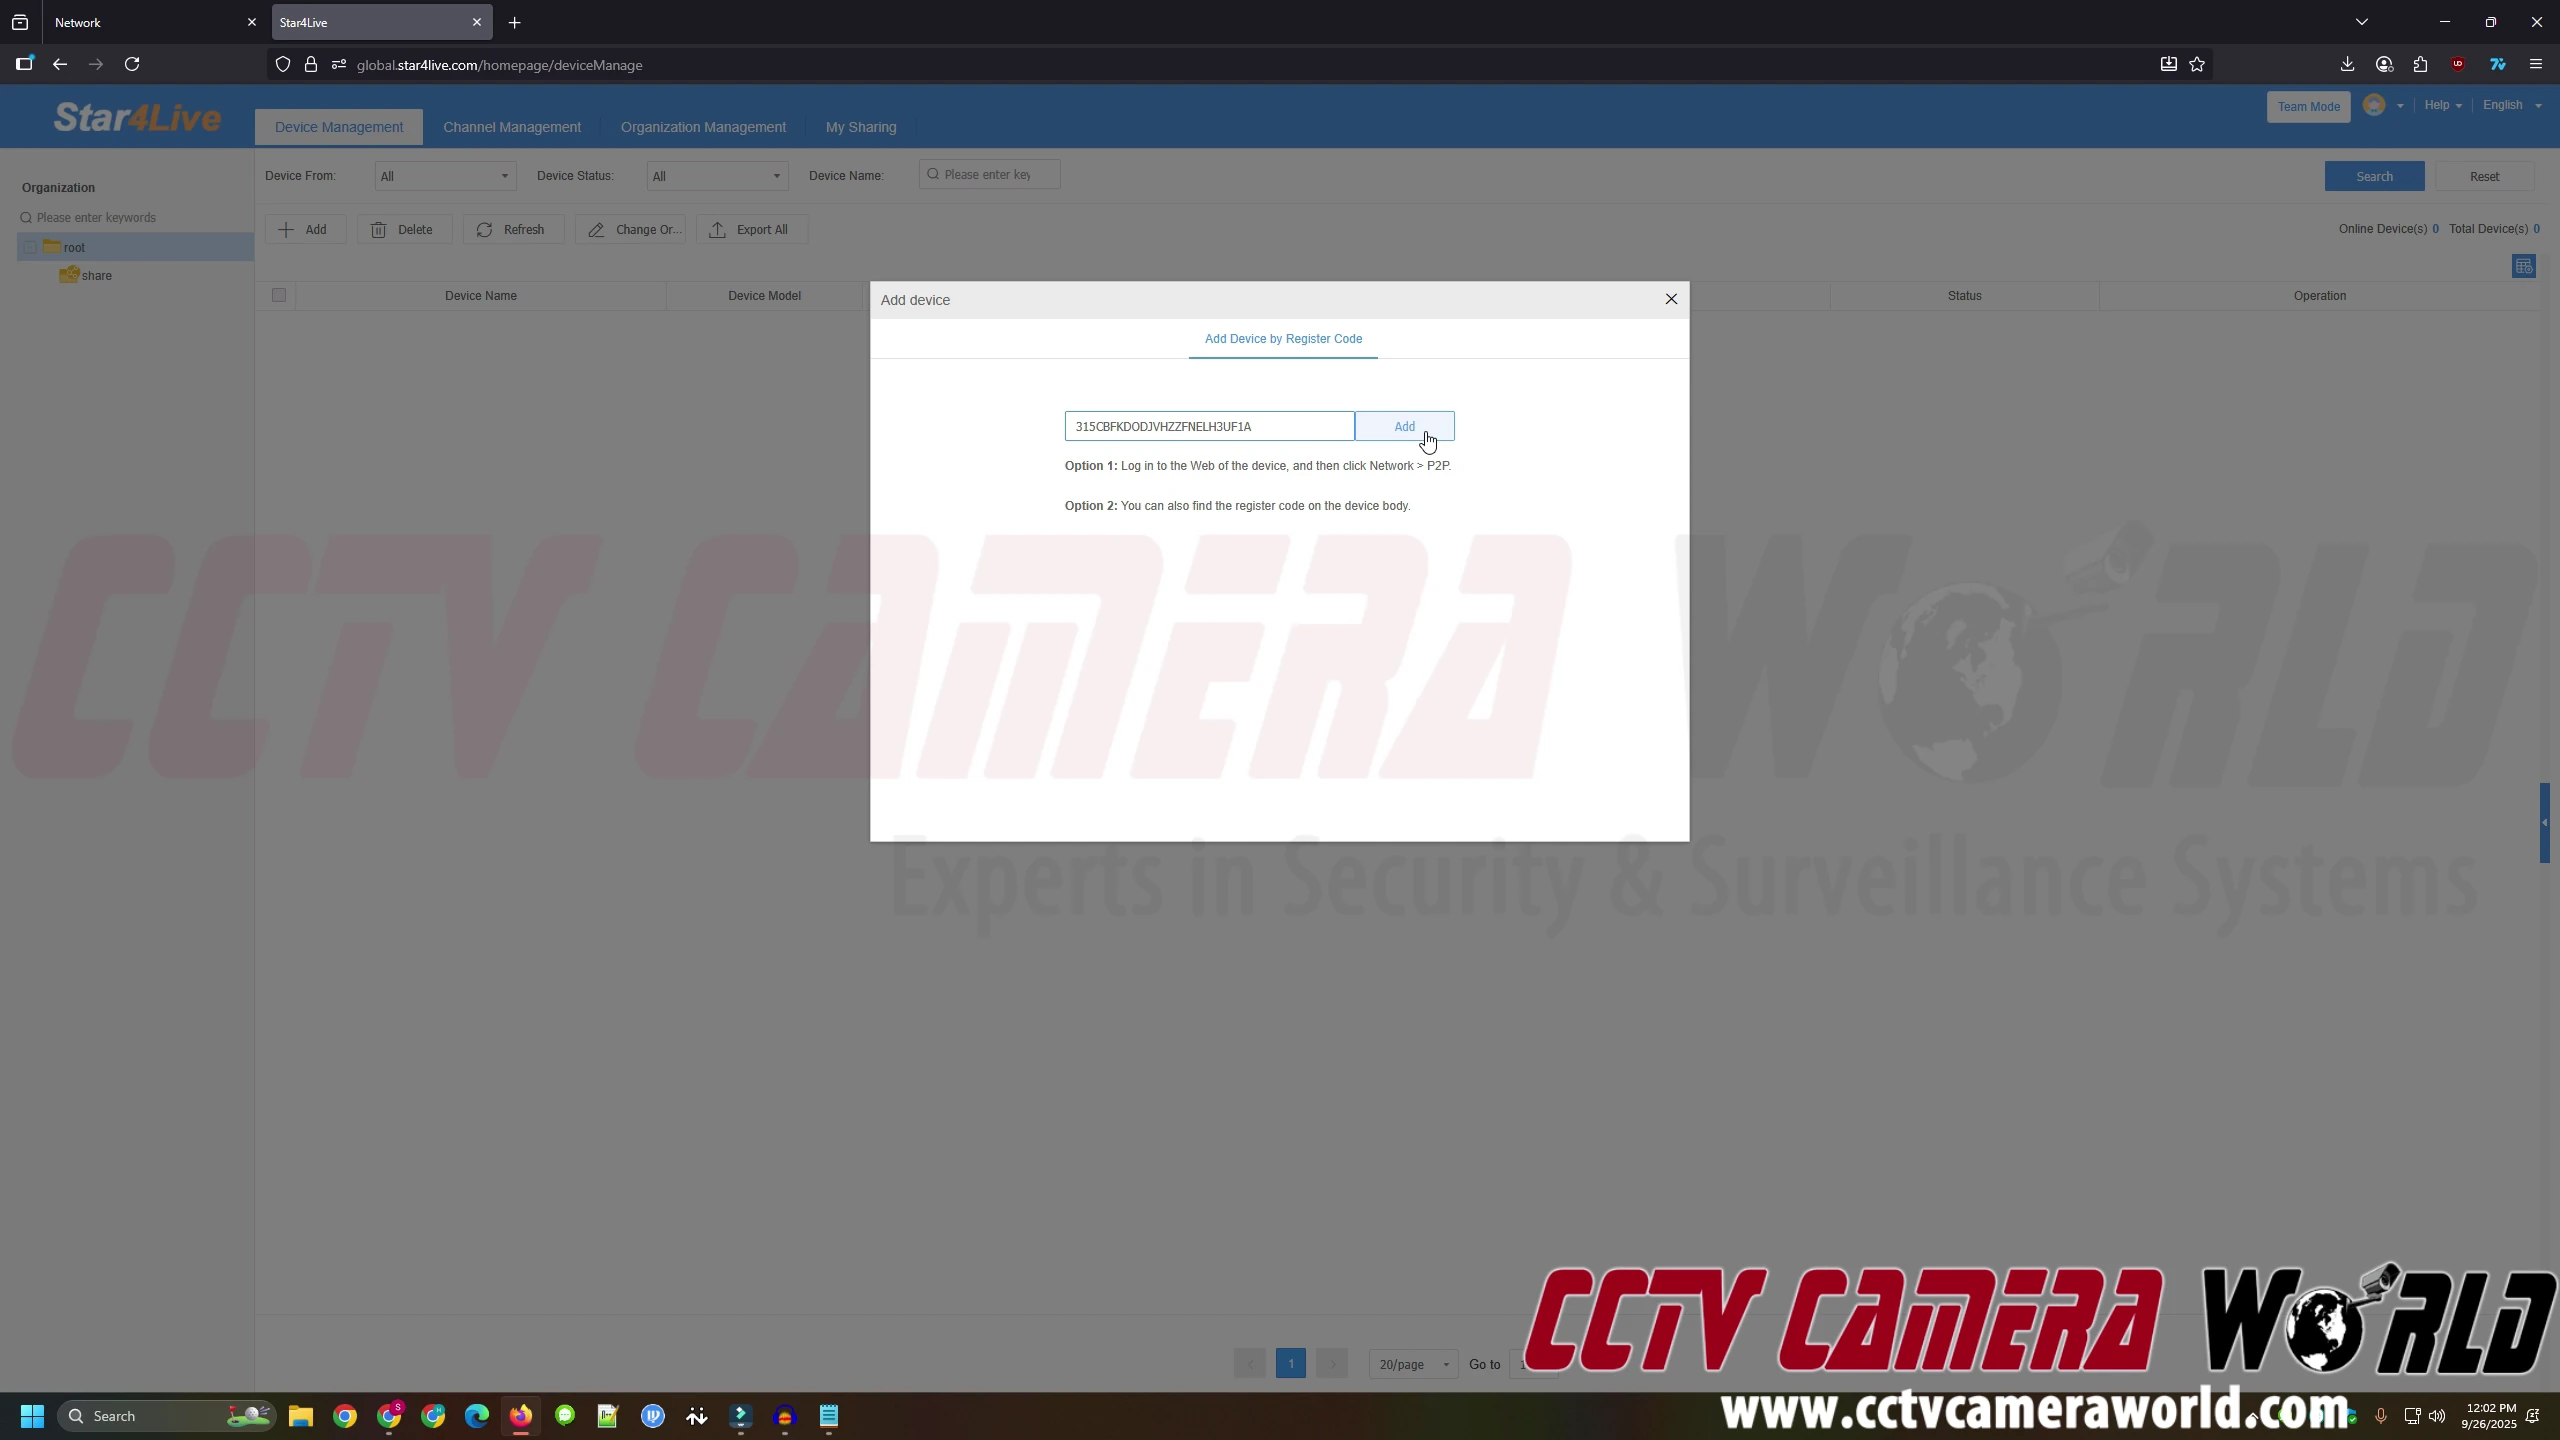
NVR or Camera P2P Remote Access Register Code
The unique P2P register code (used for cloud access) is also sometimes included on the box and can be retrieved using the monitor interface for NVRs or the web interface for NVRs and cameras.
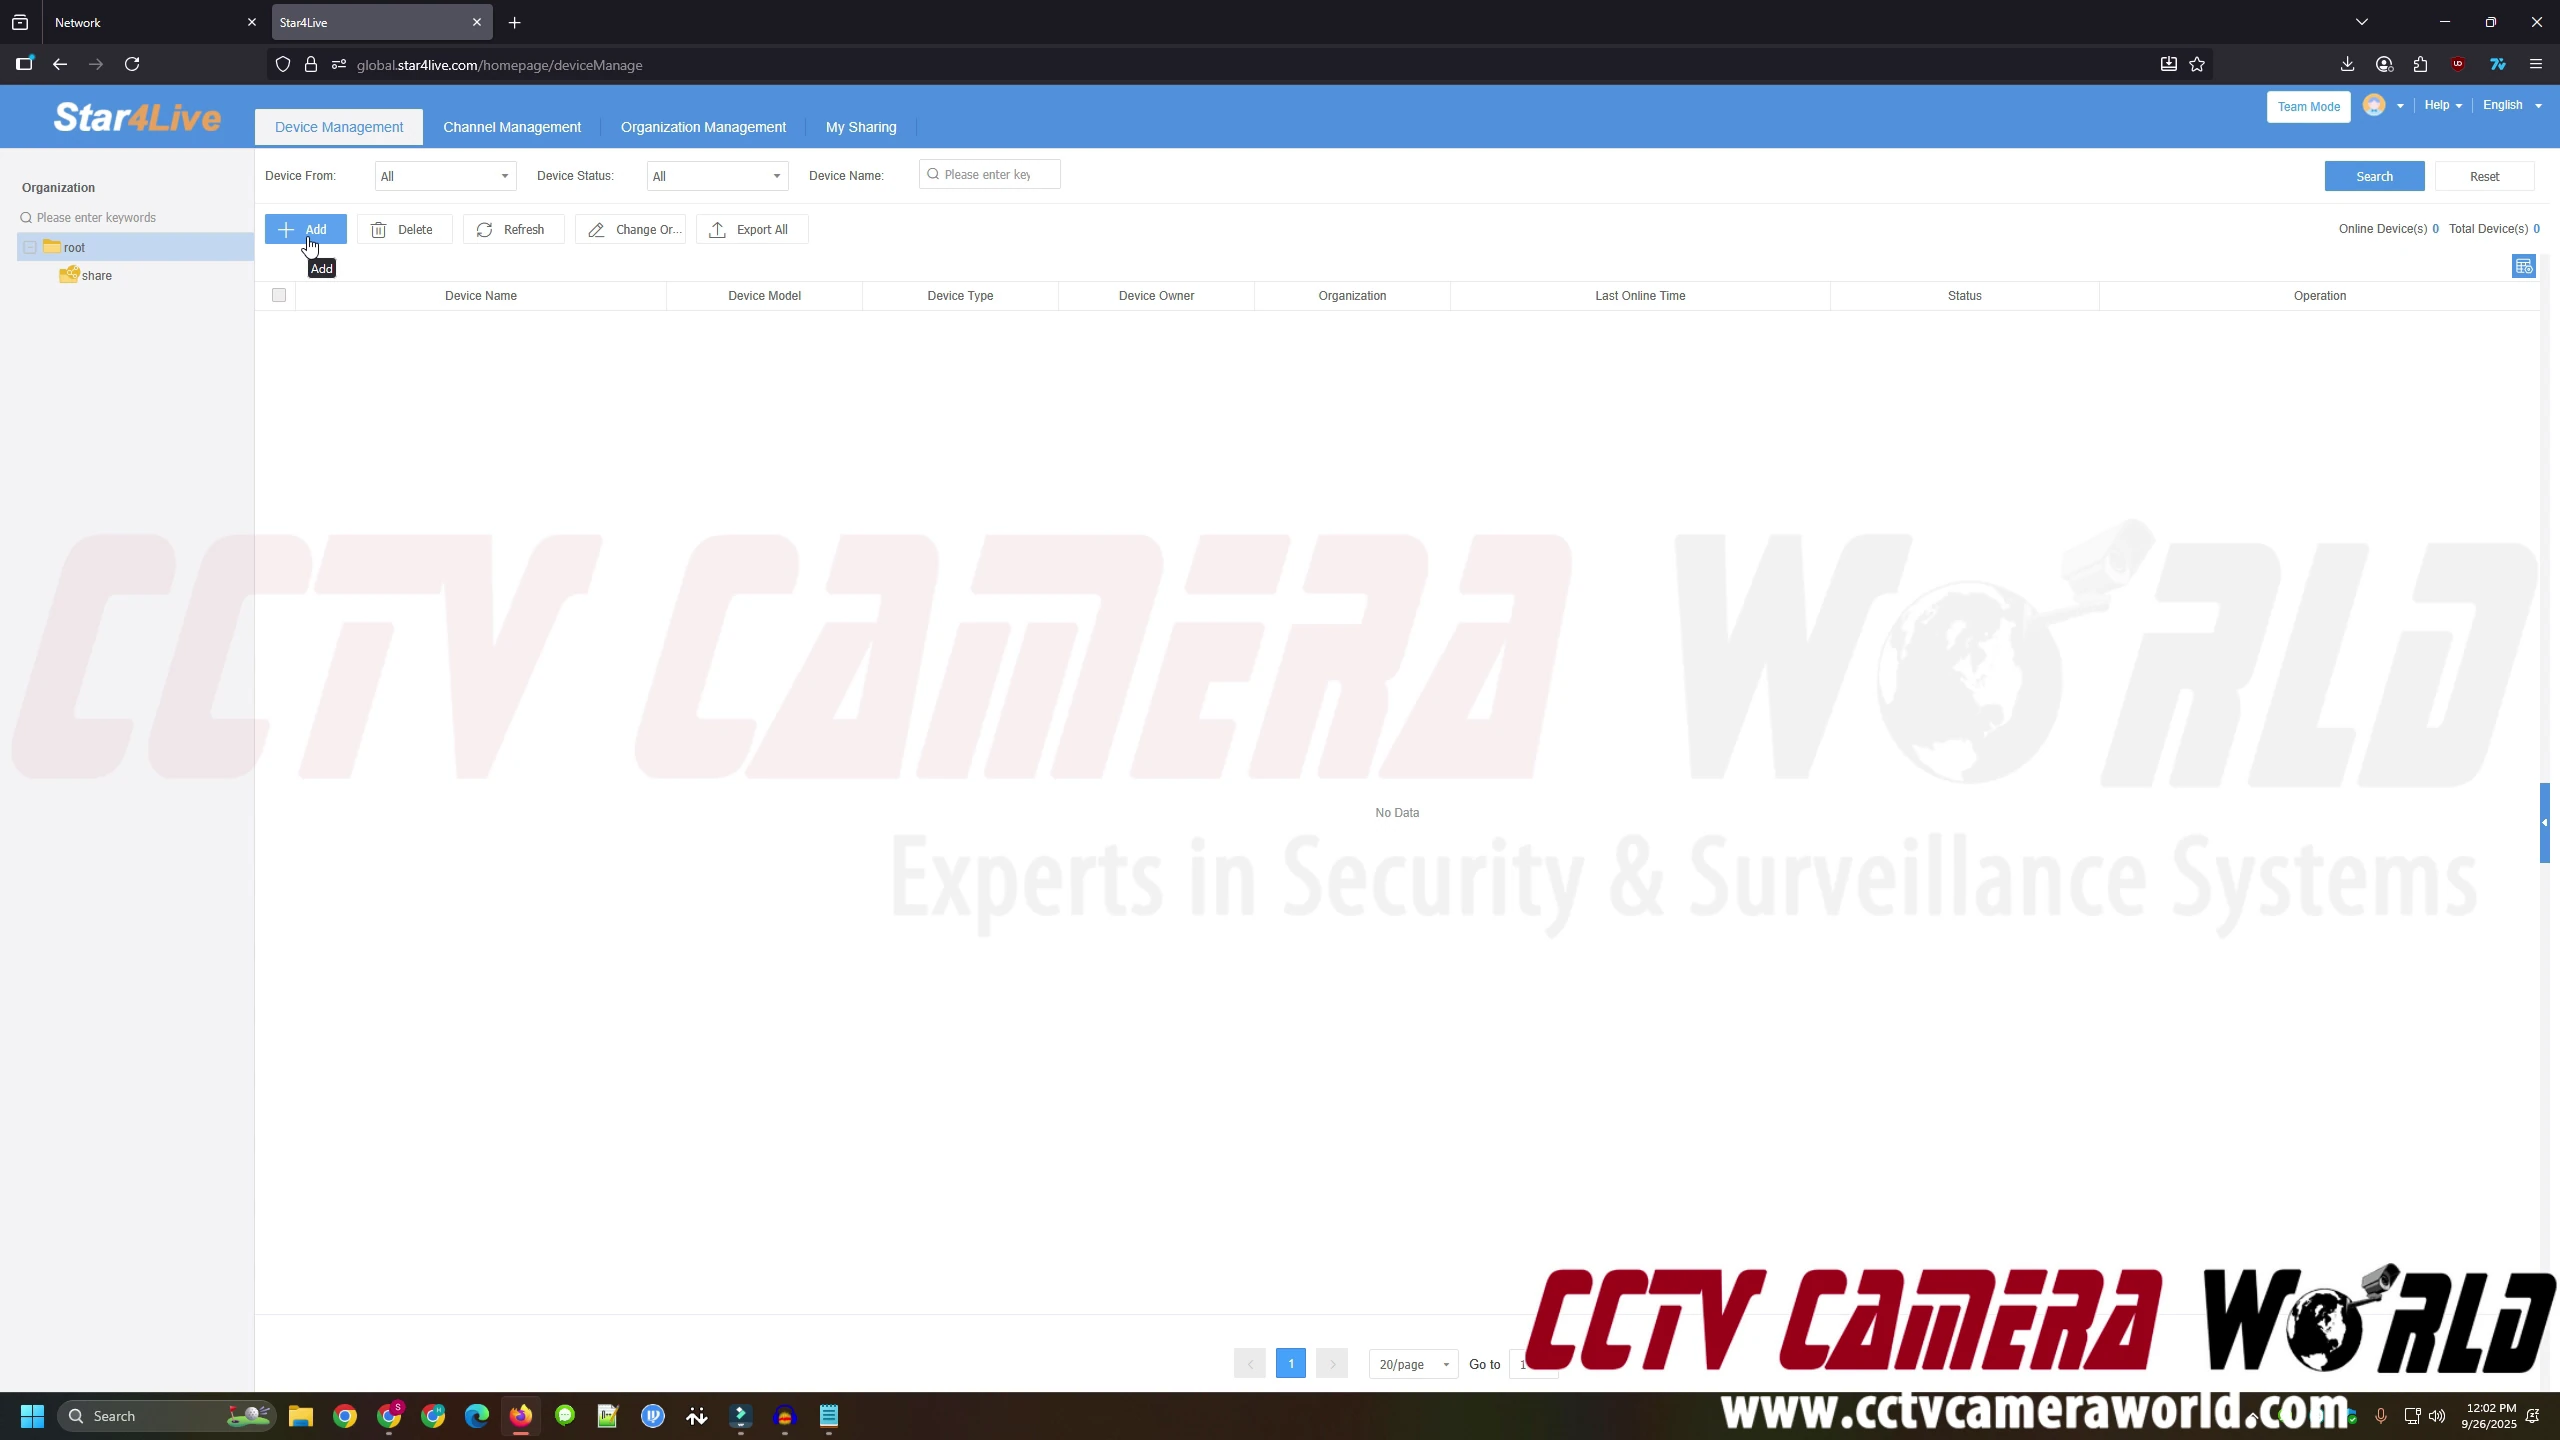
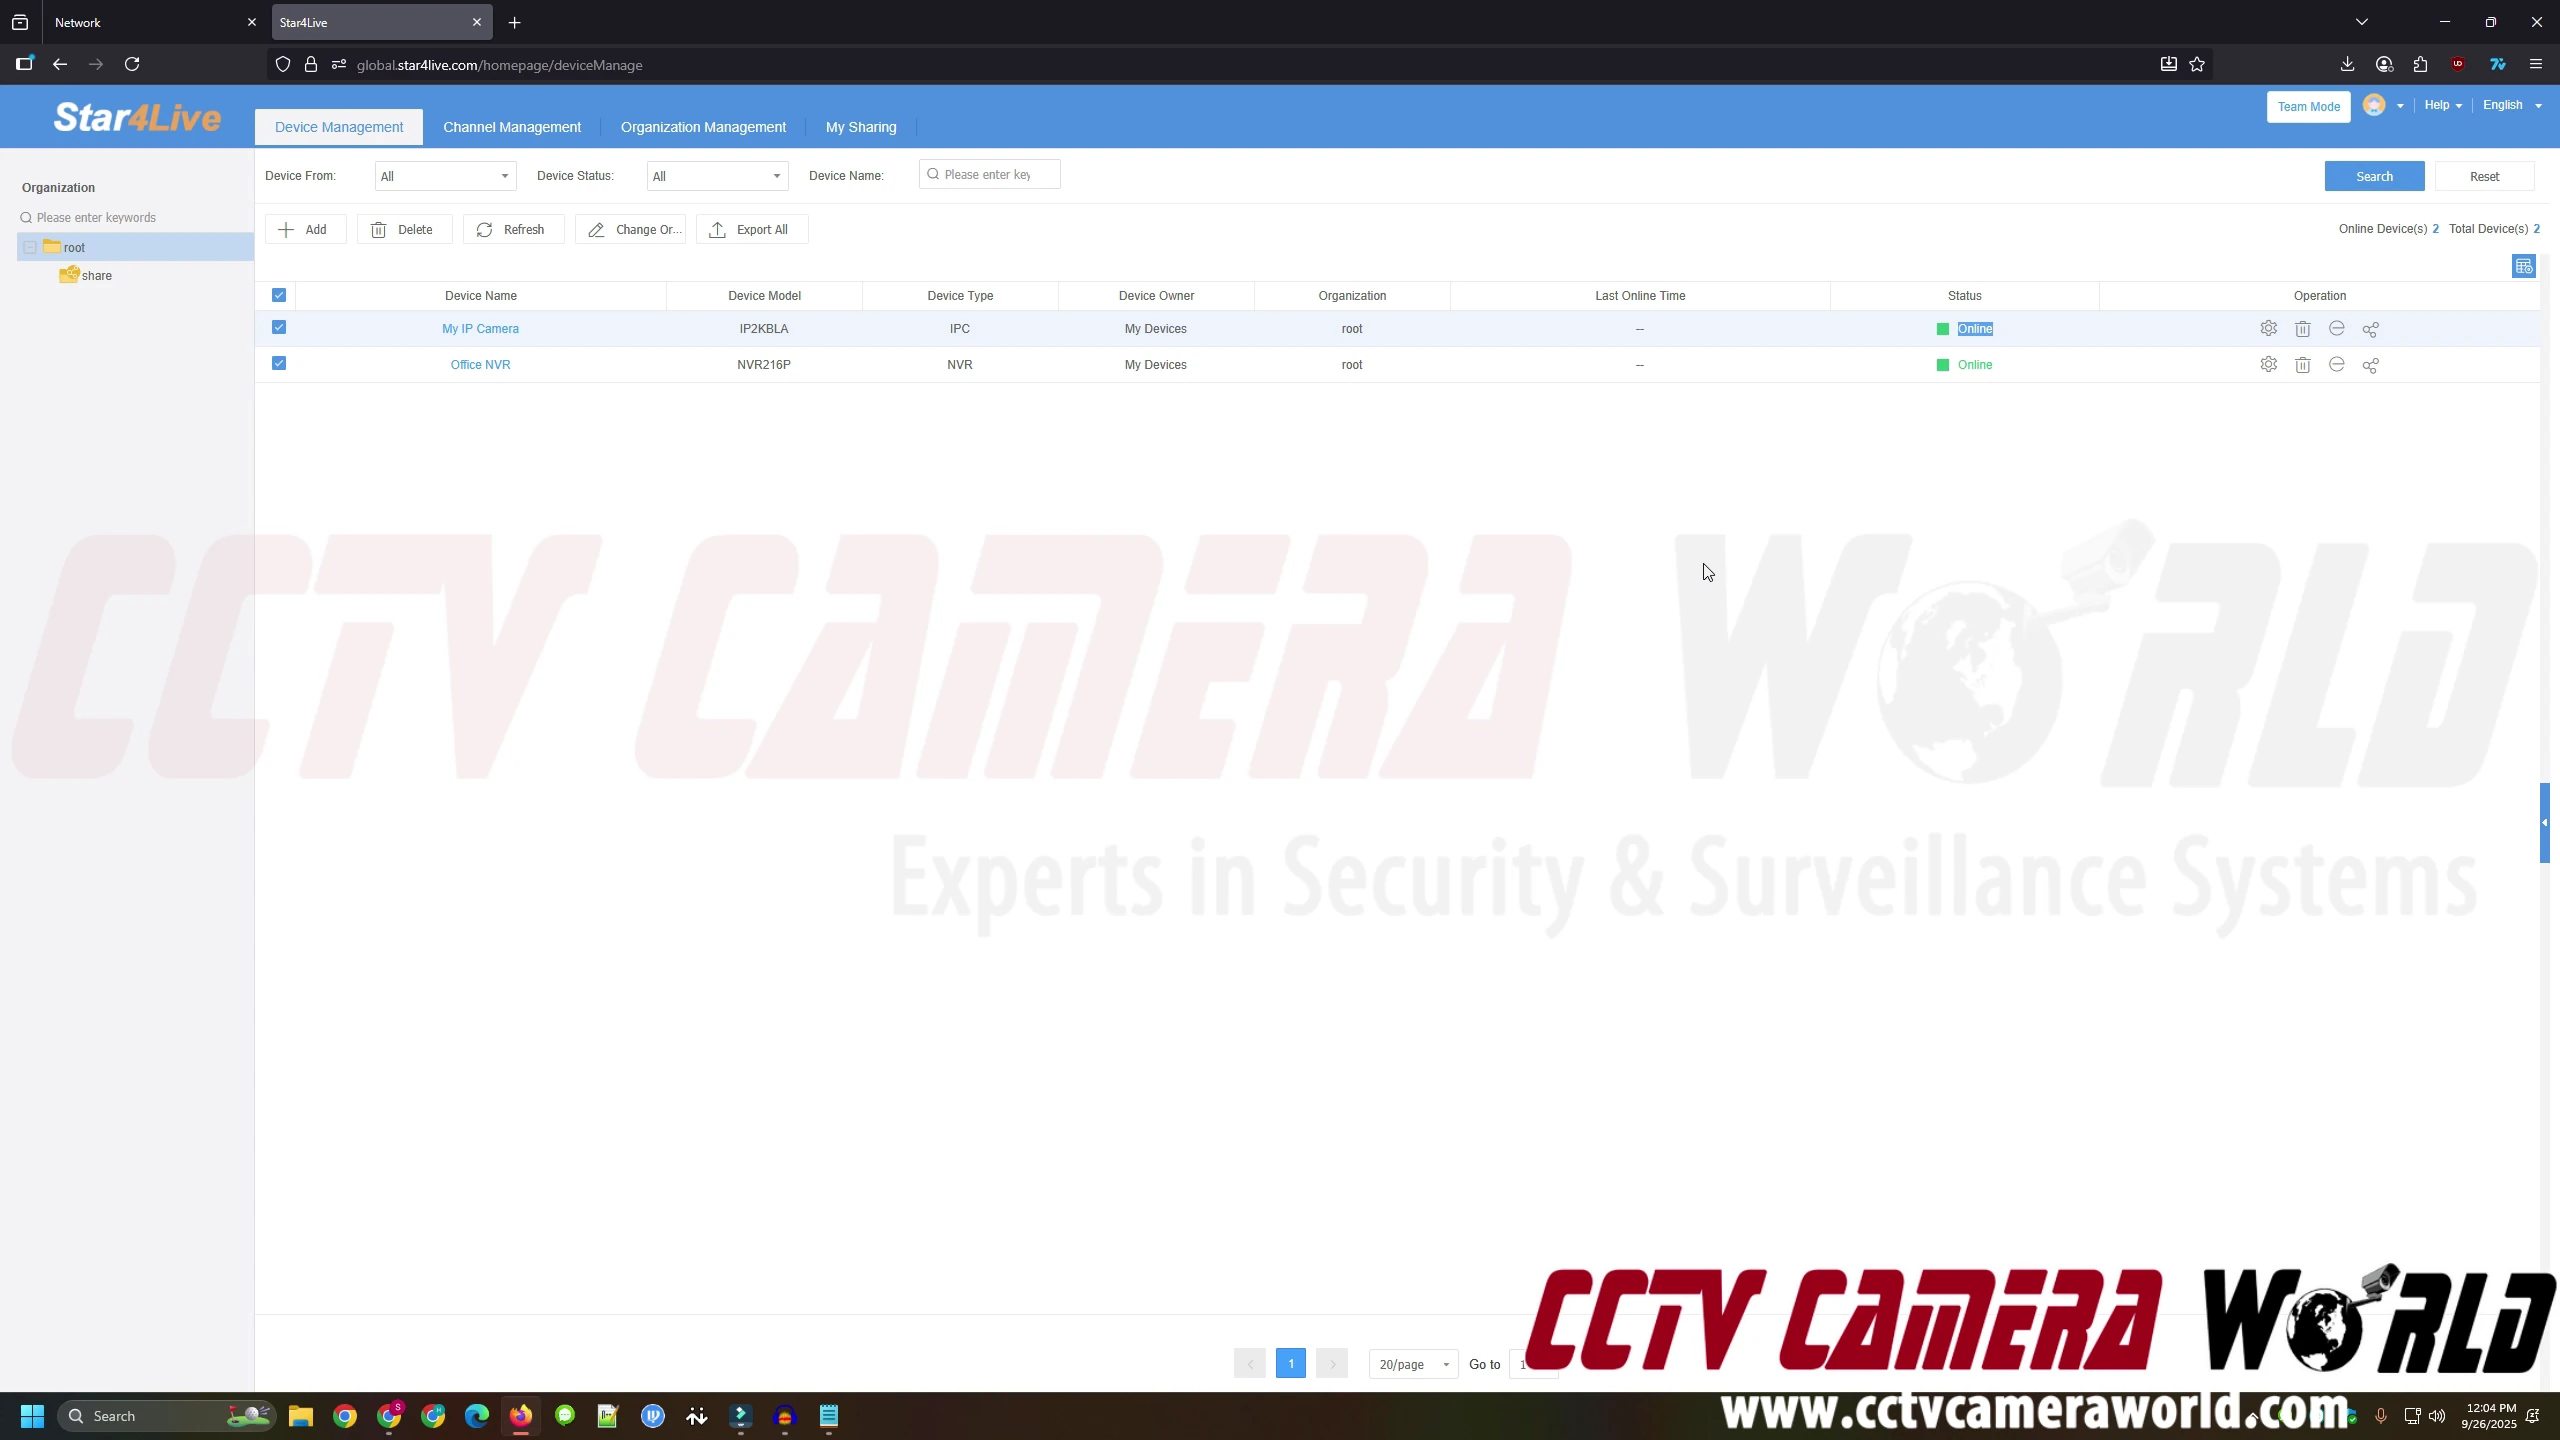
Step-by-Step: Enable Browser Access through the Cloud
Step-by-Step Video
Note: This guide assumes you already have your device’s P2P register code ready.
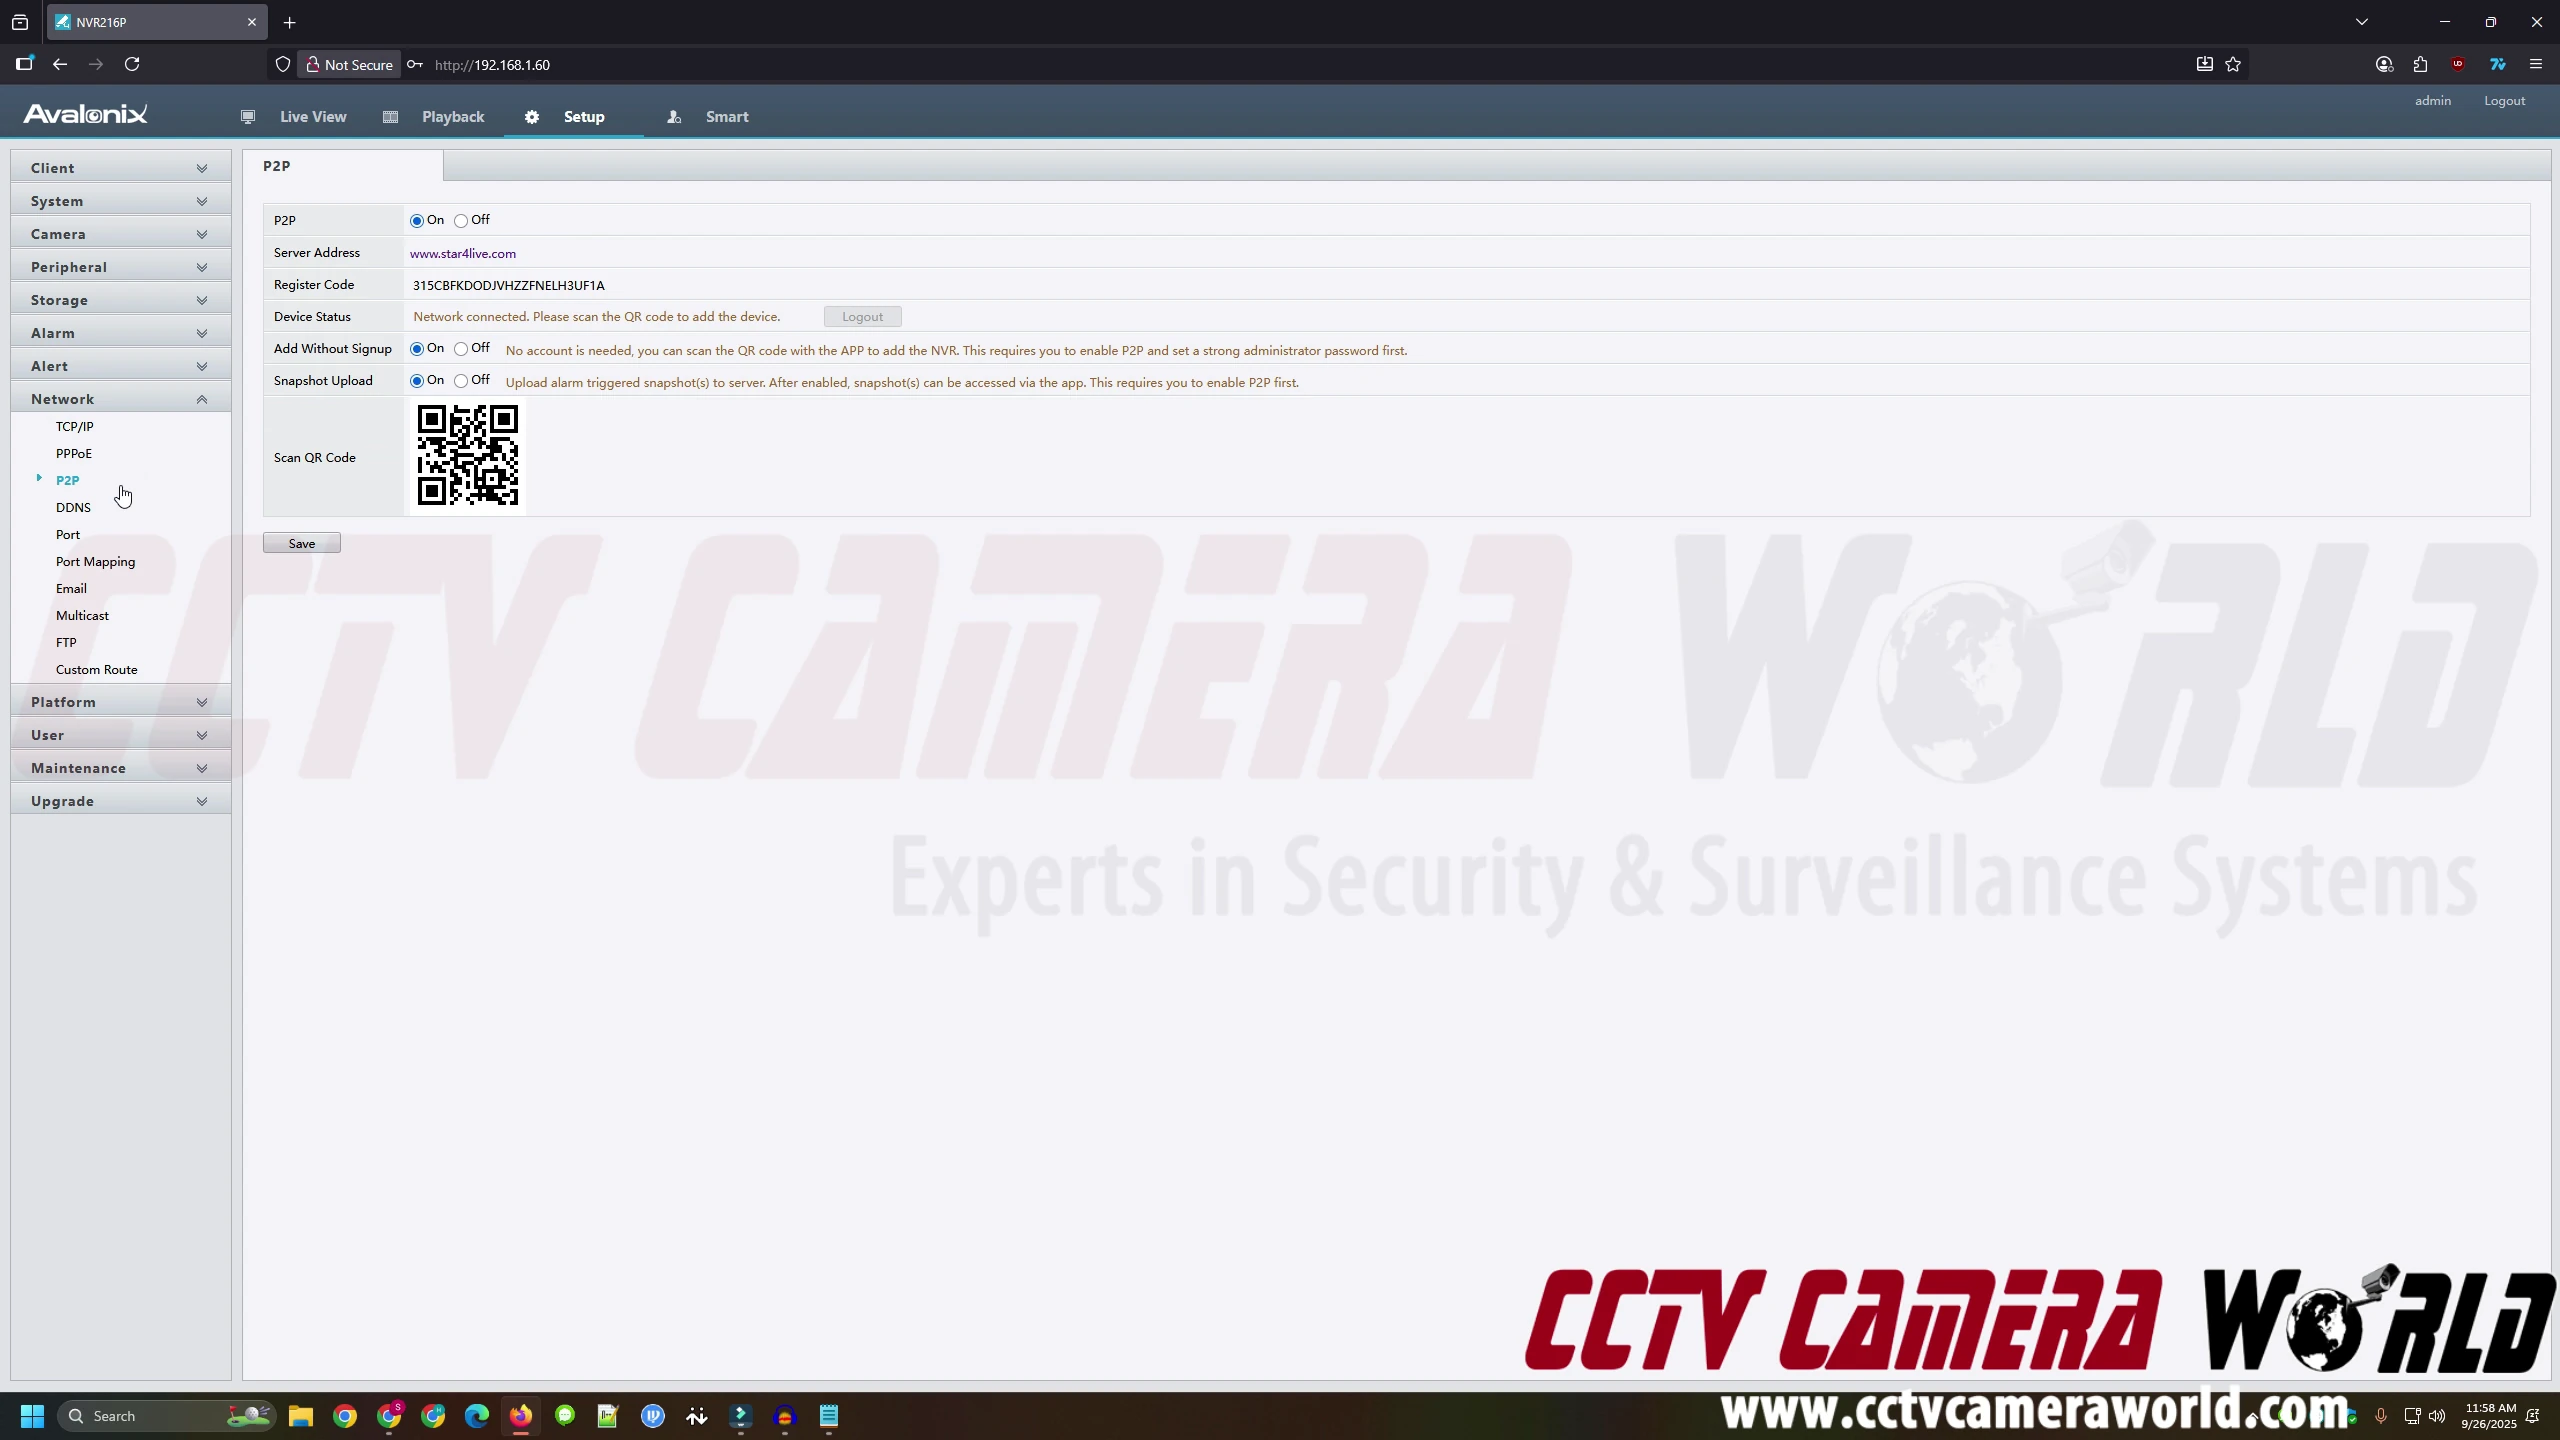
1. Enable P2P/Cloud and Locate the Register Code
On most AvaEye devices, the P2P setting is enabled by default, but it’s important to confirm it’s on.
Open your device’s web interface, then navigate to:
Network → Platform Access → P2P settings.
On NVRs, this menu is also accessible from the local monitor interface.
Even with a straightforward setup, a few common issues can arise when setting up and using AvaEye’s cloud browser access. Below are the most frequent problems and how to resolve them quickly.
Camera or NVR not showing online
Check internet connectivity: Ensure the device has a stable internet connection. If local viewing works but the cloud doesn’t, outbound ports may be blocked.
Verify the P2P setting is enabled:
On NVRs: Network → Platform Access → P2P/Cloud.
On cameras: confirm in the web interface settings.
Unable to log in from a browser
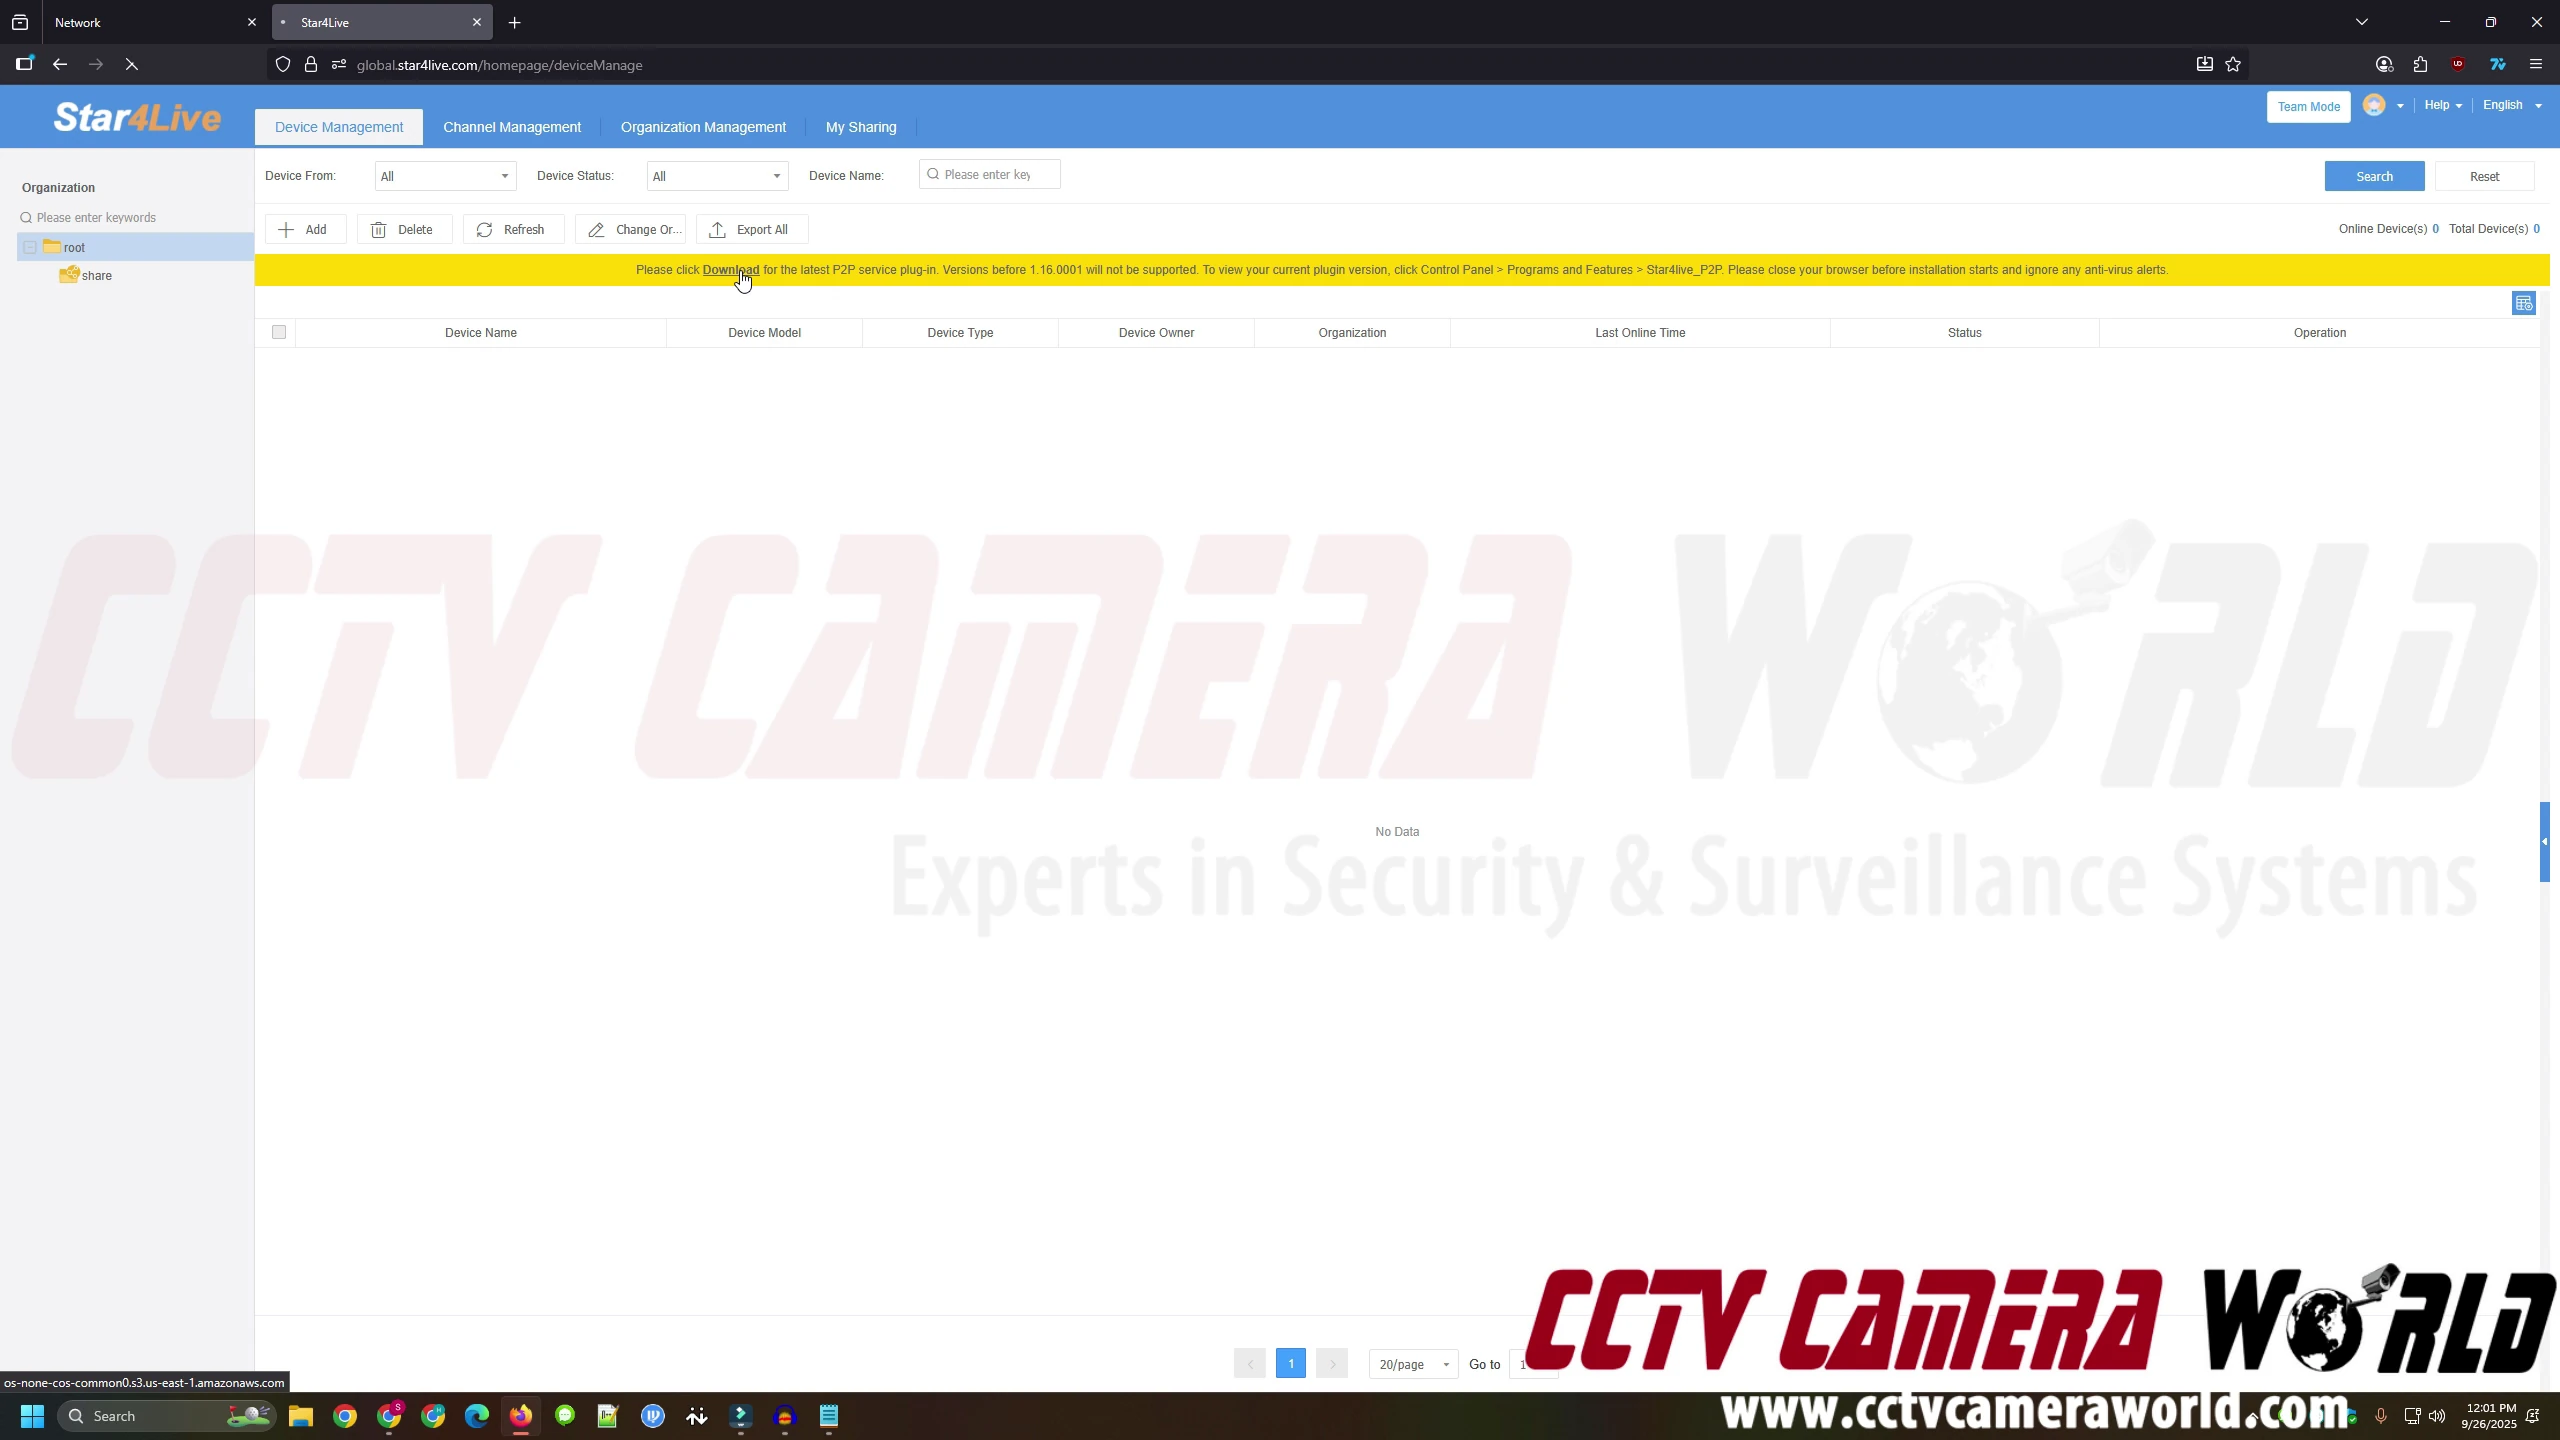
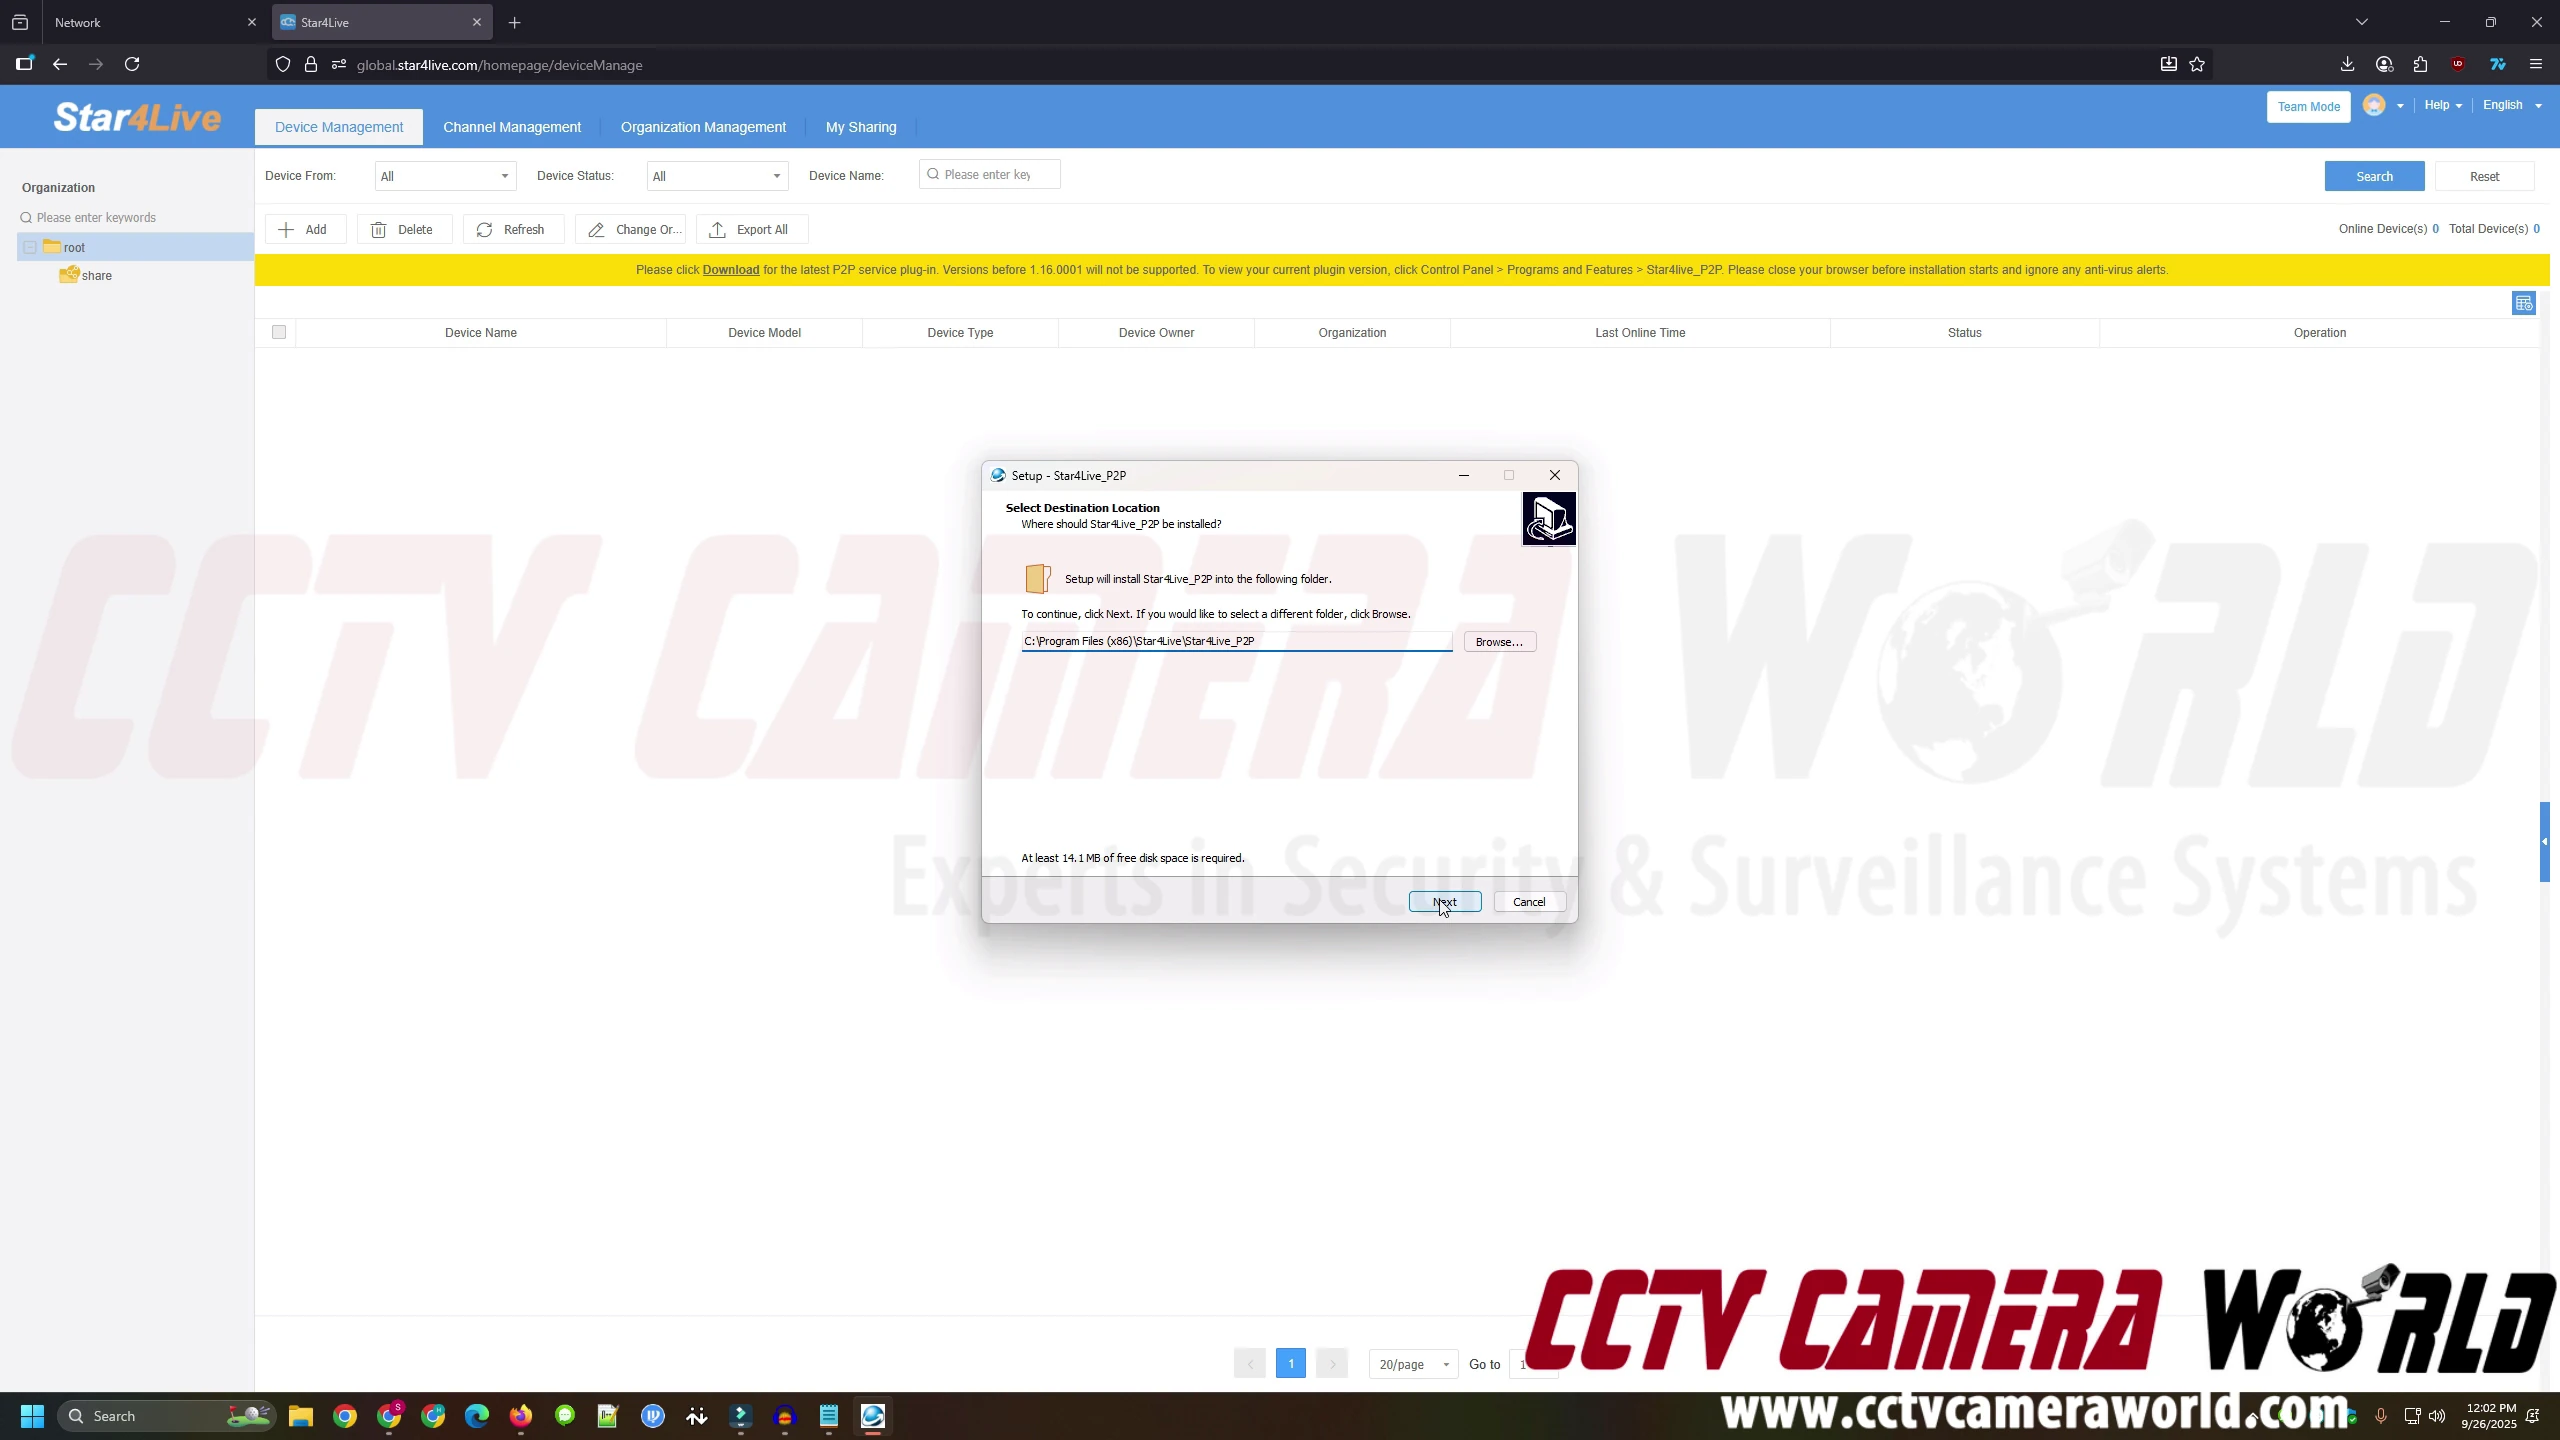
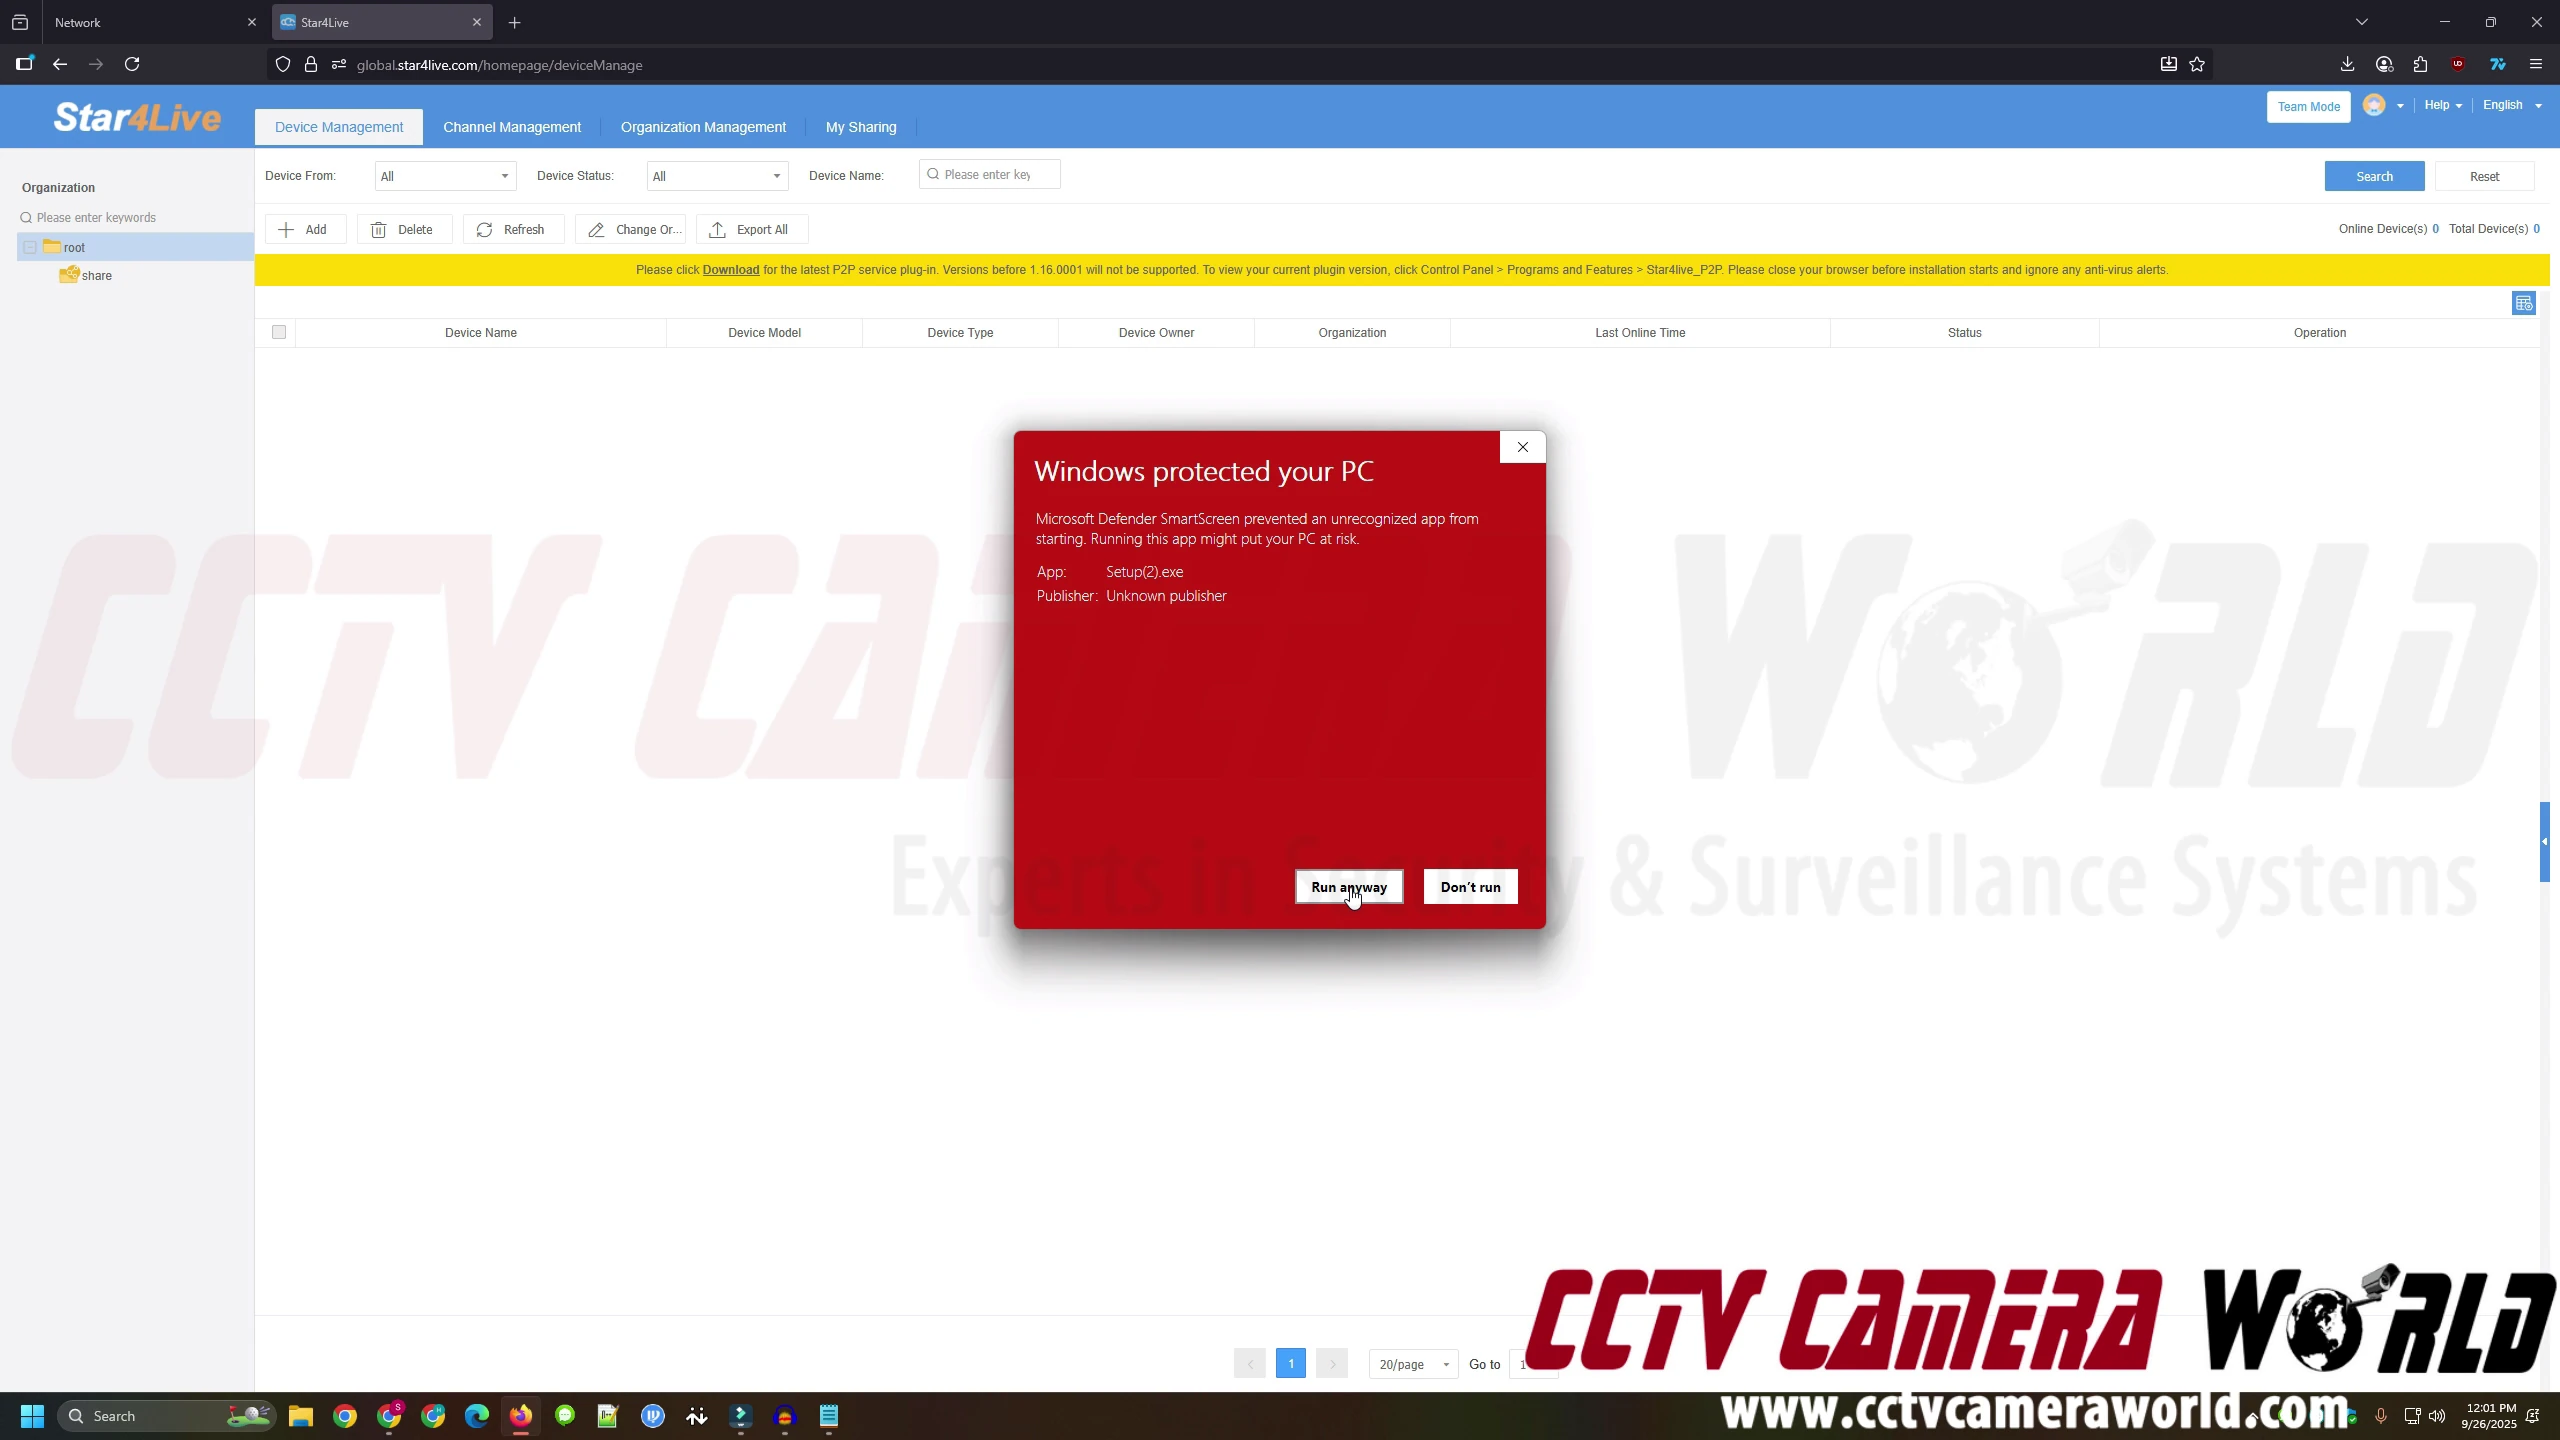
Install the P2P Connection Plugin: While not all AvaEye devices require a video plugin, they DO require the Star4Live P2P plugin for cloud connectivity. Make sure it’s installed as outlined in Step 4.
Update your browser: Chrome, Edge, and Firefox are supported; older builds may not load video correctly.
Clear cache or try incognito: Cached sessions can interfere with the login process or plugin handshake.
Check account credentials: Use the device’s own username and password, not your Star4Live account login, when prompted by the web interface.
Live view loads slowly or buffers
Bandwidth limits: Each stream requires at least 2 Mbps upload speed at the device location and adequate download speed at the viewing location. Reduce the number of active streams if bandwidth is saturated.
Switch to the substream view: Select the lower-resolution stream for smoother remote playback.
Test locally first: Verify the device streams correctly on the LAN before troubleshooting the cloud connection.
Playback not available
Review or request permissions: If you’re using shared access, the admin may only have granted live view privileges.
Confirm recording settings:
On NVRs: verify the record schedule.
On cameras: confirm the microSD card is installed and recording.
Disk/SD card health: A failed hard drive or full SD card can prevent playback.
Video won’t play
Plugin requirement: Some browser/device combinations still require a video plugin. In our testing, Firefox generally works best without a plugin, though certain models may still prompt for one.
Pop-up blockers: Allow pop-ups from the AvaEye/Star4Live portal so new windows can open.
Security settings: IT policies may block streaming ports or plugins. Coordinate with your IT department if you are accessing it from a managed network.
Frequently Asked Questions about AvaEye Cloud Cameras
Do I need a subscription to use AvaEye cloud access?
No. Unlike most consumer brands that charge monthly for cloud storage, AvaEye’s cloud platform is built in and free to use. It provides remote access, not storage, so you can view your cameras or NVR from any browser without ongoing fees.
Where are my recordings stored?
Recordings remain under your control, stored on the NVR’s hard drive or, for standalone IP cameras, on an internal microSD card. The cloud platform is simply a secure and convenient way to access these devices remotely.
Does Star4Live cloud access work with both NVRs and IP cameras?
Yes. Any AvaEye device with cloud support—NVR or IP camera—can be added to your Star4Live account. This allows mixed systems to be managed and viewed through the same Star4Live portal.
Which browsers are supported?
Windows PC with current Chrome, Edge, or Firefox for cloud access via Star4Live. On local networks some models work in macOS or Linux, but cloud browser access in this guide requires Windows.
Can multiple people log in at once?
Yes. With AvaEye’s sharing feature, you can grant access to employees, family members, or partners. Permissions can be limited to live view only or expanded to include playback and device management.
Is it secure to log in using a browser?
Yes. Browser access uses secure, encrypted connections. Your devices are authenticated through your Star4Live account, so you don’t need to open ports or expose your network to the internet.
What if my camera or NVR doesn’t appear online?
If your device shows offline in Star4Live, check that the P2P/Cloud setting is enabled on the device, confirm the network cable or WiFi connection is active, and verify DNS and gateway settings. Power cycle the device and router if needed, then wait 2–3 minutes for it to re-register to the cloud.


![[+] Click to view in full resolution](https://cdn01.capitolcam.net/cms/wp-content/uploads/10631-star4live-access-icon.webp)