How to Enable Multicast Streaming on Avalonix Premium IP Security Cameras

Multicast technology, especially when it comes to video, is beneficial for reducing network usage and processing overhead on a network camera. By default, Avalonix Premium Series PoE security cameras have multicast over TCP/IP enabled. However, you may want to disable, make adjustments, or simply not understand how to view or use the stream. There’s also another way to stream a multicast video feed over a local network using a protocol called UDP. UDP multicast is not on by default, but it’s fairly simple to enable it and access the UDP stream over a local computer network. In this video tutorial, we demonstrate how to modify the TCP/IP stream using the camera's web interface, as well as how to create and send URLs in a web browser that are required to start UDP streaming. Continue reading this article for written instructions below the video.
Table of Contents
- Software Requirements
- Video Tutorial
- TCP/IP Multicast Setup
- TCP/IP Multicast Viewing
- UDP Multicast Setup
- UDP Multicast Viewing
Software Requirements
Have a web browser, text editor, and video media player installed and open to follow the tutorial. Below is a list of examples you can use.
Web Browser: Microsoft Edge, Google Chrome, Mozilla Firefox
Text Editor software: Windows Notepad, Notepad++
Video Software: VLC Media Player, PotPlayer, OBS Studio
Video Tutorial

TCP/IP Multicast Setup
Without changing any settings, your camera will have TCP/IP multicast enabled and streaming when you connect it to your computer network. However, you can change the multicast address or disable the stream through the camera's web interface.
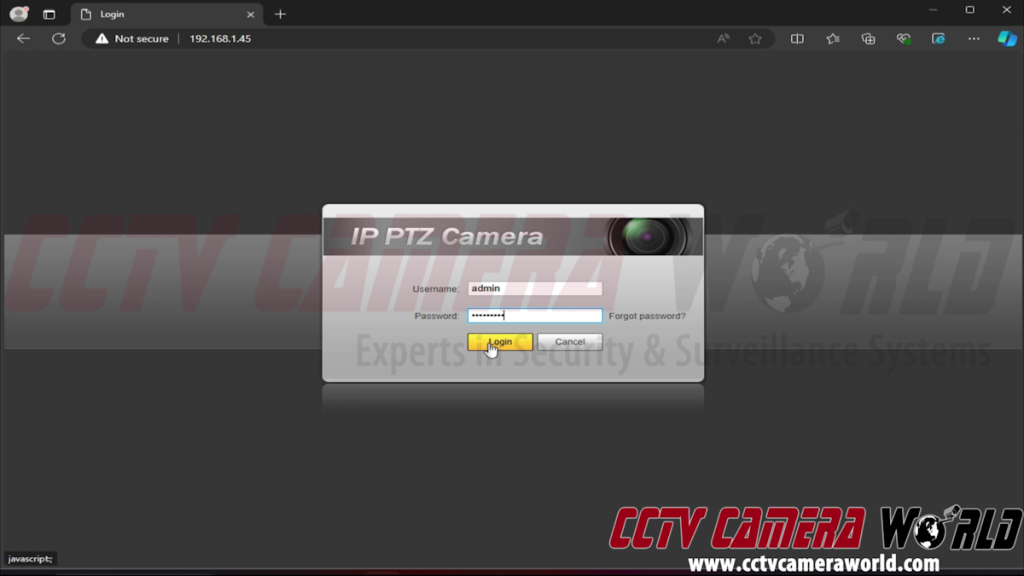
- Navigate to the camera's web interface by typing its current LAN IP address into a web browser and pressing Enter. If you’re unsure what the IP address is, use the ConfigTool software available for download in our How to Find Your IP Camera on the Network guide.
- Log in to the admin account using the password on the camera’s box label or the one you set.
- Use the Settings tab at the top right of the web interface.
- In the Settings page, click the Network menu at the left-hand side.
- In the Network menu, click the Multicast submenu option.
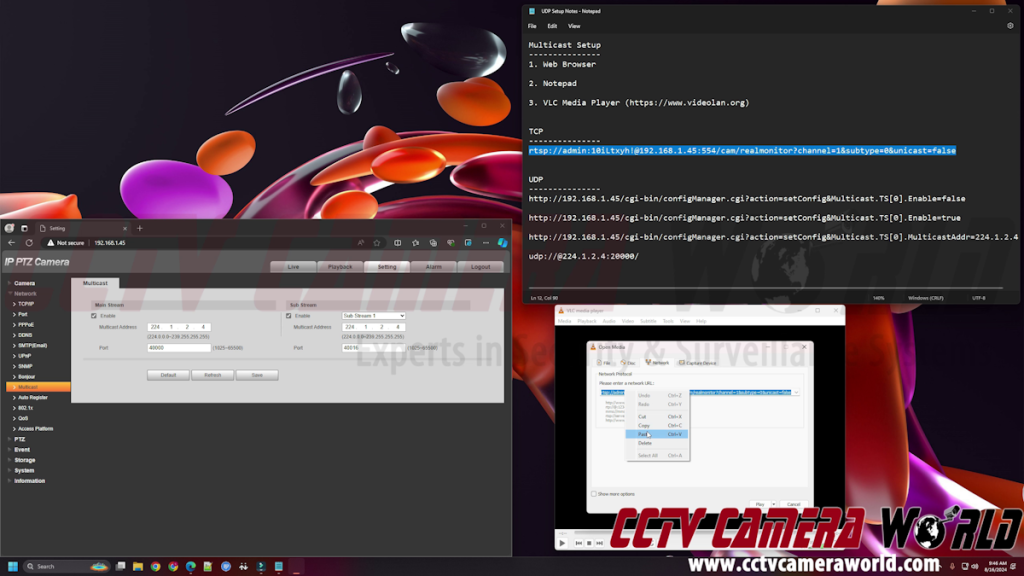
- The Main Stream and Sub Stream should already have the Multicast stream setting enabled by default. To save bandwidth, feel free to disable it by unchecking the Enable boxes and clicking Save if you intend to use the UDP method instead.
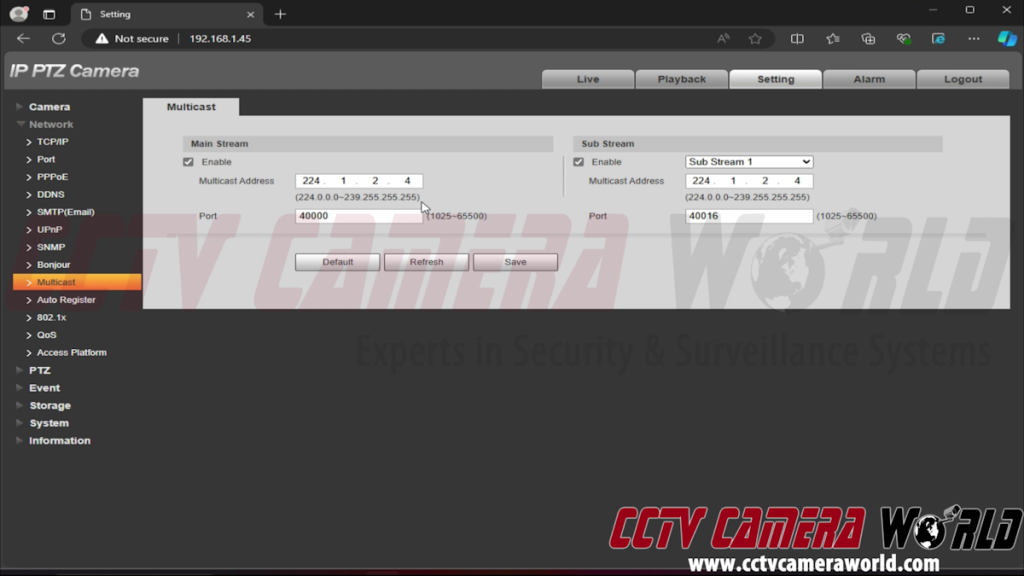
Here you can also modify the Multicast Address and Port text boxes if there is a conflict with an existing multicast stream or the default port is already in use in your network.
TCP/IP Multicast Viewing
Viewing the stream is fairly straightforward using a video file player such as VLC or PotPlayer. It works using an RTSP stream, which we also show how to create in our What is RTSP? article.
- Without going into specifics, you can use the following example RTSP stream to create your own text editor software, such as the built-in Windows Notepad or Notepad++:
RTSP URL:
rtsp://[username]:[password]@[LAN IP address]:554/cam/realmonitor?channel=1&subtype=0&unicast=false -
Replace the username, password, and LAN IP address with the information for your camera.
The most important part of the RTSP URL is the
unicast=falseoption at the end. This tells the streaming software to extract the multicast stream from the multicast address. - Open the video player software; in our example, we use the ubiquitous VLC Media Player.
- To copy the RTSP stream URL, highlight it and press Ctrl+C on your keyboard, or right-click and click Copy.
- In VLC, press Ctrl+V, or use the Media menu and Open Network Stream option at the top right.
- Most video player software should allow you to automatically paste the network stream.
- Click the Play button to start streaming. If the stream fails to start, make sure that the web interface has multicast enabled, that no firewall is blocking multicast traffic on your network, and that there are no errors in the RTSP URL.


UDP Multicast Setup
The web interface cannot configure UDP; instead, you must create and use a few URLs to transmit commands to the camera.
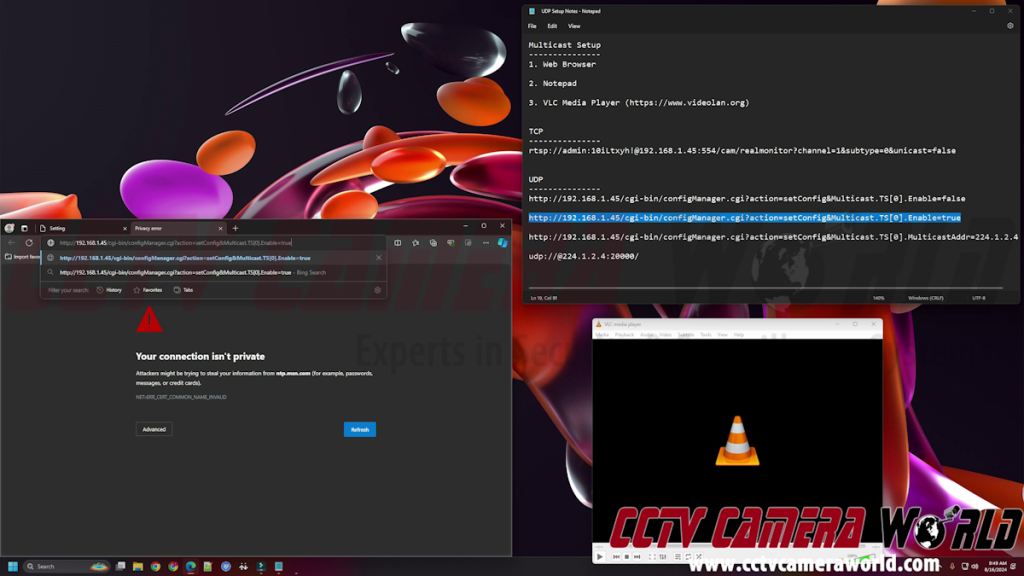
- To turn UDP multicast streaming on, you can use the following template URL:
URL:
http://[LAN IP address]/cgi-bin/configManager.cgi?action=setConfig&Multicast.TS[0].Enable=trueReplace
[LAN IP address]with the current IP address of the camera in your local network. - Copy and paste the URL you create into a web browser and hit Enter.
- Your browser will prompt you to enter the username and password for the camera. The prompt is usually located in the top-center of your browser. To let your browser login to the camera and send the command, enter the username and password.
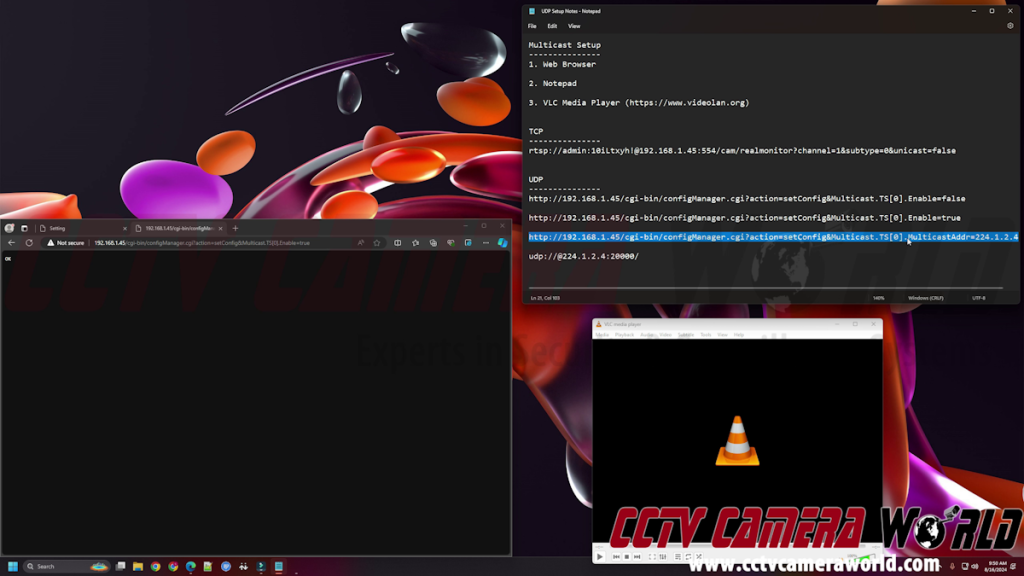
- You should receive an “OK” message on a blank webpage. This means that the camera received the command, and UDP multicast is now enabled.
- If you receive an error or some other message, double-check the cgi-bin URL that you created above. Feel free to try again by copying the template and inserting your camera’s current local IP address. Ensure that you enter the correct admin username and password when prompted.
- Optional: You can set the multicast address that you want to use with the following URL template:
- URL:
http://[LAN IP address]/cgi-bin/configManager.cgi?action=setConfig&Multicast.TS[0].MulticastAddr=[Multicast Address] -
To disable the UDP multicast stream when you no longer need it, use the following URL template:
URL:
http://[LAN IP address]/cgi-bin/configManager.cgi?action=setConfig&Multicast.TS[0].Enable=false

UDP Multicast Viewing
Viewing the UDP stream is also extremely simple with the VLC or PotPlayer mentioned in the RTSP section. However, instead of utilizing RTSP technology, you can view the raw UDP MPEG stream from the network.
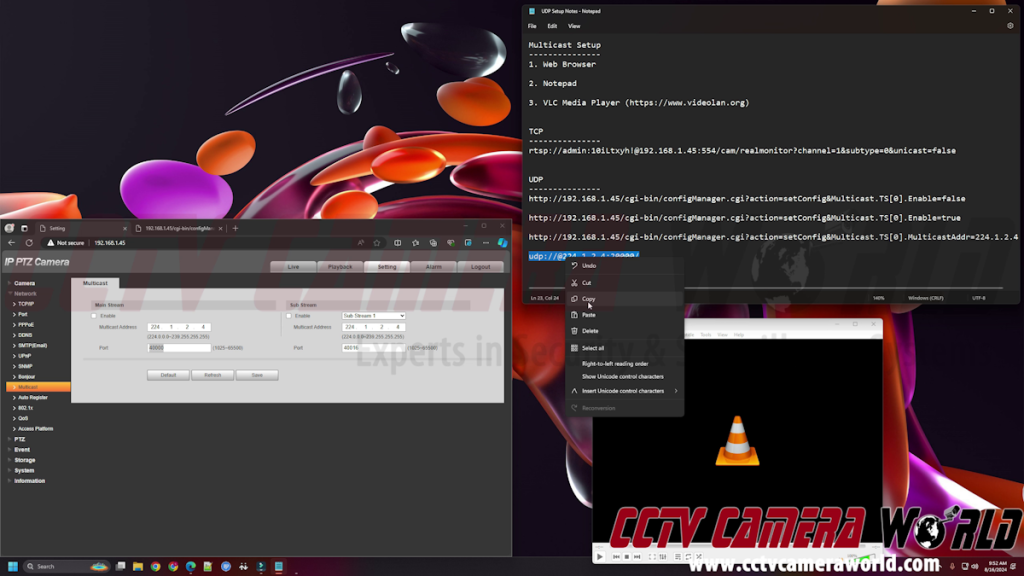
- Without diving into specifics, you can use the following UDP URL and create your own in a text editor like Windows Notepad or Notepad++:
URL:
udp://@224.1.2.4:20000/Note that the default port for the UDP stream is 20000. If you changed the address, use the address you set using the optional command from the section above.
It’s worth mentioning that the UDP stream is unsecured and thus does not require a username or password to access.
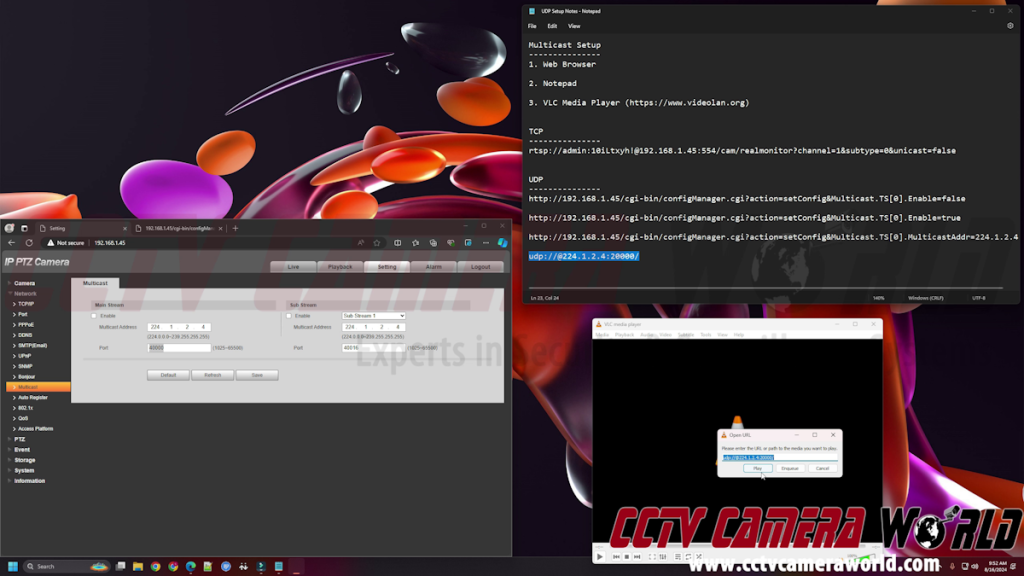
- Open the video player software; in the video tutorial, we use VLC Media Player.
- Copy the UDP stream URL by highlighting it and pressing Ctrl+C on your keyboard, or right-click and click Copy.
- Press Ctrl+V in VLC, or use the Media menu at the top left and Open Network Stream option.
Most video player software should allow you to automatically paste the network stream.
- Click the Play button to start streaming. If the stream doesn't start, ensure that the command returned an "OK" message in your web browser, that your network does not have a firewall blocking multicast traffic, and that you have no errors in the UDP URL.