
Stream directly to Youtube or Twitch without needing a PC
Stream video in resolutions up to 4K directly to your favorite streaming platform without needing a PC, and without any monthly fees.
Browse Live Streaming Cameras
One of the biggest advantages of choosing a LiveCam from CCTV Camera World is how simple it is to embed your live stream directly on your website. With support for popular streaming platforms like Twitch and YouTube Live, you can offer a seamless viewing experience to your audience without the hassle of recurring fees. Plus, if you get stuck, we provide free tech support with quick response times during business hours.
Embedding means placing a live video feed on a page of your website so visitors can view it without having to go to another website. This not only makes your stream easier to access, but it also keeps visitors engaged with your brand instead of sending them off to another platform. This makes it easier to share your stream and more traffic on your website that promotes your brand as well. No more explaining how to find your stream on YouTube or Twitch and hoping they find it!
In fact, when viewers leave your site to find your live stream, they may get distracted or end up watching someone else — including a competitor. Embedding helps you avoid that risk and gives your stream a more polished, professional appearance.

Stream directly to Youtube or Twitch without needing a PC
Stream video in resolutions up to 4K directly to your favorite streaming platform without needing a PC, and without any monthly fees.
Browse Live Streaming CamerasLive streams embedded on your homepage or landing page are ideal for:
Want to see what’s possible? Browse our full selection of LiveCam models and use the helpful guides below to get started — no subscription required.
While IP security cameras and PoE cameras can provide a live video feed, making that stream accessible over the internet isn’t simple. You usually need to set up complex port forwarding to let people view the camera’s built-in webpage — and that opens the door to serious security risks. On top of that, every person who watches the stream connects directly to your camera, using up bandwidth and potentially overloading your internet connection. If you're trying to avoid getting hacked and still want a smooth experience for multiple viewers, the setup quickly becomes complicated and unreliable.
This is where platforms like YouTube Live and Twitch come in. When you stream your camera to one of these services, the camera only needs to send a single video stream to the internet. Twitch or YouTube then takes care of rebroadcasting your stream to any number of viewers without bogging your internet down.
Not only does this solve bandwidth issues, but it’s also more secure. These platforms securely host your stream behind your user account, eliminating the security risk of exposing your camera directly to the internet. These platforms also have built-in protections and security protocols that help keep your content safe.
So, once your stream is set up, embedding it on your website gives you:
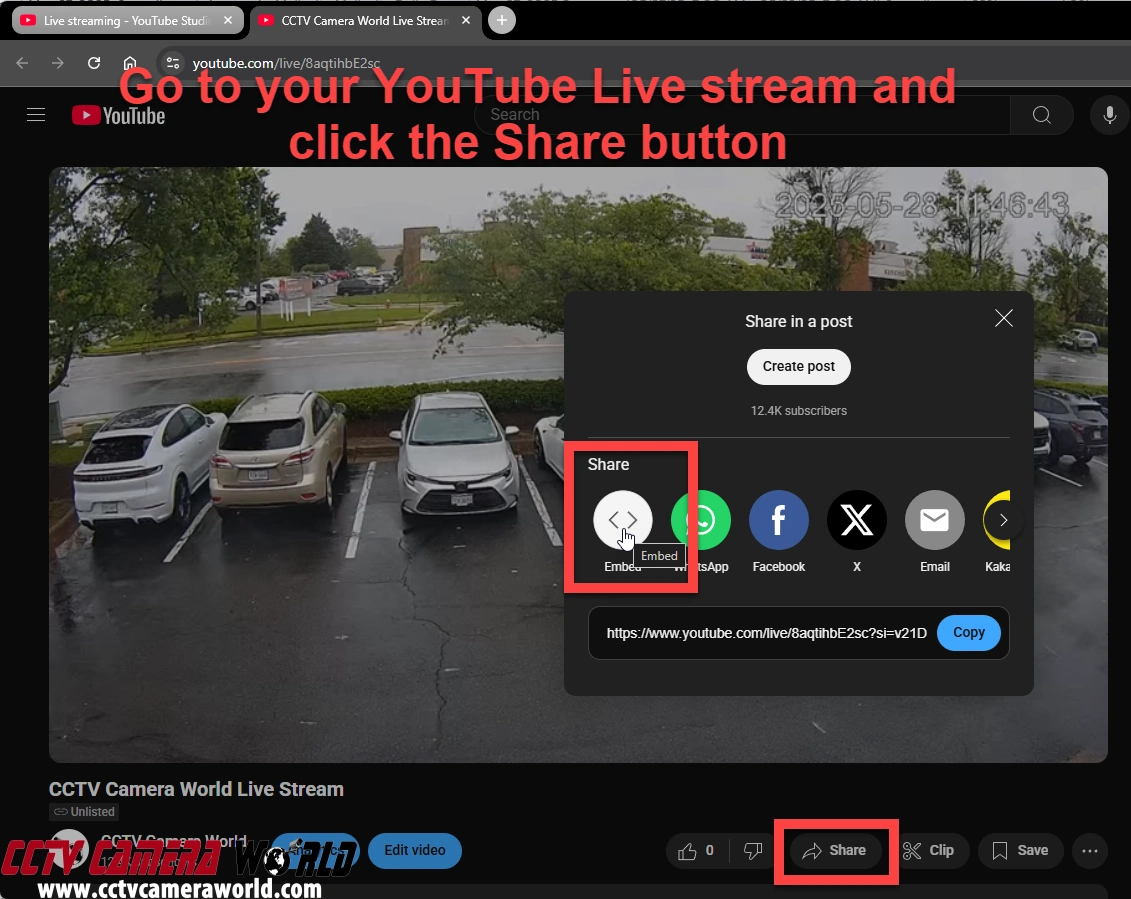
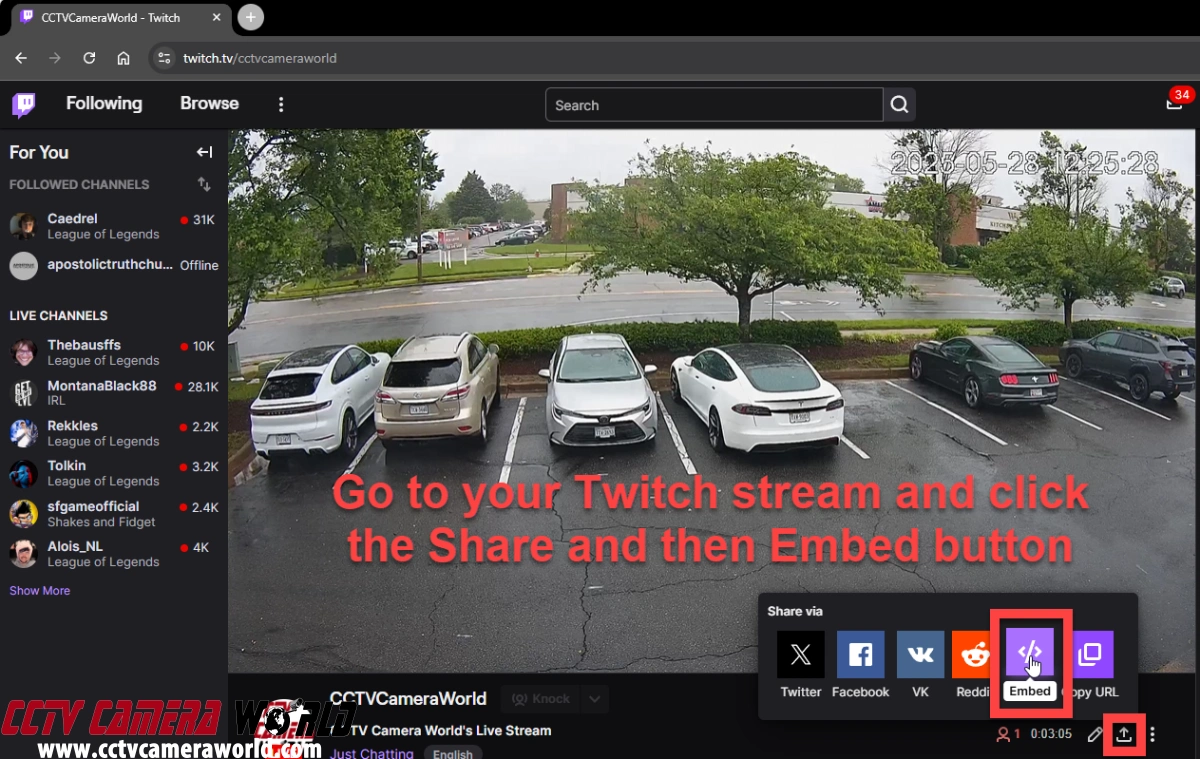
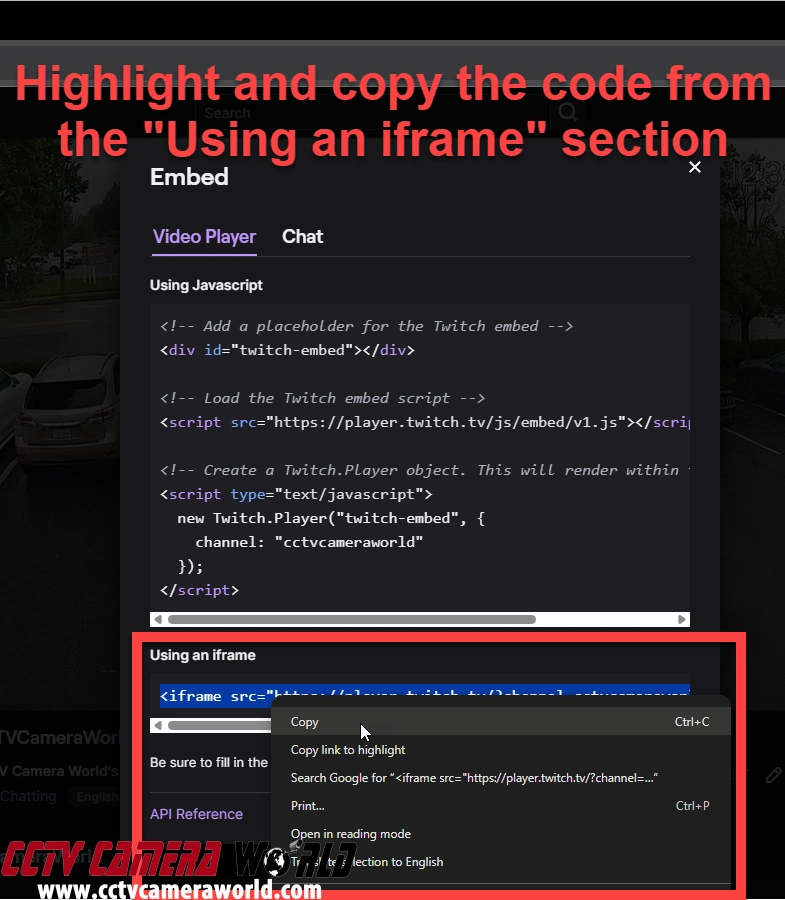
Before you can embed your stream on your website, you’ll need to get the embed code from the livestream platform you’re using. Both YouTube Live and Twitch make this process fairly straightforward.
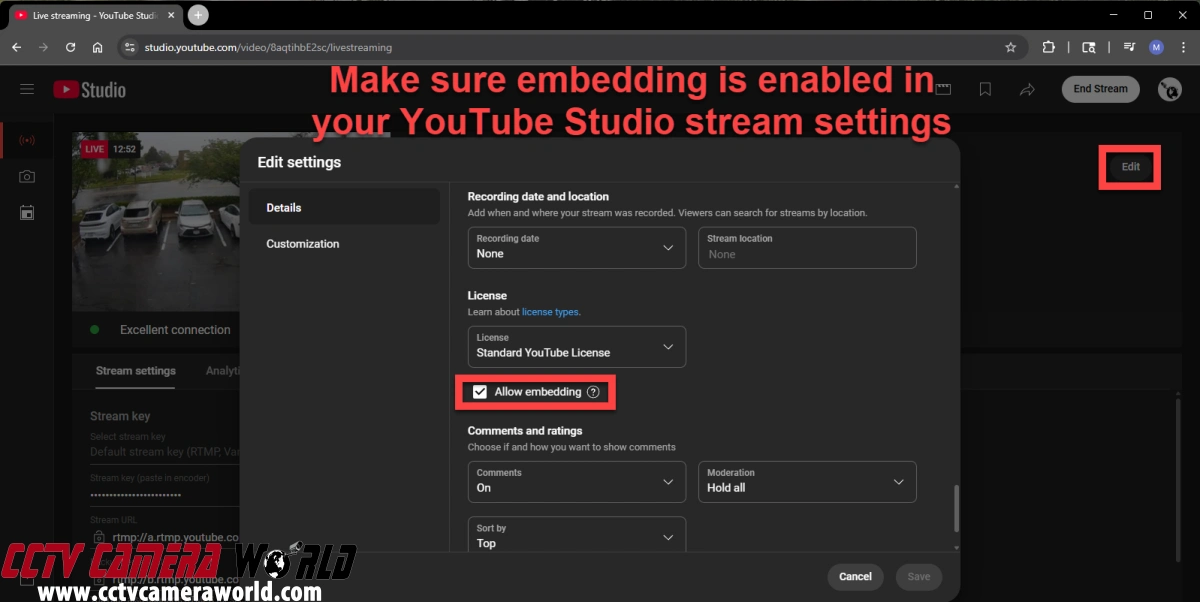
First, confirm that embedding is allowed for your stream. It’s usually enabled by default, but it’s a sensible idea to double-check.
Note: Private streams cannot be embedded. Your stream must be Public or Unlisted.

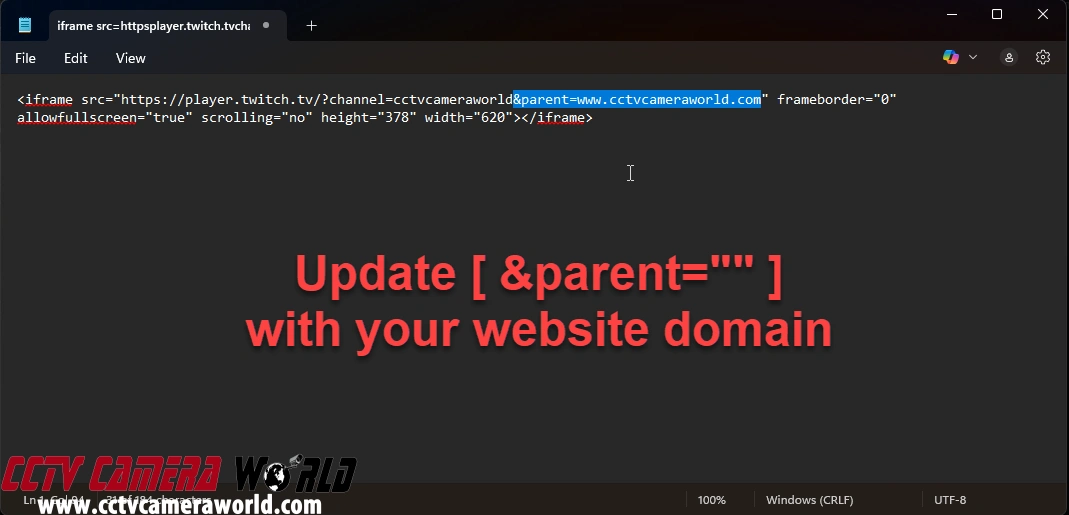
&parent=www.example.com. Replace www.example.com with your website.
For example: &parent=www.cctvcameraworld.com
Twitch needs this final step to determine which domains it has permission to send your stream to.
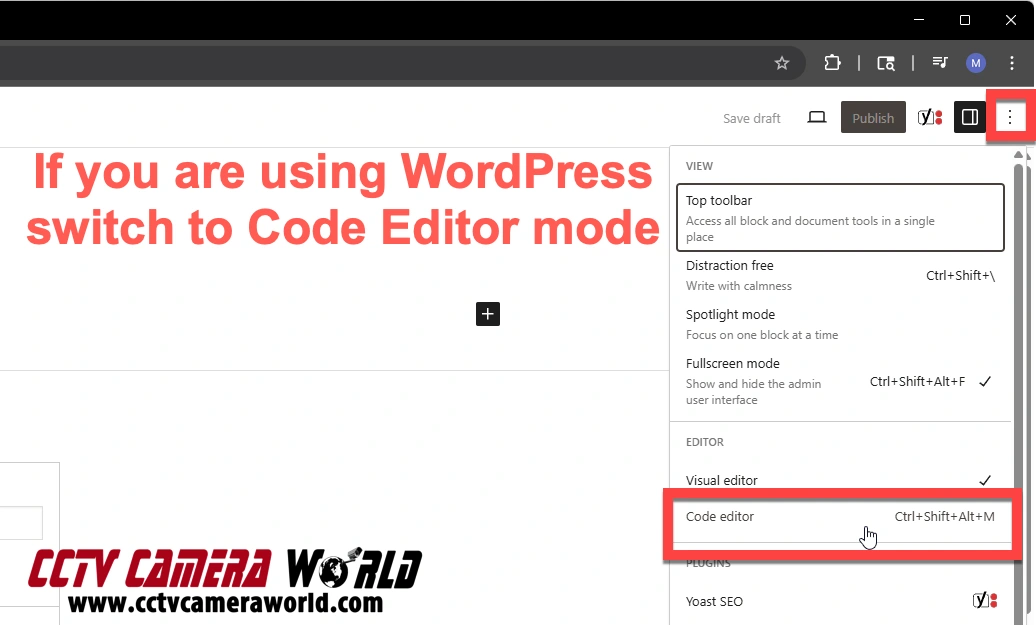
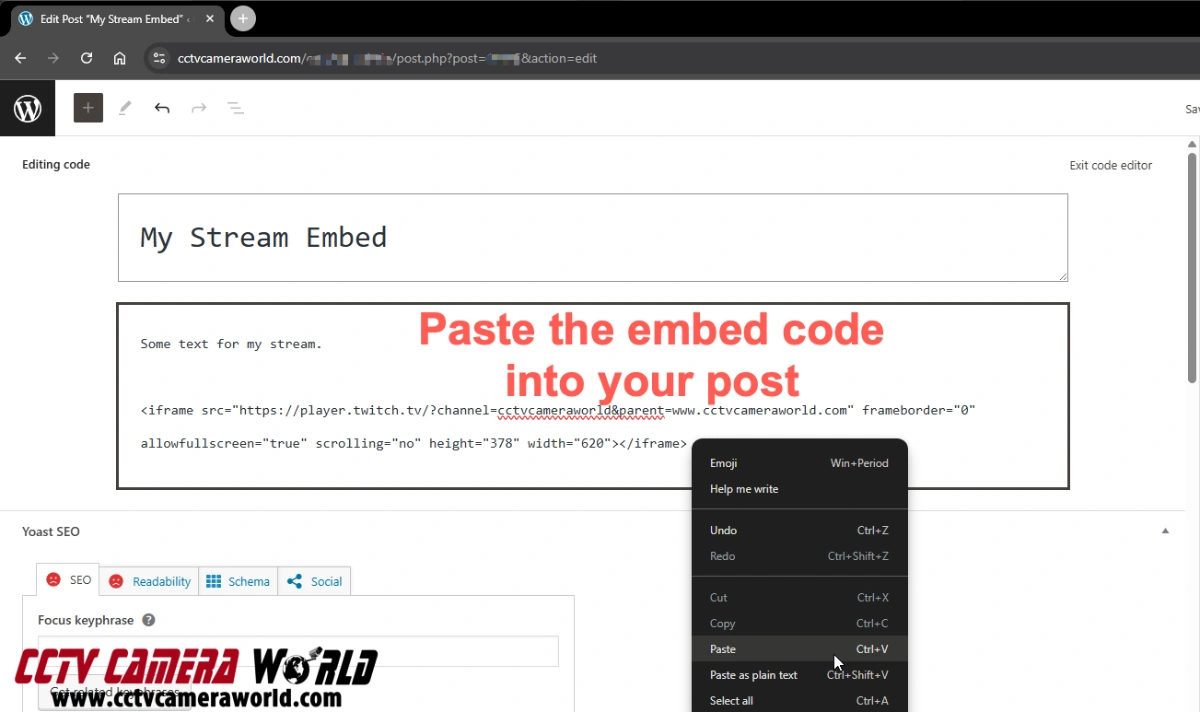
In this example, we’ll show you how to embed your stream in a WordPress post, but the process is similar for most content management systems (CMS). If your site doesn’t use a CMS, you can paste the embed code directly into the HTML of your webpage where you want the stream to appear.
For this walkthrough, we’ll create a new post, but you can also add the embed to an existing post or page if you already have a suitable spot for it.

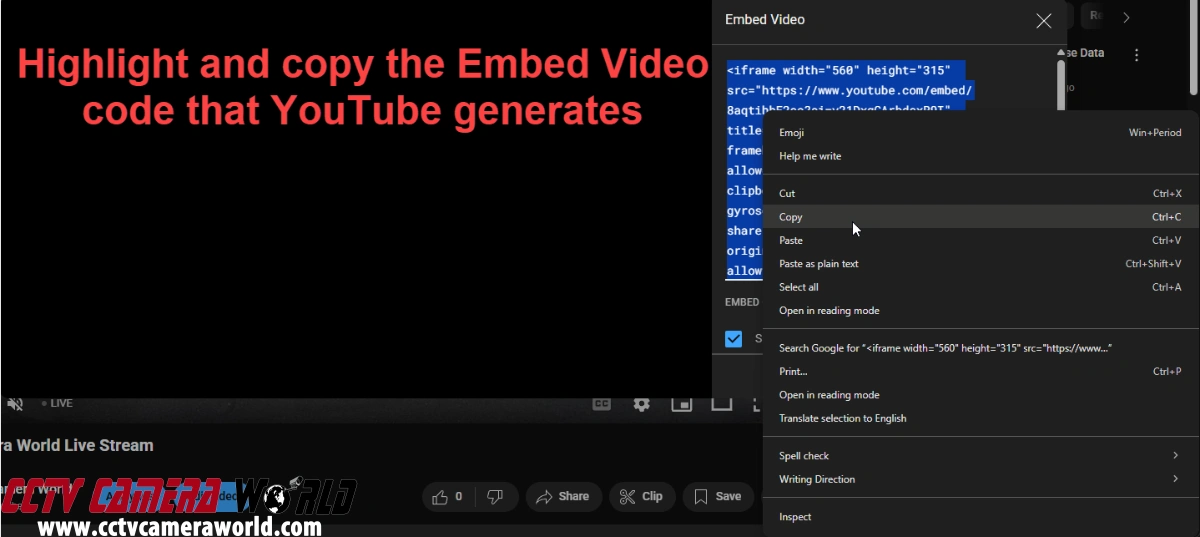
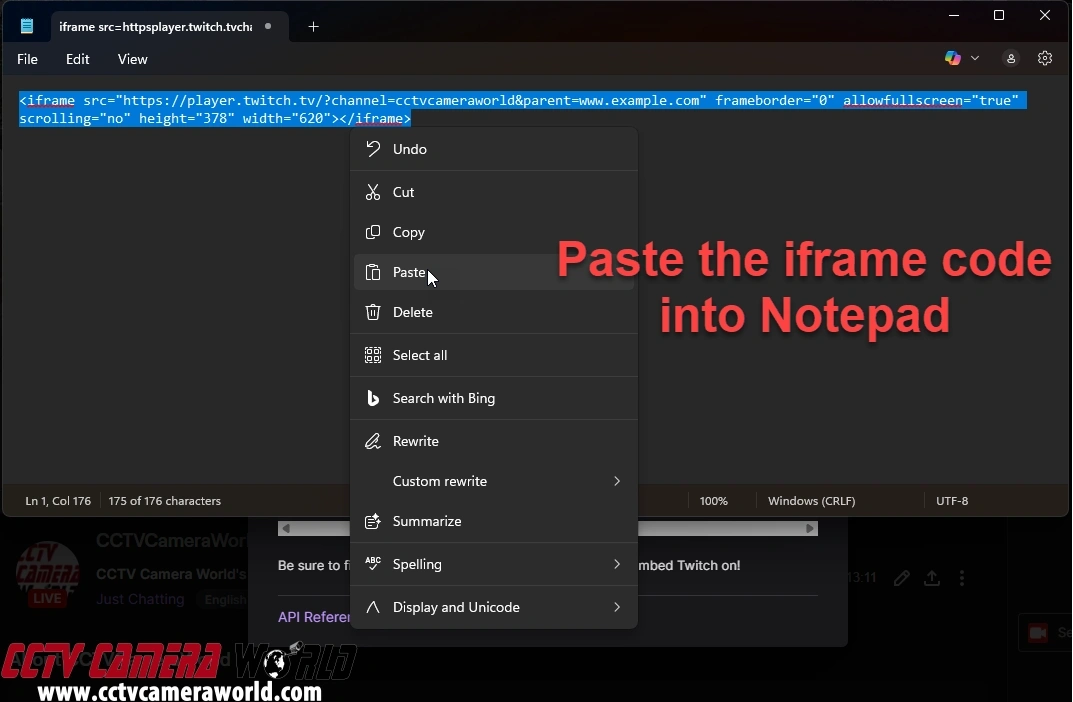
<iframe> embed code, right-click, and choose Copy.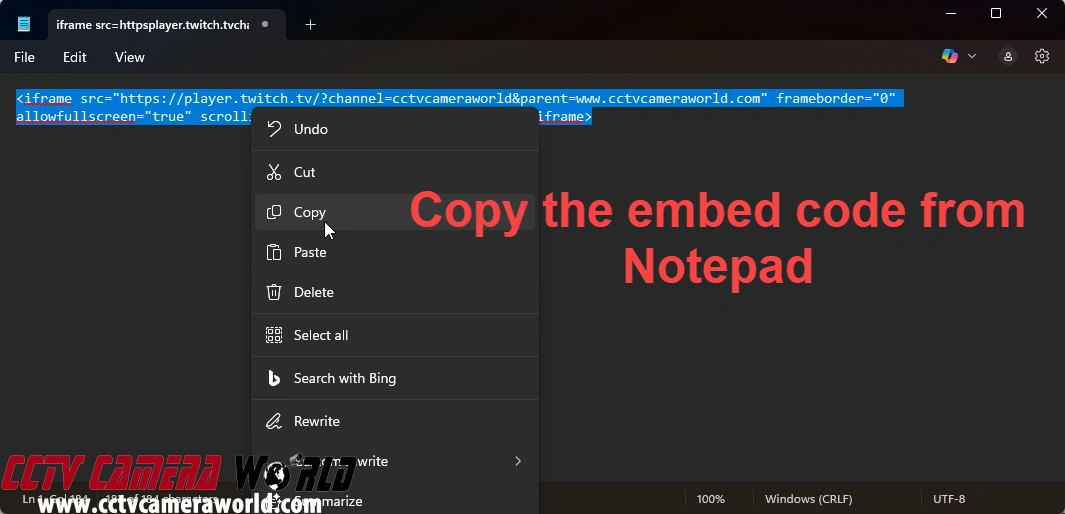
Tip: You can preview the post as a draft before publishing to make sure the stream looks correct and is loading properly.
Now that your stream is on your site, you may want to customize its appearance and ensure it runs smoothly.
This section covers simple ways to adjust the size and layout of your stream, make sure it works well on mobile devices, and avoid common mistakes that could prevent it from loading properly.
Whether you're using WordPress or editing your site manually, following these tips will help your embedded stream look excellent and function reliably.
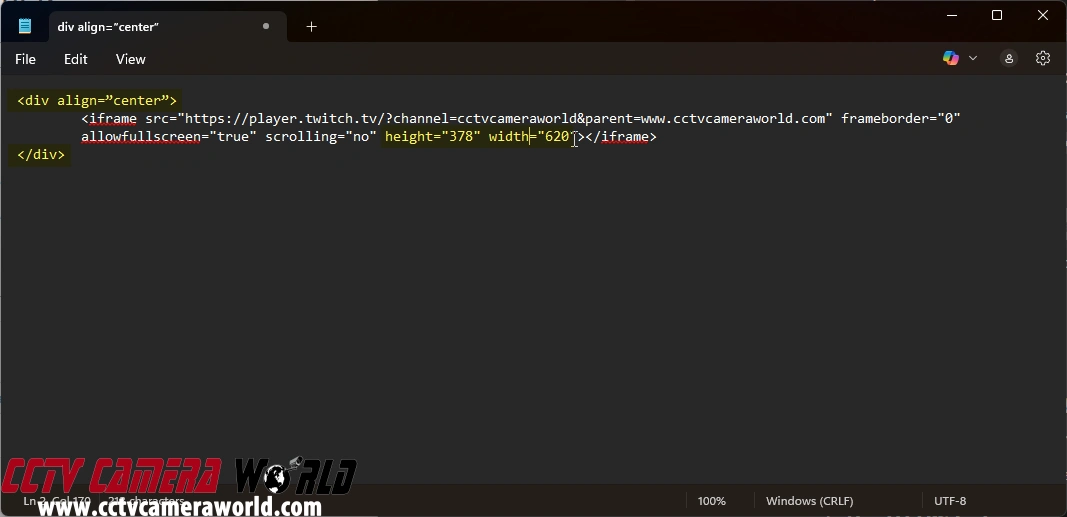
To control how your embedded stream appears on the page, consider these tips:
			<div style="text-align:center;">
				<!-- your iframe embed code here -->
			</div>
Adding some text around your embedded stream can help with visitor clarity and search engine optimization.
<h2>Our Office Livestream</h2>
<p>If the video does not load, please refresh the page.</p>

To help you visualize how a properly embedded stream should look, here’s a screenshot of a real example taken from our Live Streaming Example page. This stream is embedded directly into the webpage using the same steps outlined above and comes from one of our customers who allowed us to feature it.

Use this as a reference to compare. If your embed doesn’t appear similar or isn’t loading, revisit the previous steps or review the best practices we covered.