Hikvision IP cameras are very popular in the security camera industry. You may already own a Hikvision system or cameras. One of the recurring complaints we hear about Hikvision equipment is that it can be difficult to use. For your everyday home consumer complicated equipment can be time consuming, and just not worth it. Even installers have difficulties getting Hikvision systems to work exactly how they want. The good news is Hikvision’s cameras can connect and record to an Avalonix NVR.
Some notable OEM Hikvision brands include: LaView, LTS, and more. OEM means the cameras and NVR are relabeled and sold under a different brand. However, it does not mean OEM systems are any easier to use. If you are unhappy with your Hikvision NVR, but want to keep your cameras and are looking for a professional and easy to use system then you found the right place.
Step 1. Prepare your Hikvision Camera to be added
You will need to set your IP camera up to be added via the ONVIF protocol.You will need to access the web interface of the camera. This may vary depending on the firmware version on your cameras, but the process should be relatively the same. If the options look different, try looking for similar settings.
A. Configure the cameras to be accessible from your network
Using Hikvision’s Batch Configuration or SADP tool you will need to change the IP address on your IP camera. You will need to set the IP address to the same network as your router so you can access the cameras web interface from your computer. Keep in mind each camera needs a unique IP address on the same network.
If you’re unsure how to change the IP address, or need to download software tools for your cameras we recommend contacting Hikvision or the OEM camera vendor you purchased from.
B. Enable ONVIF protocol and add an ONVIF user
After you are able to access your camera's web interface you will need to enable the ONVIF protocol inside the camera. ONVIF allows our NVRs to add and connect to the Hikvision cameras and start recording video.
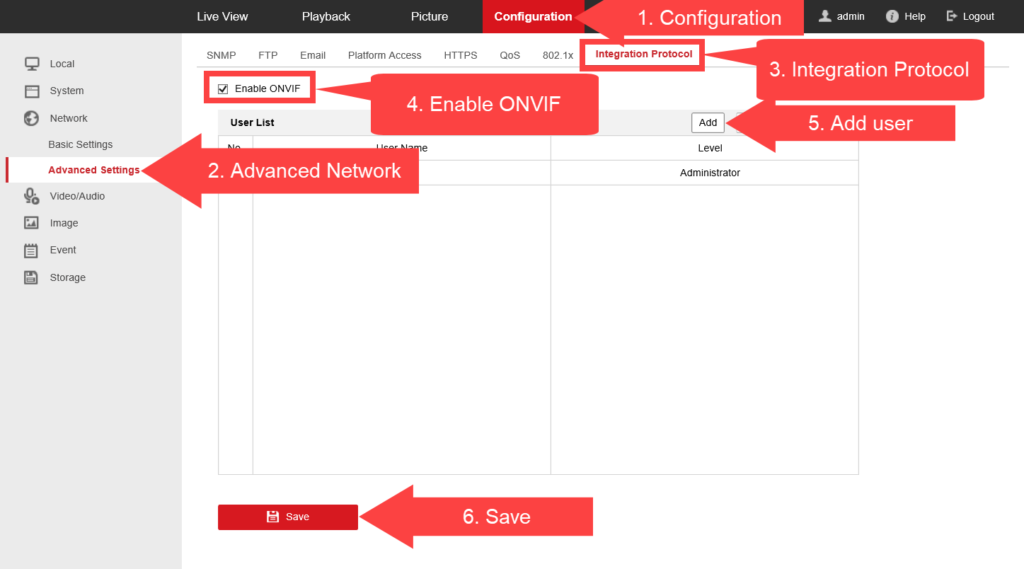
The ONVIF option is usually found in the Configuration page under the Network subsection and finally Advanced Settings (items 1 and 2 in the image above)
The advanced settings page will have multiple tabs. The ONVIF settings are found in the Integration Protocol tab (item 3 in the image above).
Check the “Enable ONVIF” box (item 4 in the image above).
You also need to create an ONVIF user. To create an ONVIF user simply click the Add button (item 5 in the image above). Create a username and password you will remember. This is the username and password that you will need to enter for connecting to the camera from the NVR. For the best compatibility we recommend making the ONVIF user at the Administrator level.
Click Save at the bottom of the options to save the changes.
Step 2. Add the Hikvision Camera to an Avalonix NVR
After your cameras are configured to have an ONVIF user and the ONVIF protocol is enabled you can now move on to adding them to the Avalonix NVR. In our guide we cover using the web interface to manually add the camera. However, you can also manually add these cameras in front of the NVR using the Camera registration screen.
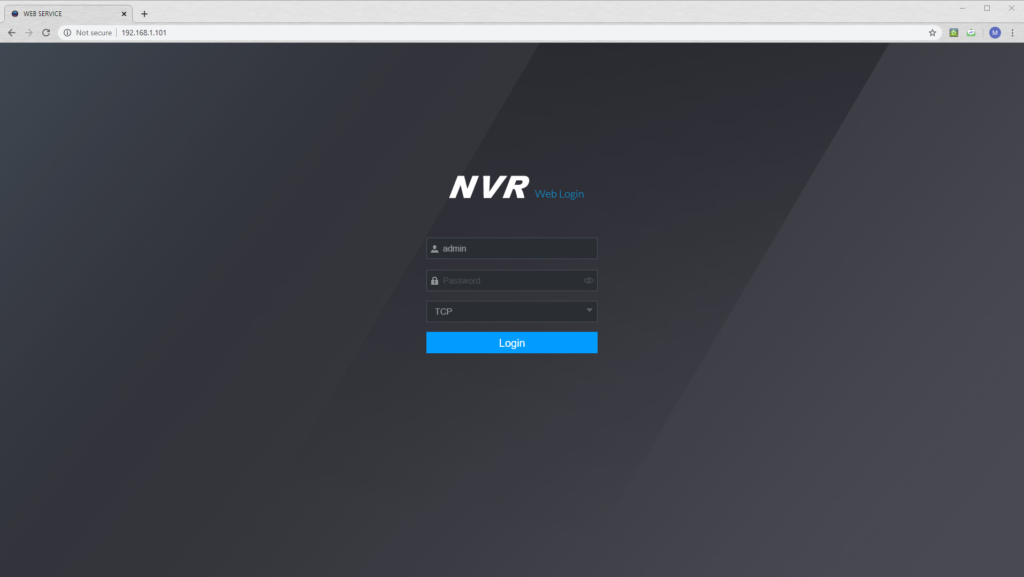
A. Access the web interface of the NVR
You will need to access the web interface of the NVR. You will need to type the IP address set on your NVR in the address bar of a web browser like Edge, or Chrome. Our NVRs ship with a default IP address - 192.168.1.108.
You will be required to login with the username and password that is set on your NVR. If you have not changed the username and password from default, you can find the password label located on the top of the Avalonix NVR.
B. Navigate to the Camera Registration screen and click Manual Add
When you first login to your NVR you will see a lot of options. You will want to navigate to the Camera Registration screen. On our NVR this is done by clicking Management at the top left and choosing the top option Camera.
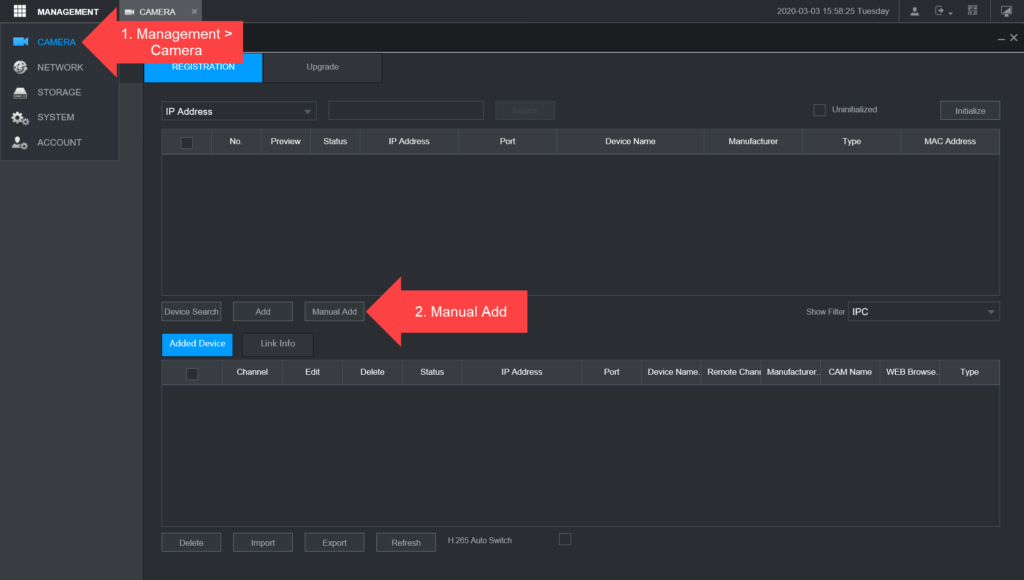
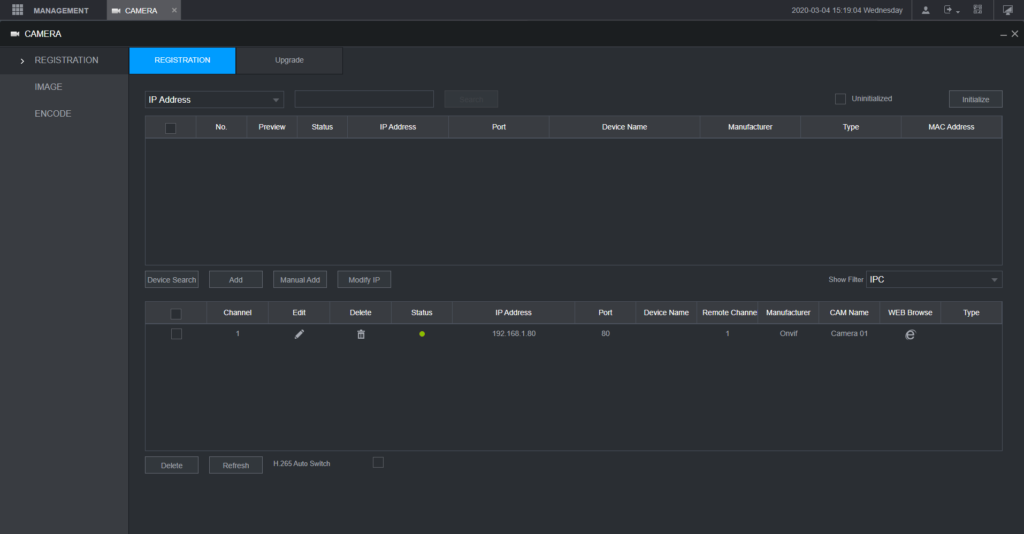
After you’re in the Camera Registration screen you will see the linked devices. If your NVR has no cameras added, or connected then you see a blank screen like in our example.
To add an ONVIF camera click the Manual Add button to bring up a Manual Add menu.
C. Manually Add the Hikvision IP camera
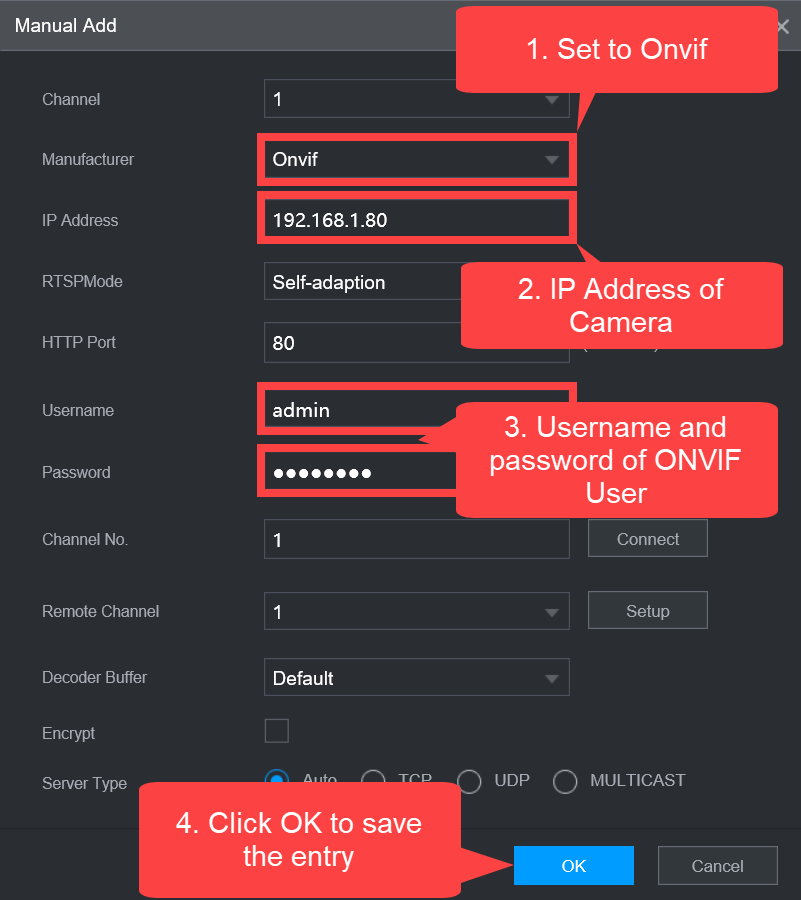
Finally you are ready to manually add the information for your Hikvision cameras. You will need to create a manual entry for each camera you want to add to the NVR.
When adding the cameras you will first want to change the Manufacturer from Private to ONVIF. This will tell the NVR to look at the IP address for an ONVIF device.
Then you will need to enter the IP address you set on your camera earlier. This will need to be repeated for each camera you have setup on the network.
To finish your Manual Add entry, type in the username and password for the ONVIF user you created on the camera. Click OK to save the entry.
As long as you’ve typed everything in correctly and the camera has been configured properly you should receive a green status and the device entry might fill in the Hikvision model number or camera name. You should give it up to a minute or two before it finishes connecting.
Troubleshooting
- If you don’t receive a green status after some time you will want to review the Hikvision camera's settings to ensure the ONVIF protocol is enabled and the ONVIF user is created.
- Try restarting the NVR and camera if you’ve verified all of the information is correct.
- You want to make sure the NVR and camera are on the same network and can communicate.
Please note not all Hikvision cameras will connect to an Avalonix NVR using the ONVIF protocol so your mileage may vary.