
To access your DVR security system through either the computer or your phone, you must first go through a process known as port forwarding. Port forwarding with your router is a process of making "port rules" within your router that point internet traffic to your DVR. This enables your security system to be viewable from offsite. Through this guide we will demonstrate the port forwarding process with the very popular Verizon Fios router.
To begin port forwarding you will need to know several crucial pieces of information about your home network. You will need to know several things such as the Default gateway of your network (router's IP address) as well as the login credentials for your router. You will also need to know your DVR's IP address, and the port numbers assigned to your DVR for the HTTP port and TCP port. All this information is easily found, mostly through your DVR's Networking section. If you are unsure of how to find this information, we have written a very simple and easy to follow guide here:
https://www.cctvcameraworld.com/port-forwarding-for-dvr-and-nvr/#dvrip
Our DVR's are normally shipped with the following defaults. For IP address it is normally 192.168.1.108. HTTP and TCP are normally 80 and 37777 respectively. If there are no conflicts on your network with these port numbers then they will be fine to use. Sometimes, there is another service on your network that is using these pot numbers. You can then change the port numbers to something else that isn't being used as long as you change the corresponding port in your DVR's networking section to match. You also must make sure that your DVR's IP address reflects the network it is on. To illustrate, if your default gateway is 192.168.0.1, then you must change the DVR's IP address to match, 192.168.0.108.
Step 1) Access the router
The first thing to do after finding your network information is to access your router through your internet browser browser address bar. You type in the default gateway of your network to access it.
![]()
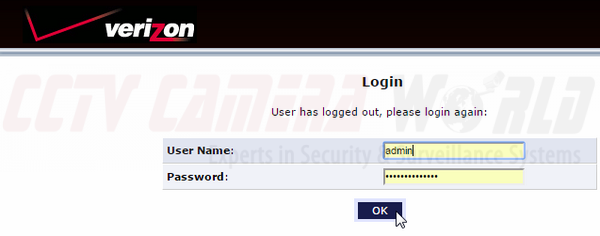
Immediately you will be prompted for the login credentials. If you do not know your login information you can either look up the manufacturer defaults online, or call your internet service provider for help with these credentials.
Step 2) Find the port forwarding section
From here, you will need to find appropriate section within your router in which to enter the port rules. First at the top of the page there will be several tabs to select. The appropriate section we are concerned with is the "Firewall" section. Click this to continue.

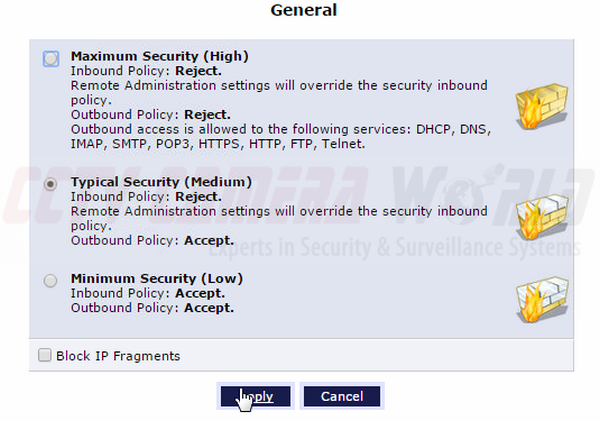
The page that should be immediately brought up from here is a section relating to the security level of your router. Make sure this is set to "medium." If you have it set to "high" this will deter all incoming traffic and you will not be able to access your DVR remotely even if you have the port rules configured correctly.
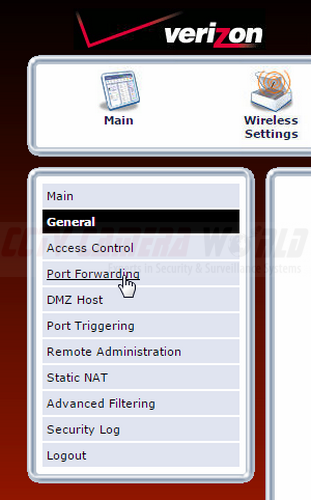
On the left tab you then must select "port forwarding" to go to the appropriate section. Here you will see several sections that you need to fill out to enable your port rules.
Step 3) Create the port rules
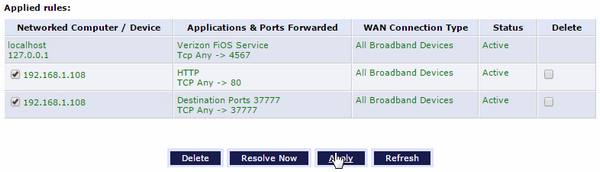
In the first section, you must find and select the IP address of the DVR to show that you want the following port rule applied to that device. As long as your DVR is connected to your router via a network cable you should be able to find the IP address. In the next section, you are choosing what type of port rule you are creating. For the HTTP port, all you need to do is select "HTTP" in the drop down menu and this will auto fill the appropriate port number. Click "Add" and your port rule will be completed. As a note, if you are using a different port number than the standard "80" for your HTTP port, then follow the next set of instructions to create a custom port rule.
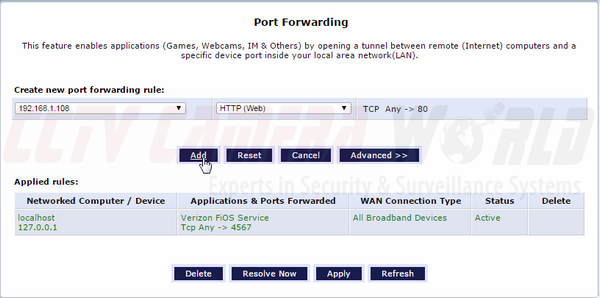
Now, assuming that you created your rule for the HTTP port, the only thing left to do from here will be to create a port rule for your TCP port. The default port number for this is 37777. Again, in the first section, select the IP address of your DVR from the drop down menu. Then in the next section, select "custom ports." This will alter the menu to allow for custom port data. You will select "TCP" from the next drop down menu and then type the port number "37777" or whatever port number you have decided to use. Click "add" to finalize this port rule.

Step 4) Checking the status of your ports
Now as long as your rules have been added successfully, you should be ready to connect with your DVR remotely. Sometimes there are complications in your router because of your service provider blocking certain ports or any number of things. The best way to test and make sure that your ports have been added properly and are open for traffic is to perform a port scan on your network.
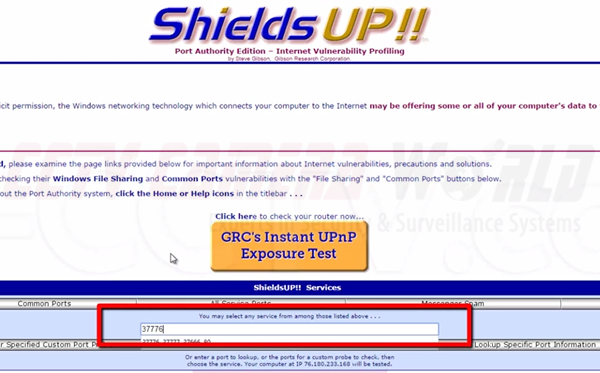
To do this, we suggest using the very good GRC scan.
https://www.grc.com/x/ne.dll?bh0bkyd2
Click Proceed on the home page to continue. When the page loads, you will then type the two port numbers in the input bar separated by a comma such as "80, 37777." You then click "user specified custom port probe" to initiate the port scan.
On the next page, look only at the status next to each port number and ignore whether the scan "passed" or "failed." If the ports say "open" then the rules have taken effect properly and are ready for traffic. If both are open then you are done.
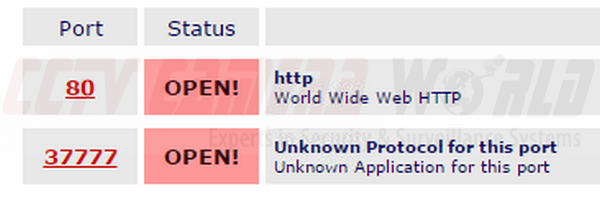
If the port numbers say "closed" then your rules were not created properly and you perhaps did something inappropriately. You will have to go back and determine what has gone wrong. If the ports say "Stealth" then this points to an issue with your internet provider. They commonly block certain ports and you will have to contact them to determine why they are blocked and ask them to unblock these ports.
If everything was done properly, you should be ready to access your DVR through the internet. If you need help on accessing your DVR through the internet, we suggest this guide located here:
https://www.cctvcameraworld.com/port-forwarding-router/#howtoaccessdvr