

DDNS Setup using NO-IP and your Computer

So you’re having trouble viewing your surveillance system remotely, and you’ve already read our articles on forwarding your ports. Unless you pay your internet service provider for a static IP address you will need to set up Dynamic DNS (DDNS) in order to access your home network remotely. This article will explain what is DDNS, how to get free DDNS service, and configure it on you security cameras and DVR recorders purchased from CCTV Camera World.
What is DNS
Every site you access on the web has an IP address, but generally you don’t enter the IP address to go to a site. Instead you enter a hostname such as www.cctvcameraworld.com. When you enter the hostname in your web browser it gets sent to DNS servers in the internet to find a matching IP address for that hostname. You are then routed to that matching IP address to view the webpage.
So DNS converts your hostname entry to a unique IP address. How does that relate to Dynamic DNS (DDNS)? Dynamic DNS is a way of updating a DNS name server with your changing IP address assigned to you by your internet service provider (ISP). Unless you subscribe to a static ip address with your internet service, your ISP uses DHCP to assign addresses to its customers. Eventually the lease on that address runs out. Sometimes you may get the same address again, other times it may change. When your external IP address does change, the DDNS service will update the record of your hostname to correspond to the new IP address.
Why Use DDNS?
In order to have a consistent way of remotely accessing your DVR/NVR to view your surveillance feed remotely, you need to have a constant pointer to your home/office network. Configuring DDNS is an efficient way to ensure that you can reach your device through the cloud. With this configuration you won’t have to worry about your property while you’re away.
How to set up DDNS for free using NO-IP
One of the simplest ways of setting up DDNS for yourself is through NO-IP. They provide a free service that’s really easy to get running. Click the link above to get started.
Register a Free Account
In order to use NO-IP’s service you’ll need to register with them. It’s quick, easy, and free. Provide the information required and create a hostname. After that finished click on “Free Signup.”
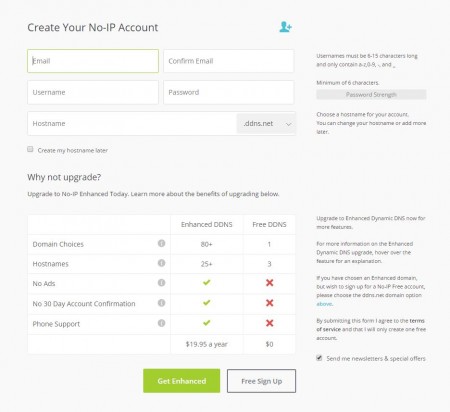
NoIP Registration
In order to start using your account you’ll have to confirm your email.
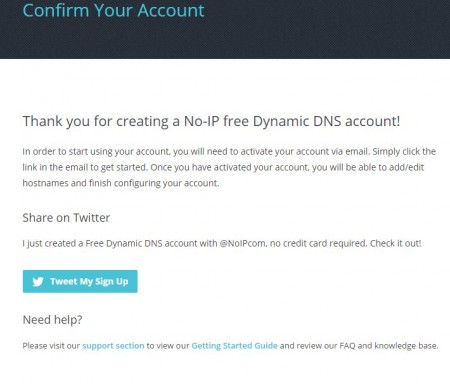
NoIP Confirm
Download the DUC
In order for the DDNS to function properly we need to update the managed DNS host in the event your IP changes. NOIP does this with a very lightweight client they call the “Dynamic Update Client (DUC). To get this installed navigate to your account on www.noip.com and select “Dynamic Update Client” from the left menu.
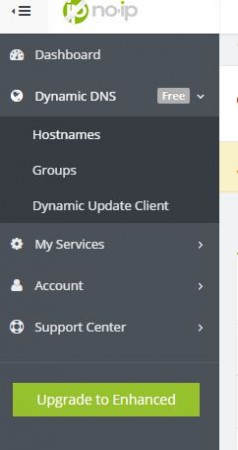
NoIP Left Menu
This will link you to the download.
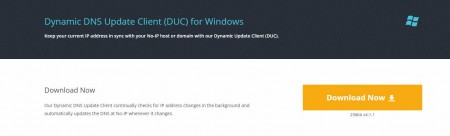
DUC Download Link
Install and Configure DUC
Now that the client is downloaded we need to install it. Run the executable downloaded from NOIP and follow the prompts. Once the client is installed open it. Make sure that your existing host is checked in the box and click “Save.”
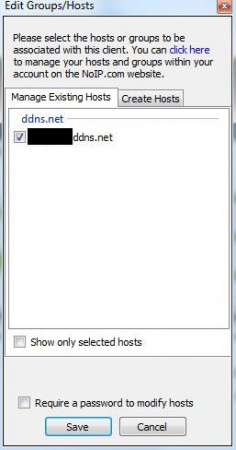
DUC Edit Groups
The DUC will display your Client ID, Account, what it’s updating, your external IP, and the next check for a change in IP.
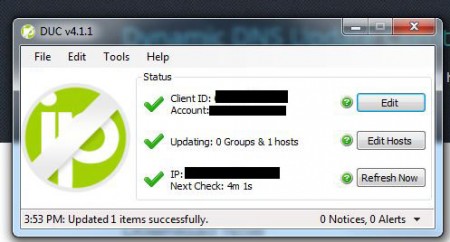
DUC Interface
If you check back on NOIP’s website your status should be a check mark. Also, double check that your hostname and IP match the client.
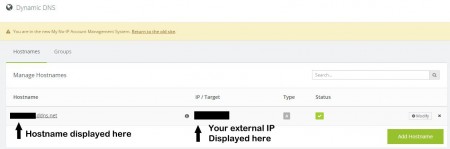
DDNS Check
What did I tell you? That was easy right? Your NOIP account and DUC are now set up.
Configure DDNS in Your Web Interface
The last step to configure is on your DVR/NVR. Use IE11 to log in to your device (or go to it directly). Log in to your admin account. Navigate to “SETTING” at the top and “Network > DDNS” on the left. Here you will enter the host IP (dynupdate.no-ip.com), your hostname, your user name and password for NOIP, and the interval that you’d like to check for a new IP.
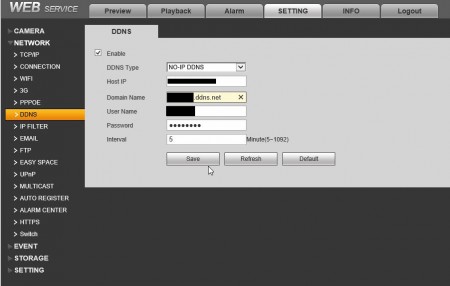
DVR DDNS
Press save when you’re finished.
Now that your ports and DDNS have been configured you’ll be able to monitor your system remotely by using the IP/Domain login on your smart phone app.