

How to Remote View Security Cameras for Free
After you’ve connected our smartphone app to a camera or system, you may be wondering how to use the app. CCTV Camera World's mobile Apps allow you to do a lot more than just view your security cameras for free. You can playback recorded footage, control PTZ cameras or motorized lenses, and record short clips on your cell phone just to name a few. If you’re not sure how to use some of these features this guide will help you to get the most out of your security camera system purchased from CCTV Camera World.
This guide assumes that you’ve already connected the remote viewing app to your security cameras and you are able to pull up a stream. If you have not set remote viewing up and need some assistance, please feel free to contact our support team by using the Tech Support form or visit the remote viewing knowledge-base located at the bottom of our website.
Table of Contents
- Prerequisites
- Live Viewing - Video Overview
- Live Viewing - Stepwise Guide
- Playback - Video Overview
- Playback - Stepwise Guide
Prerequisites - What's needed to use the mobile app?
- A Digital Video Recorder or Network Video Recorder - purchased from CCTV Camera World
- You can also connect to a single IP Camera or PoE Camera - purchased from CCTV Camera World
- Need to have an established internet connection to your Security Recorder or IP camera
- Need to have set up external access using our Portforwarding Guides or easy P2P setup
Videos for using the latest version of the app

If you're using the older iDMSS or gDMSS apps please review our written and photo guides below:
Live Viewing
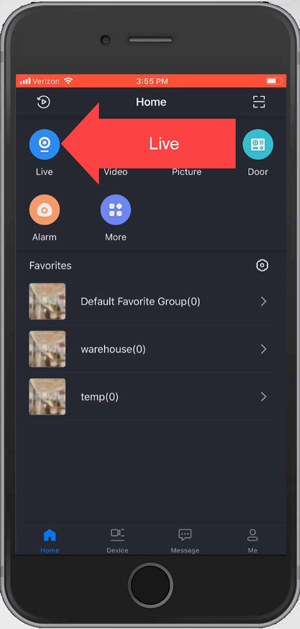
1. Open the app and navigate to the Live view screen
After opening the app you may already be on the Live View screen depending on the app’s settings. If you are not already at the Live View screen, you can get there by going to the Home icon at the top left and then selecting Live.
2. Pull up a camera or your full system
There are two ways that you can bring in cameras to the live grid view. You can bring in a whole system or individual cameras.
View a single camera in grid view
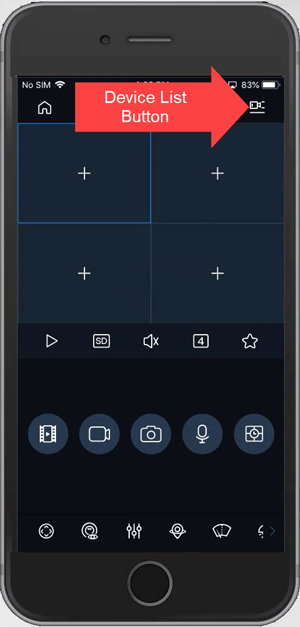
- You can add a single camera by tapping the “+” icon on the grid view.
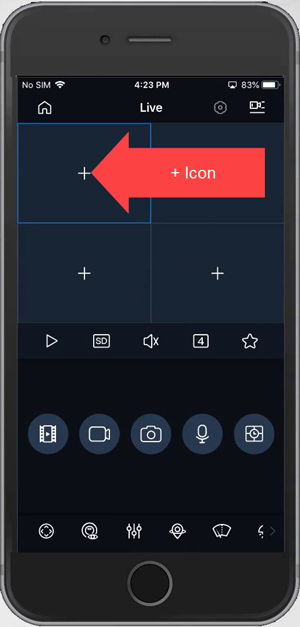
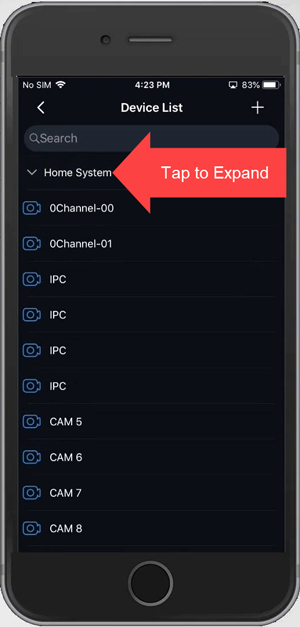
- Pressing the “+” icon brings up your Device List where your camera or recorder will be listed. Tap on your recorder to see the available channels.
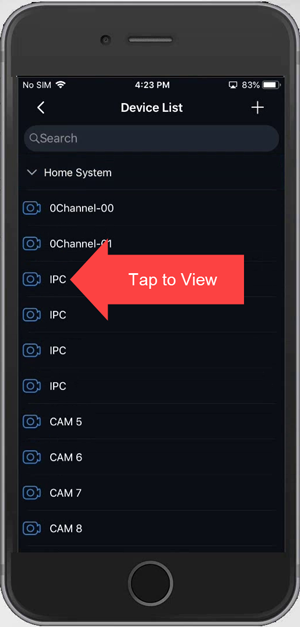
- Tap the camera name you would like to view. Repeat this process for each camera channel you would like to view.
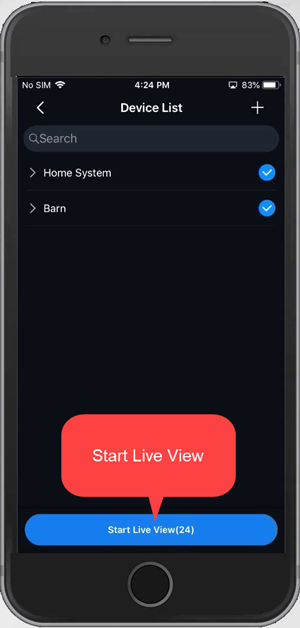
View your complete security camera system in grid view
- You can connect to all of the cameras from your system by using the Device List button at the top right.
- Check the system that you would like to connect to. You can connect to multiple systems by checking additional device entries.
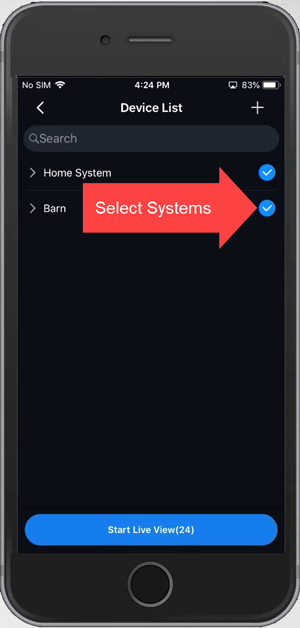
- Press the Start Live View button to connect to your system(s).
3. Using the Live Viewing Features
In Live View mode there are a lot of different things you can do on the app. To view in full screen you can double tap a camera. You can also rotate your smartphone to bring up a full screen grid, or make a camera stretch to full screen.
Using the Live Viewing Controls
The Live View mode offers several controls located directly underneath the grid view.
- Play button - Allows you to continue viewing or stopping the current highlighted channel
- [SD]/[HD] button - Allows you to switch the stream between Mainstream and Substream. We recommend leaving it on the Substream to avoid buffering unless you have a strong internet connection at both locations. SD is substream/HD is Mainstream
- Speaker button - Allows you to listen into a camera channel if it has a microphone. You can listen-in from one camera at a time.
- [4] button - Allows you to switch between 4, 9, and 16 camera grid views
- Star button - Allows you to add a camera to a favorite view

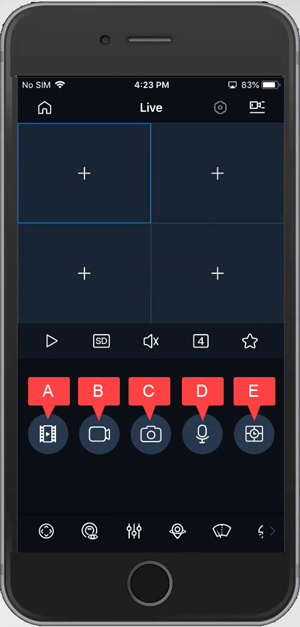
Playback, Video Clipping Tool, Instant Snapshot, Two Way Talk
Below the Live view controls there is another set of useful tools for managing your security cameras or camera system from afar.
- Filmstrip Playback button - Takes you to the Playback feature for the camera you have selected.
- Camera Video Clip button - Starts recording the selected camera directly to the smartphone
- Camera Instant Snapshot button - Takes a snapshot from the camera videostream and stores it on the smartphone
- Microphone button - Allows you to listen-in from the camera or access the two-way talk feature if your camera supports it
- Grid button - Clears the screen of cameras or recalls the last camera view that was streaming
Playback
The mobile app is not limited to live viewing. You can also access a system or camera's recorded video by using the playback feature. The playback feature accesses the recorder’s hard drive or camera’s SD card storage to pull video files and play them on your smartphone.
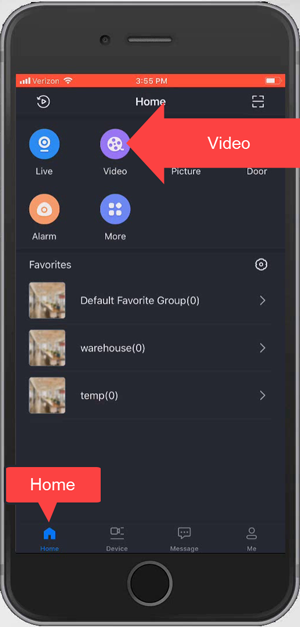
1. Open the app and navigate to the Video playback screen
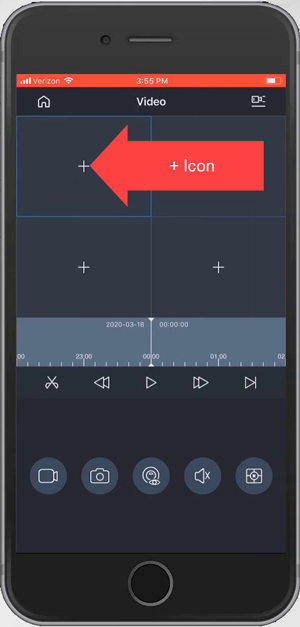
To get to the playback screen you will need to select “Video” from the Home screen. To get to the home screen you can press the Home icon at the top left of the app or bottom navigation bar.
![]()
2. Search for playback from a channel on your recorder
- Tap the + icon in the playback menu to access the Device List.
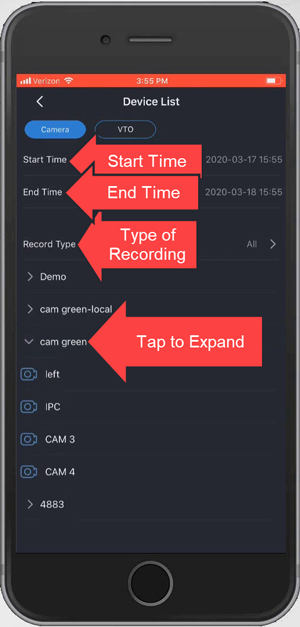
- The Device List will allow you to select a Start Time, End Time, and then a camera from your system. You can also select the recording type whether it’s continuous, motion, or Smart Detection. Tap your system to expand the channel list.
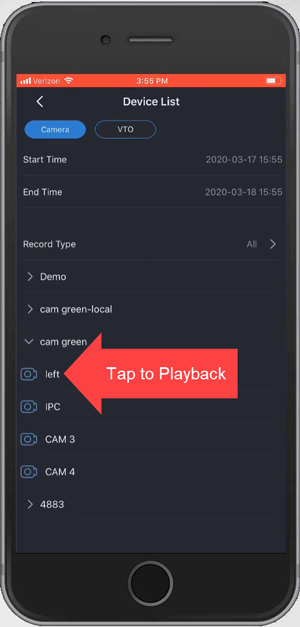
- Tap on the channel you would like to playback from the system you’ve selected.
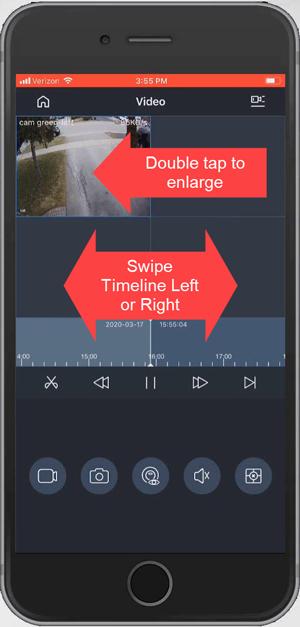
- You can double tap a channel to enlarge it, or add more channels for playback. Rotate your phone after double tapping a channel to make it fullscreen.
3. Using the Playback Features
On the playback screen there are playback controls, and other useful features that allow you to record a small clip, take a snapshot, or listen to playback if the channel has recorded audio.
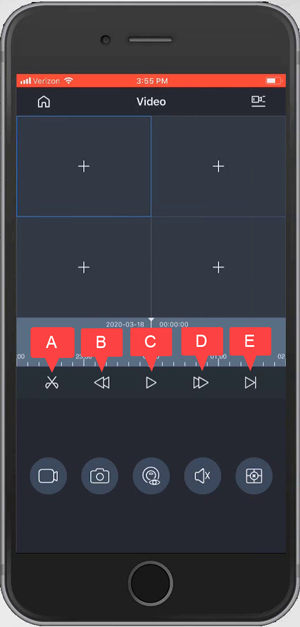
Using the Playback Controls
The playback controls under the grid screen are useful. Here’s what they do.
- Scissors button - Allows you to download and export a clip from your system for that selected channel
- Double left arrow button - Allows you to decrease the playback speed
- Pause/Play button - Allows you to pause or play the currently selected channel
- Double right arrow button - Allows you to increase the playback speed
- Skip button - Allows you to skip forward to the next recorded section of video
Playback, Video Clipping Tool, Instant Snapshot, Two Way Talk
Below the Live view controls there is another set of useful tools for managing your security cameras or camera system from afar.
- Camera Video Clip button - Starts recording the selected camera directly to the smartphone
- Camera Instant Snapshot button - Takes a snapshot from the camera video stream and stores it on the smartphone
- Eye button - This feature works with active deterrence cameras
- Speaker button - Allows you to access recorded audio for the selected channel
- Grid button - Clears the screen of cameras or recalls the last camera view that was playing back