

Setup a Live Stream Camera without Monthly Charges
Live streaming is more popular than ever, but many of the options on the market lock essential features behind monthly subscriptions. In addition, most are not outdoor weatherproof cameras and lack the ability to send video directly to your streaming platform of choice without an encoding device such as a PC in the middle.
If you want the best live stream camera to broadcast directly to Twitch, YouTube, Facebook Live, or other platforms without recurring costs, you’re in the right place!
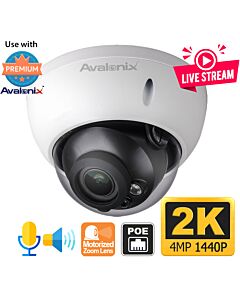
All of the Avalonix LiveCams by CCTV Camera World are weatherproof security cameras with night vision and feature direct video broadcasting without needing a PC-based video encoder.
In this guide, we’ll walk you through setting up your Avalonix LiveCam for seamless live streaming—no cloud storage fees, no hidden charges, just pure streaming freedom. Whether you’re a content creator, a business owner, or just want a DIY live stream setup, we’ve got you covered.
If you're curious about the end result and what quality to expect from our Avalonix LiveCams, be sure to check out examples from some of our LiveCams in action.
You can find our most popular models below.
-
-
-
-
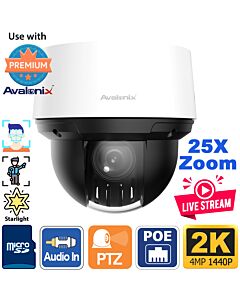 Auto Tracking 2K Mini Pan Tilt Zoom PoE Camera, 25X Zoom & Night VisionSKU: IPTZ25XIA$899.99 $999.99 10% off
 -
 4K PTZ Camera with Auto Tracking, 25X Zoom, Smart AI Detection, Active DeterrenceSKU: IRPTZ4KAD$899.99 $1,199.99 25% off
You can follow this guide as a stepwise written guide by following the instructions below, or jump to the tutorial video below.

Table of Contents
- Before You Start
- Step 1) Add your Camera to the PC Software
- Step 2) Access the Camera’s Stream Settings Using Link to Web
- Step 3) Creating the Custom Address for Twitch Streaming
- Step 4) Start Streaming to Twitch
- Embed Your Stream on a Website
- If You Get Stuck, Get Help
Before You Start
In this guide, we focus on setting up a live broadcast to Twitch.tv, which we find more reliable than YouTube Live for streaming continuously. If your internet is not a high-end fiber connection, Twitch is going to be the best option for you.
As of 2025, Twitch requires viewers to be logged in to a Twitch account to watch streams above 1080p resolution (e.g., 1440p or 4K), whether on the Twitch website or in embedded players. Streams at 1080p or lower remain publicly viewable without login. If your plan is to embed your stream on a website or you expect a high number of public viewers, consider setting your camera to 1080p to maximize accessibility.
Before setting up your live stream camera for Twitch, ensure you have everything ready:
Required Equipment
- Live stream camera
- Power over Ethernet injector or PoE switch
- Two Ethernet cables
- Windows computer for setup and management
- Stable internet connection with at least 5 Mbps internet upload bandwidth reserved for the video stream. For the most reliable results, especially with 2K or 4K streaming, we recommend using a fiber internet connection, which provides a steadier upload speed needed for continuous live broadcasting.
Create a Twitch Account
If you don’t have one yet, sign up at Twitch.tv. Twitch has a helpful guide if you need assistance with creating a Twitch account.
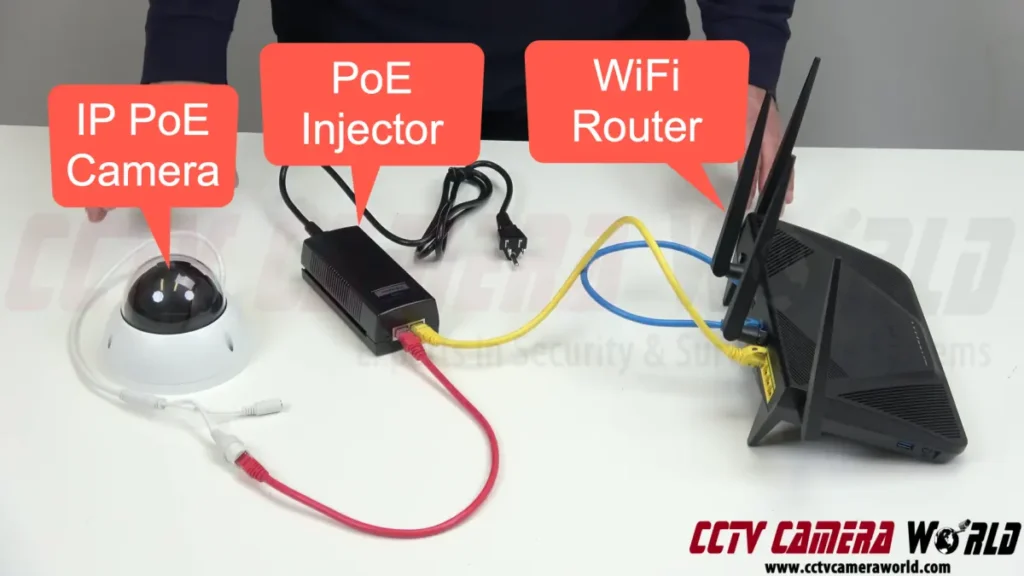
Connect Your Camera
Plug the camera into your PoE injector's PoE-out connector and connect the PoE+Data connection to your router using two Ethernet cables.
Install the PC Software and open Notepad
Download and install SmartPSS Lite for Windows to access the camera and connect it to your streaming platform.
If you are using a Arm processor based Mac, you can download the Mac Version of SmartPSS Lite.
Open Notepad or another text editor on your computer to stitch together your Custom Address streaming key.
Step 1) Add your Camera to the PC Software
After you download the software from the link above, you’ll need to install it on your Windows computer.
Opening SmartPSS Lite for the first time
After you install and open the software for the first time, you will need to click through a few windows before you’re able to add your camera. If you have trouble or are unsure how to get through the startup process, please refer to the video.
- The first screen is a scene selection page. Choose the Video Monitor option and click OK.
- Next is the Software License Agreement. Click the checkbox and then click Agree.
- The second agreement is the Privacy Policy. Click the checkbox and then click Agree.
- Next, you’ll set a password for accessing the software. Note this is not the password for the camera. Click Next after setting a password.
We recommend that you also check the “Auto log in after registration” checkbox so you don’t have to manually log into the software every time you open it.
- After setting a password, the software will have you set recovery questions. Click Complete after choosing your questions and setting the answers.
- The last popup before you can add your camera is the User Experience Improvement Program. Click "Not Now".
Adding a camera to SmartPSS Lite using its P2P Access Code
Now you can get your camera added to the software.
- Click the Devices button under the Management section at the bottom of the Home page.
If you somehow left the Home page before you were able to click the Devices button, there is a Home tab at the top that you can click to go back.

- Within the Devices tab, click the Add button.
- Click the Add Mode dropdown and click the SN (Available on devices…) option. The Add Device window will change.
- Type in a device name. You can name it anything you’d like; here are some examples: livecam, livestreaming camera, outdoor live stream camera, church live stream camera, 4K live stream camera.
- Copy and paste or manually type your camera’s P2P Access Code into the SN textbox.
You can find your camera’s P2P code in an email from our support department or on the label that is on the top of your Livecam’s box.
- Type in the username and password for the camera.
The label on the camera’s box will also have the username and password.
- Click Add to finish adding the camera to the software.

After clicking Add, wait up to 10-15 seconds for the software to establish a connection with the camera and show an Online status.
Step 2) Access the Camera’s Stream Settings Using Link to Web
Now that your camera is added to the software and showing as Online, you can access it using the Link to Web feature. This feature automatically opens a web browser to the camera, allowing you to manage your camera from anywhere with an internet connection—as long as the camera remains online. Whether you're at the location of the camera or away, Link to Web makes remote management simple and convenient.
Click the Link to Web button in the software
While you’re still on the Devices page in SmartPSS Lite, you should see a classic-style World Wide Web button next to your camera under the Operation column. (We know—World Wide Web? Who remembers calling it that?)
- Click the Link to Web button (the little globe icon) to access the camera.

- Log in to the camera with the same username and password as when you added it to the software.
- After logging into the camera, you’ll be at the Live View page.
Navigate to the RTMP Settings Page for Stream Setup
The Avalonix LiveCams are specialized IP cameras that feature direct RTMP streaming capabilities. RTMP is the communications protocol that our 24/7 live stream cameras use to send data to Twitch, YouTube, or Facebook Live. The RTMP settings page is where you will enter your unique stream Custom Address. This Custom Address tells the camera where to send video data to. First, you’ll need to get to the RTMP page and adjust a few settings so you can enter and save your Custom Address.
- Click the Setting tab at the top to access the camera’s settings.
- Click the Network menu on the left-hand side to open the dropdown menu for more options.
- Click Access Platform at the bottom of the Network submenu.
- Click the RTMP tab at the top of the Access Platform page.
- Click the Custom Address Type option.
- Click Save to save the change.

Now you’re ready to create the Custom Address to enter into this RTMP page. Leave this webpage or tab open in the web browser.
Step 3) Creating the Custom Address URL for Twitch Streaming
The Custom Address is a URL, or web address, that our PoE livestreaming cameras use to send data to Twitch. The Custom Address consists of two components: the server URL and the unique stream key for your Twitch account. This section covers finding your stream key and choosing the best Twitch server for your stream.
To follow this section, make sure that you have Notepad or another text editor open on your computer. You could write this information down, but it’s much easier to copy and paste it within your computer.
Getting your Twitch Account Stream Key
To follow this section, you will need to have already created a Twitch account and be logged into it. Refer to the Before You Start section above for a link to a guide for creating a Twitch account if you haven’t created one yet.
- Go to Twitch.tv in a new tab or browser window.
- Click your profile icon at the very top right of the Twitch homepage.
- Click the Creator Dashboard menu option.

- In the Creator Dashboard, click the Settings menu dropdown.
- Click the Stream option under the Settings submenu.
- There are two ways you can copy the stream key to the Notepad.
- Click the Copy button to the right of the Stream key
- Or Reveal the Stream key and manually highlight and copy it by right-clicking and clicking copy.

- Paste your Stream key into the Notepad file. Hit enter a few times to add a few empty lines after the Stream key.

You may want to save your Notepad file to your Desktop or Documents folder if you haven’t, just in case you accidentally close the file or some other issue happens. Also, leave a browser window or tab open to your Stream settings, as we’ll use it later to verify your stream is working.
Getting the Twitch Ingest Server URL
Now you need to get the Twitch ingest server URL to put at the beginning of the Stream key to finish creating the Custom Address. Fortunately, Twitch has a helpful tool for finding the optimal server for your stream.
- Open a new tab or browser window.
- Go to Google and search “Twitch Ingest Server.”
- Click on the first result titled “Twitch Ingest Recommendation.”

- This webpage will have several servers listed in the order of most to least optimal.
- Highlight the first Default global option, or the #2 option, which should be a city near you, before the {stream_key} brackets.
- Copy the URL.
- Paste the Twitch ingest server URL into your Notepad on a new line.

Combine the Stream Key and Ingest Server
The last step for creating your Custom Address is easy! You’ll just need to combine them in Notepad.
- Within Notepad, copy and paste your stream key at the end of the Twitch ingest server.
- The Custom Address should look like the example below, except your ingest server and stream key will be different.
rtmp://ingest.global-contribute.live-video.net/app/live_661156170_uwuX8n8sgOUS5r8yGRv4vxKa2R7nY1

Step 4) Start Streaming to Twitch
With your Custom Address ready to go, you’re nearing the finish line. The last step involves pasting the Custom Address into the camera and starting the stream!
Enter the Custom Address in the Camera Settings and Enable Streaming
You’ll want to hop back into your camera’s web interface. If you closed out of the browser tab or window for your camera or it timed out, reopen the software and use the Link to Web button on the Devices page.
- Highlight and copy the Custom Address you created in Notepad.

- Paste the Custom Address into the Custom Address textbox within the camera’s RTMP settings.
- Click Save to ensure the Custom Address is stored in the camera.

- Click Refresh to verify it is saved.
- Click the Enable Checkbox.
- Click Save.

- A prompt will appear confirming you want to send video and audio to Twitch. Click OK to begin your stream!

Provided everything is working as it should and you’ve entered in a valid Custom Address, your camera’s video feed should now be streaming to your Twitch channel.
Verify the Stream is Working
Verifying that your stream is working is pretty easy using Twitch’s Creator Dashboard. Or you could just go directly to your stream by typing twitch.tv/[youraccountname] (replacing the brackets with your actual account name) into a web browser.
- Back in your web browser or tab for Twitch and the Creator Dashboard.
If you closed out of it, go to Twitch.tv, click your icon at the top right of the page, and then click Creator Dashboard.
- Click on the Stream Manager tab on the left side of the Creator Dashboard.
- On the Stream Manager page, you can monitor your stream, moderate chat, change the title, and adjust various other settings.

Embed Your Stream on a Website
If you want to feature your live stream directly on your own website instead of just sharing a link, it’s easy to do. We’ve created a step-by-step guide that shows how to take your Twitch or YouTube Live feed and embed it on any webpage. This is a great option if you want to showcase your stream to visitors without sending them off-platform. Follow our embedding guide here to learn how.
Video Tutorial
If you're more in to absorbing content in video form, then the video tutorial below is right for you. We show the full process from beginning to end of how to setup a live stream camera from the Avalonix Premium Series. Feel free to pause and rewind the video to make sure you're duplicating our actions in the video.
Newer cameras manufactured in 2025 have their web server set to a https connection by default. When accessing their web interface over the SmartPSS software you may be prompted with a warning that the connection is not secure. This is a normal warning that can be ignored by bypassing it as shown in the video below.
Additionally, these cameras have a new look to their web interface. In this video we show the location in the web interface where you should enter the stream url for your preferred streaming server such as Twitch or YouTube Live.

If You Get Stuck, Consider Purchasing a Support Sessions
Even after trying all of these troubleshooting tips, if you still need assistance, our team is available! We offer a paid remote support service that’s available by appointment to help you get your camera up and stream online.