
Professional security camera recorders available with alarm inputs
Selection of 8 through 256 channel Network Video Recorders available for use with professional PoE and IP cameras.
Browse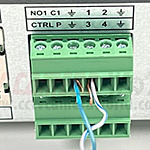
Security cameras do more than watch a property. With the right setup, they also help with business and clerical tasks. Our approach is simple: we pair a professional CCTV Camera World system with a manual trigger. A physical switch connected to the camera or recorder starts and stops capture on demand. One press on a push button, foot pedal, or wall switch tells the camera or NVR to record a short clip or take still photos. No menu diving in a DVR, no app required.
Most home and cloud-based camera systems can’t do this. They lack hard-wired alarm inputs or relay control for a physical switch. Our professional security cameras and recorders do, which is why this workflow is possible in an interview room, on a shop floor, or at a packing bench.
Selecting hardware? For camera picks by business use, see our best business security cameras, and for turnkey bundles sized for workplaces, compare our best commercial security camera systems.
Record only when it matters, based on your or an employee’s discretion. A simple-to-use manual trigger lets you capture exactly what you need, the instant you need it, without hours of extra footage.
Continuous or motion recording can fill a card or hard drive quickly. Triggered capture saves only the moments you choose, so retention stretches much longer on the same storage.
Each clip or snapshot is tied to an intentional trigger. That makes it quick to find files later, without scrolling through days of video or a long timeline.
Manual trigger recording fits common legal, business, and industrial needs, including:
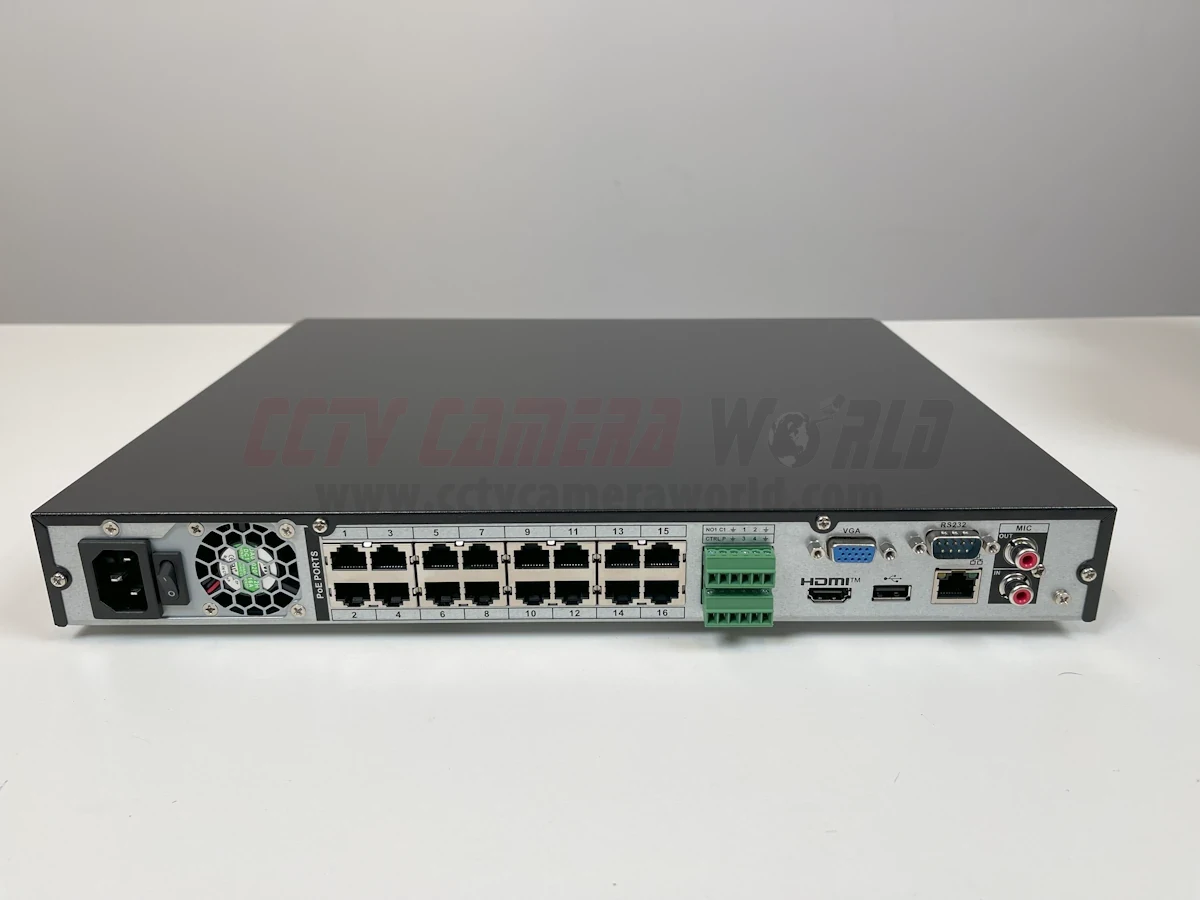
In this guide, we use an Avalonix Premium Series 16-channel NVR connected to multiple cameras. The same trigger-based (alarm-based) method works with our NDAA-compliant AvaEye and Security Cameras Inc systems. Make sure the recorder has alarm inputs before making a purchase.
In this guide, we use an Avalonix Premium Series 16 Channel NVR recorder that can be connected to multiple cameras. The trigger-based (alarm-based) recording method can be used to activate recording on one or multiple cameras of your choice. The same method works with our NDAA-compliant AvaEye and Security Cameras Inc systems. When purchasing, confirm the recorder has alarm inputs.
If you're pressed for time, or you're more of a visual person, you can jump to the tutorial video below.
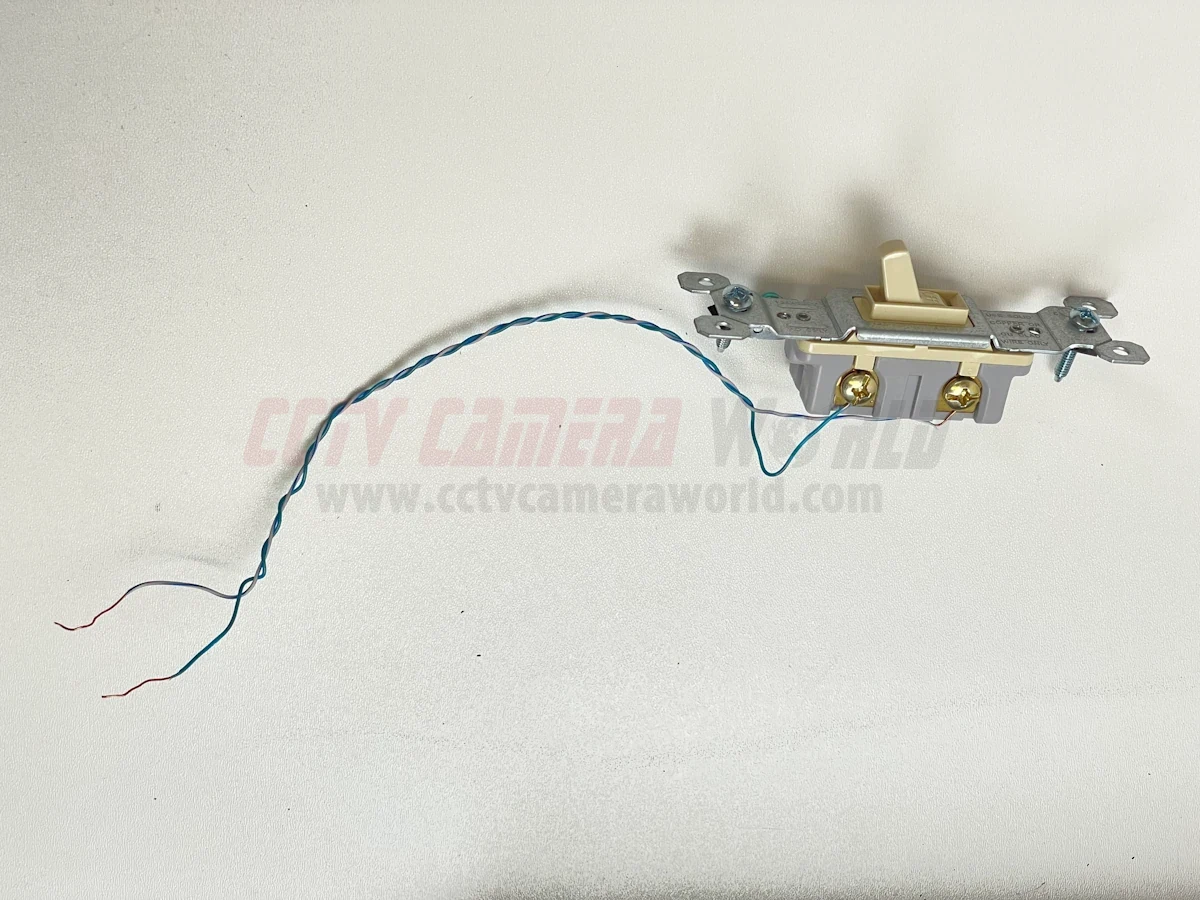
You only need a few pieces, and most are easy to source.
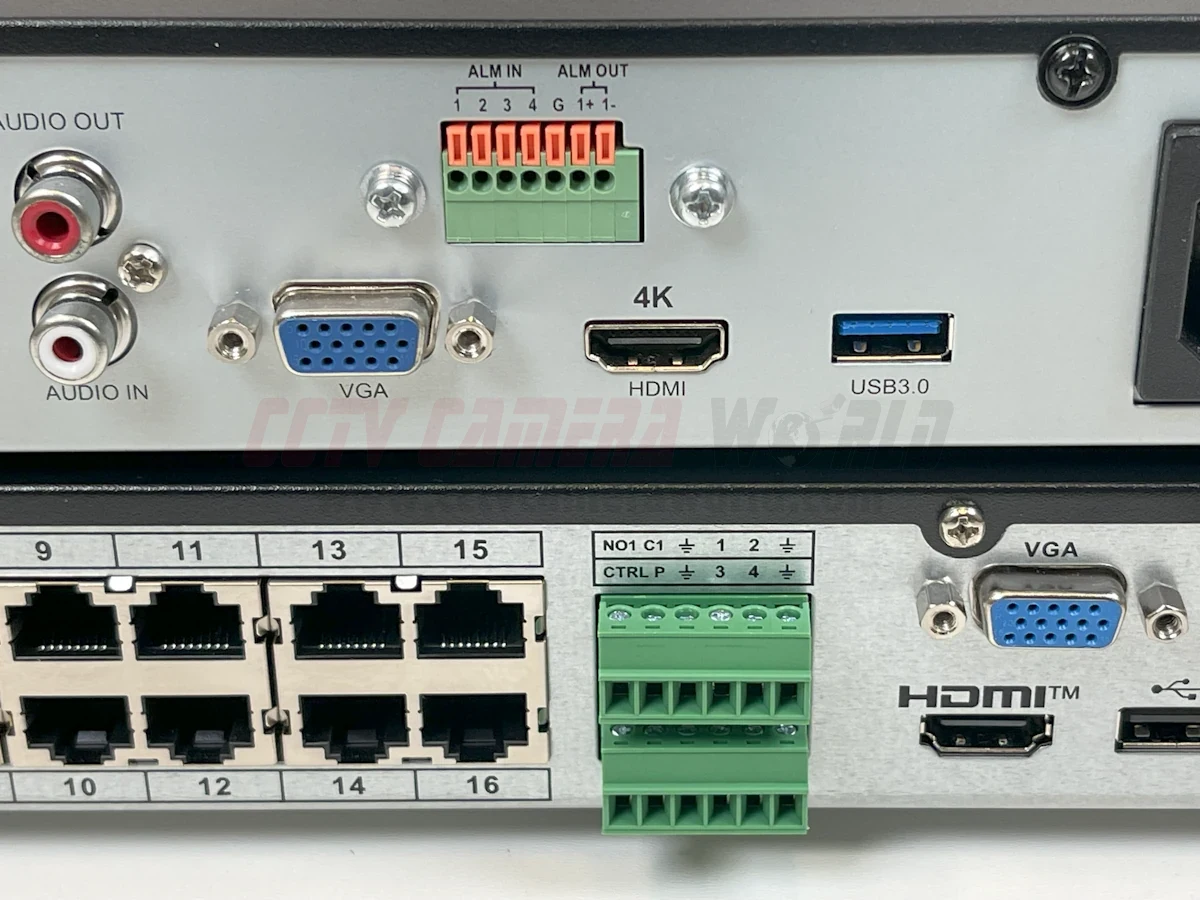
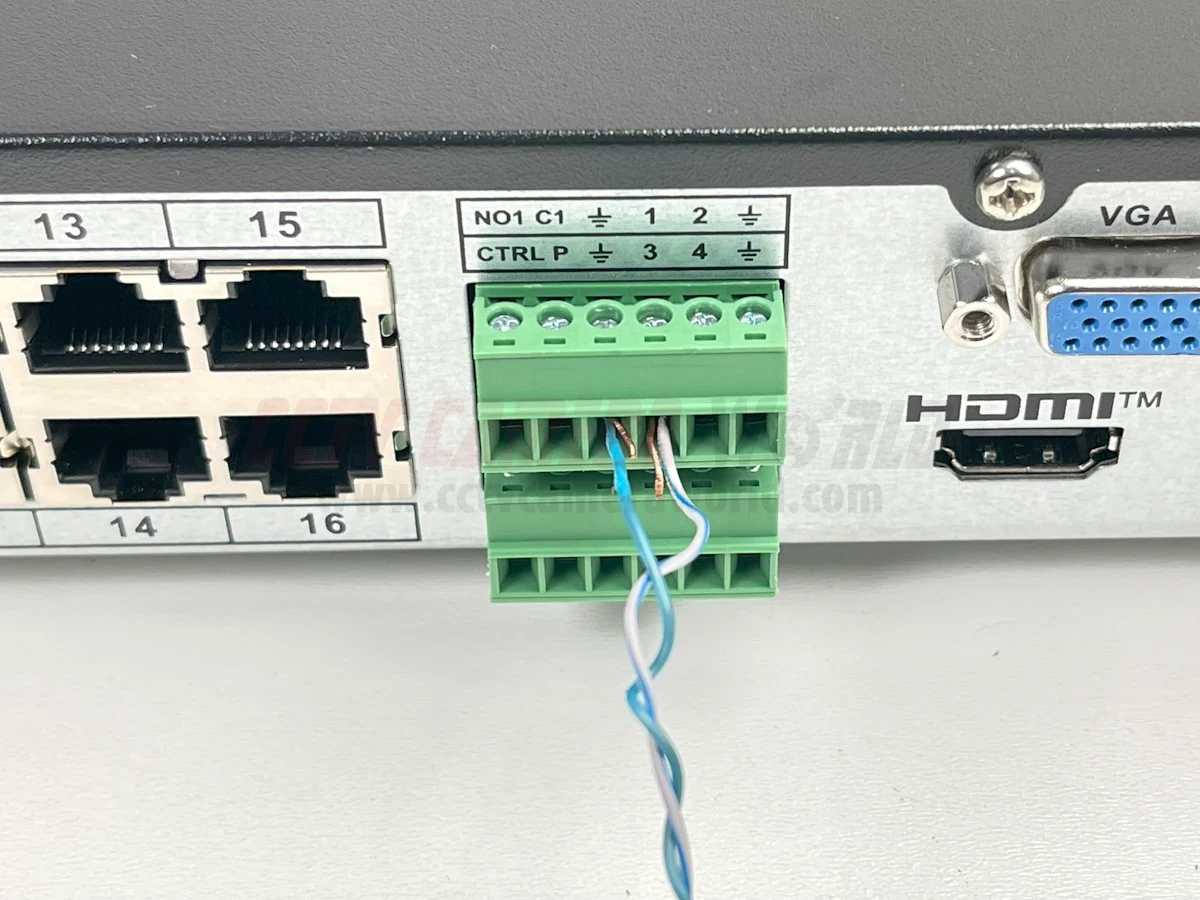
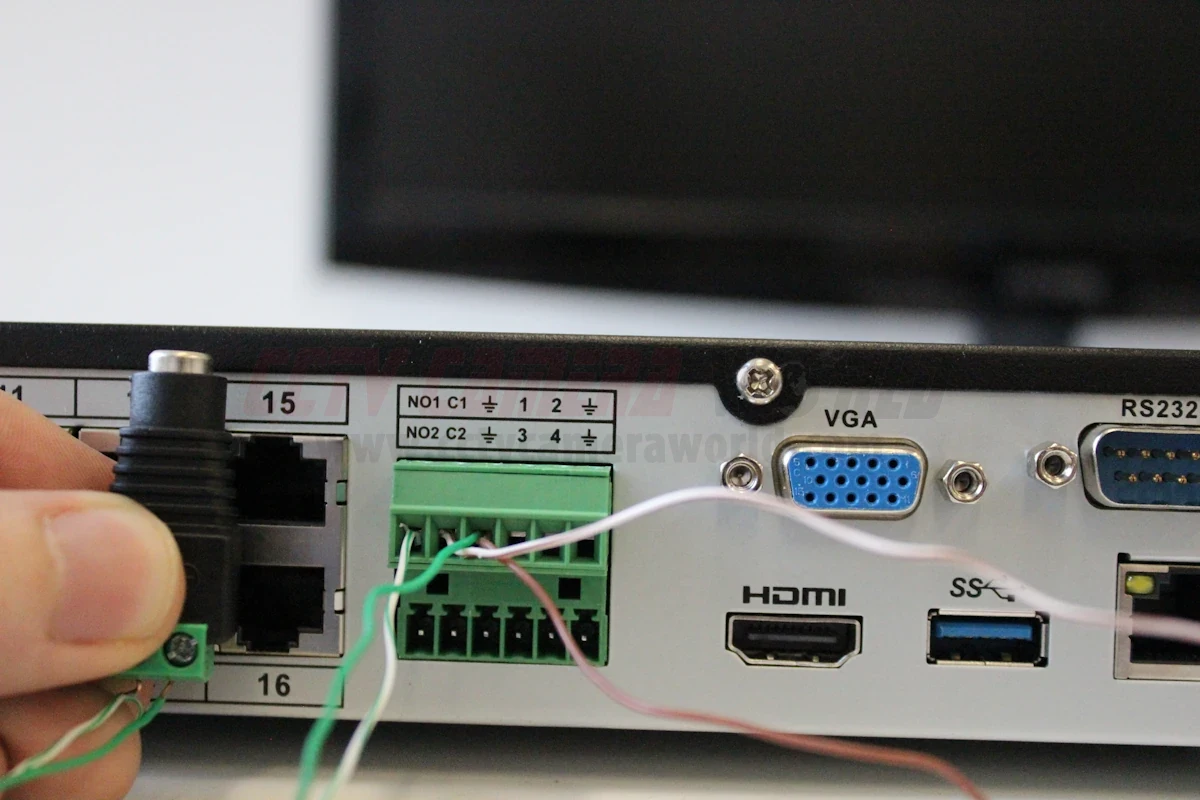
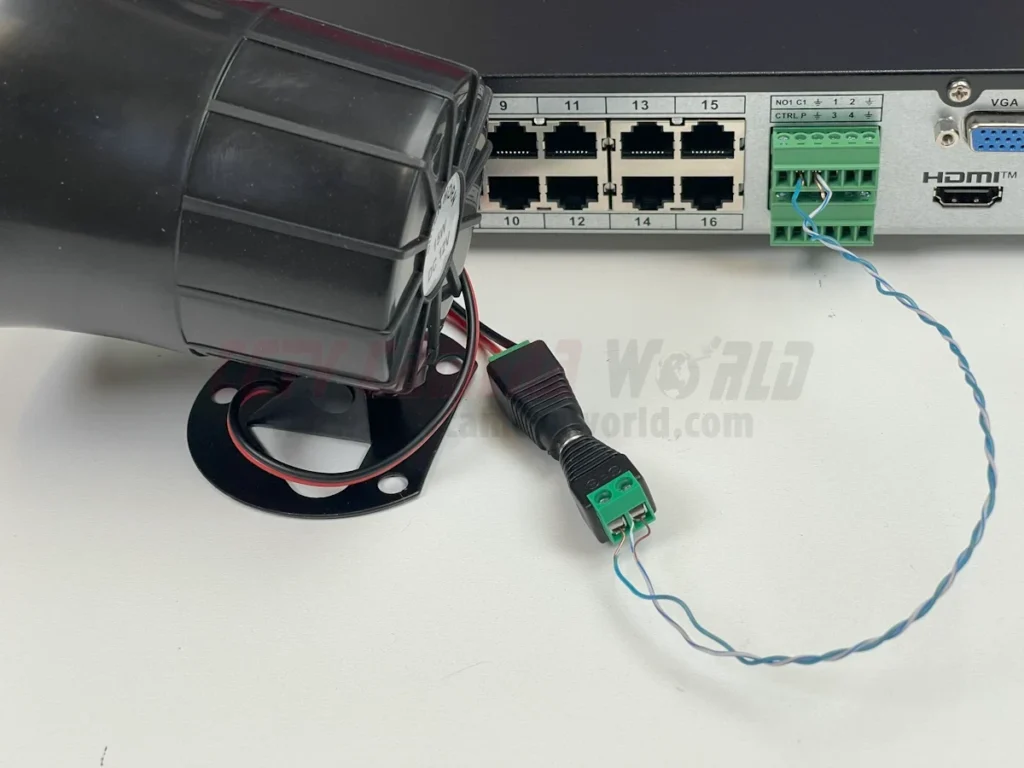
An NVR with alarm inputs is required to tie in a trigger such as a light switch for controlling recording. In this guide, we will use the Avalonix 16 Channel NVR, and below is a picture showing what the alarm blocks look like.

Professional security camera recorders available with alarm inputs
Selection of 8 through 256 channel Network Video Recorders available for use with professional PoE and IP cameras.
BrowseBe sure to purchase the NVR with a hard drive. Some systems can upload to a NAS or FTP for flexibility. We don’t recommend cloud storage for mission-critical projects because it depends on an internet connection and third-party uptime.
As a general rule, our NVRs with 2 hard drive slots or higher usually have an alarm input/output connection on the back. You'll want to browse through the following categories of recorders for one that fits your needs.
Reliable options for business or industrial use include:
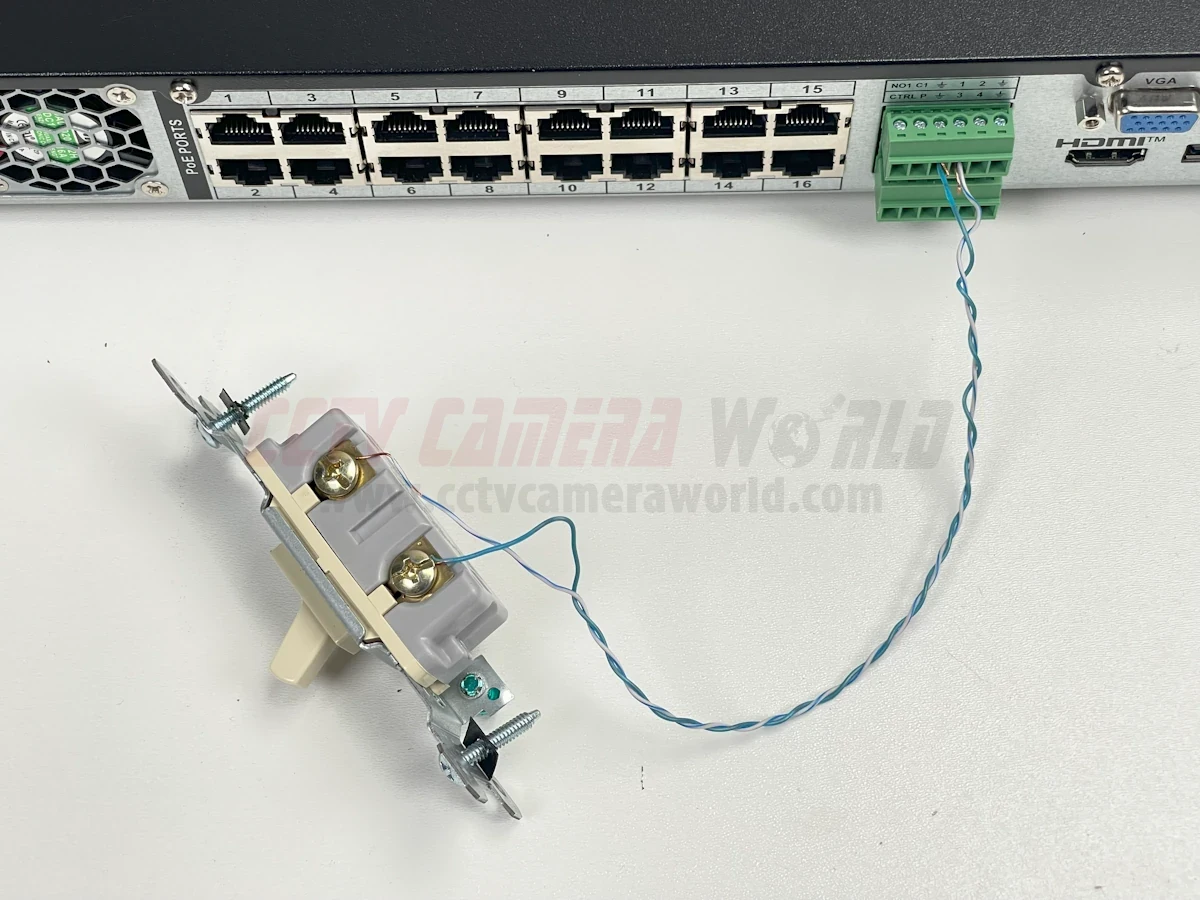
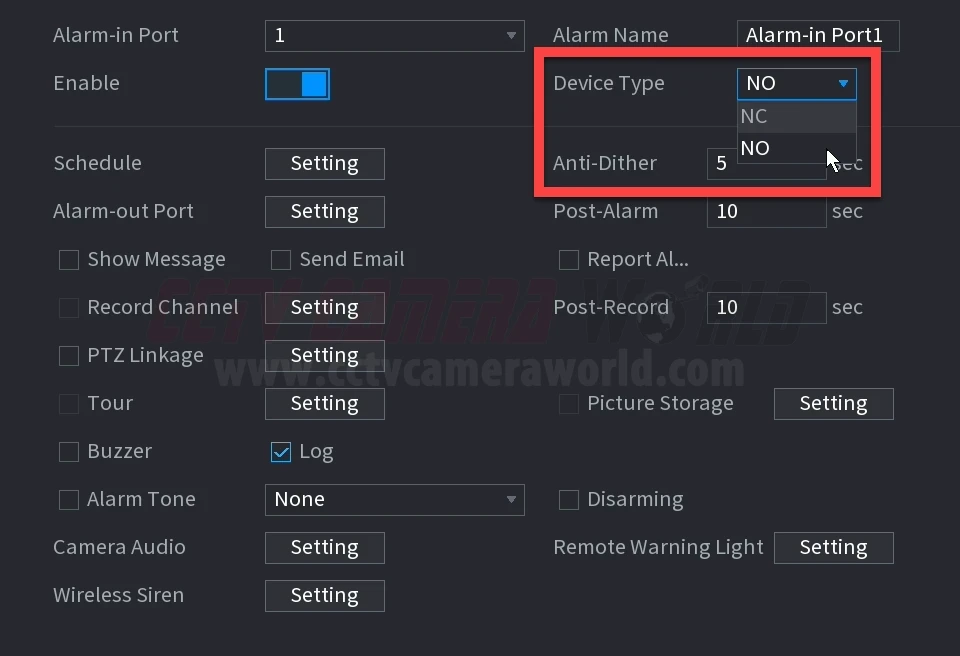
Tip: for most workflows, use a Normally Open (NO) contact so nothing triggers unless the switch is pressed.
We use a simple light switch for our demo.

Professional network-based surveillance cameras
Choose from 3 brands of professional camera products CCTV Camera World offers to tie in to your system.
BrowseYou can use one Trigger switch to record multiple cameras, or separate Trigger switches for different cameras when using an NVR with alarm inputs.

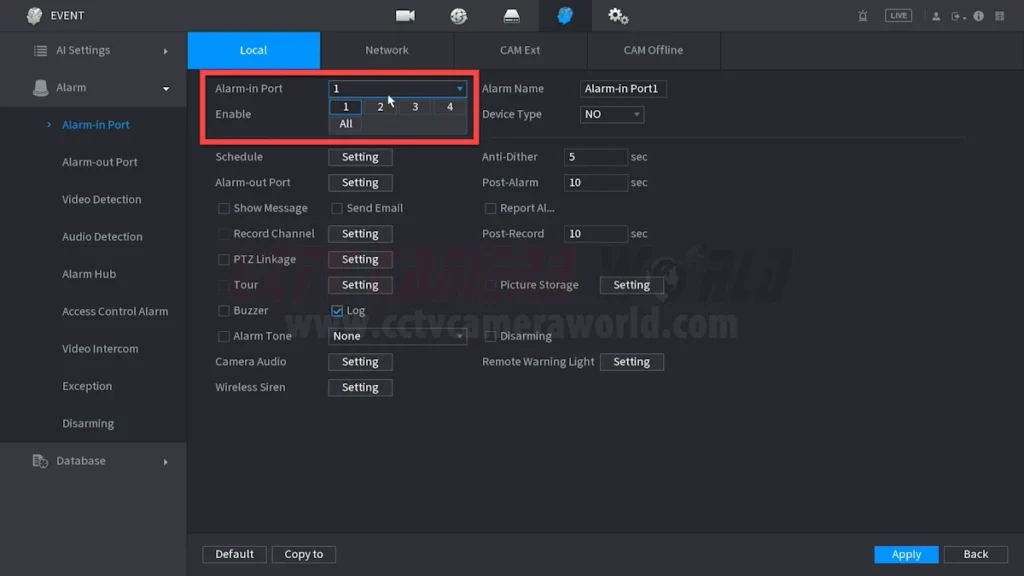
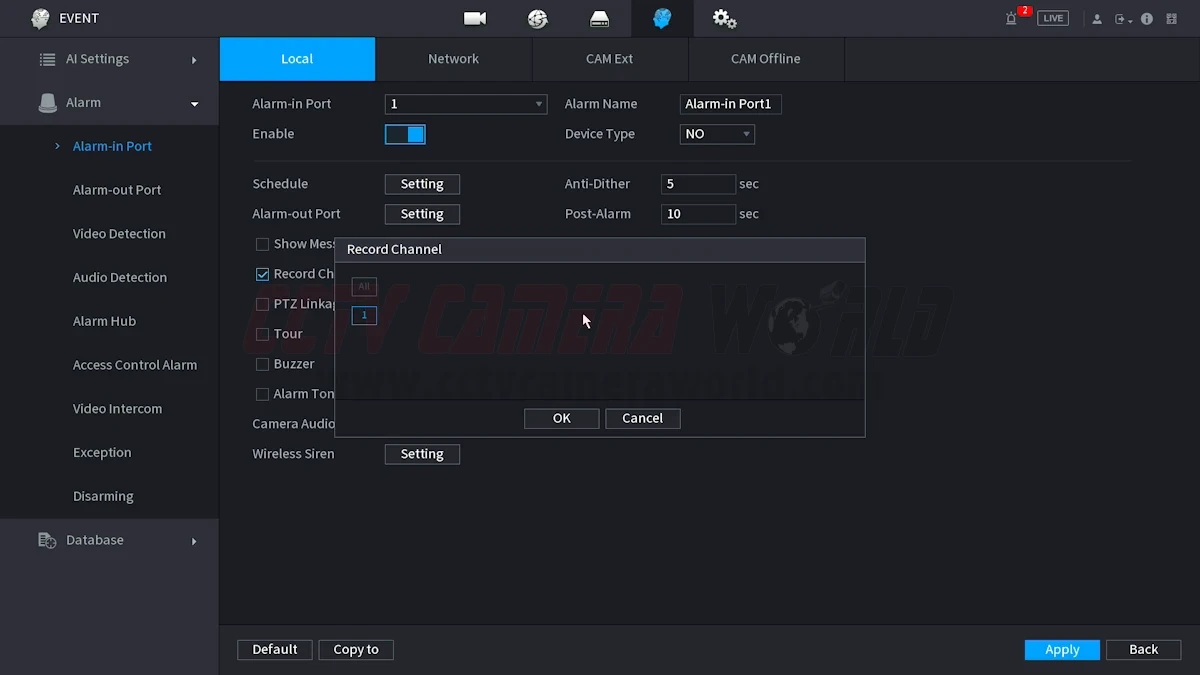
Activate the input you wired (for example, Input 1), and set its type to either NO or NC to correspond with your switch.
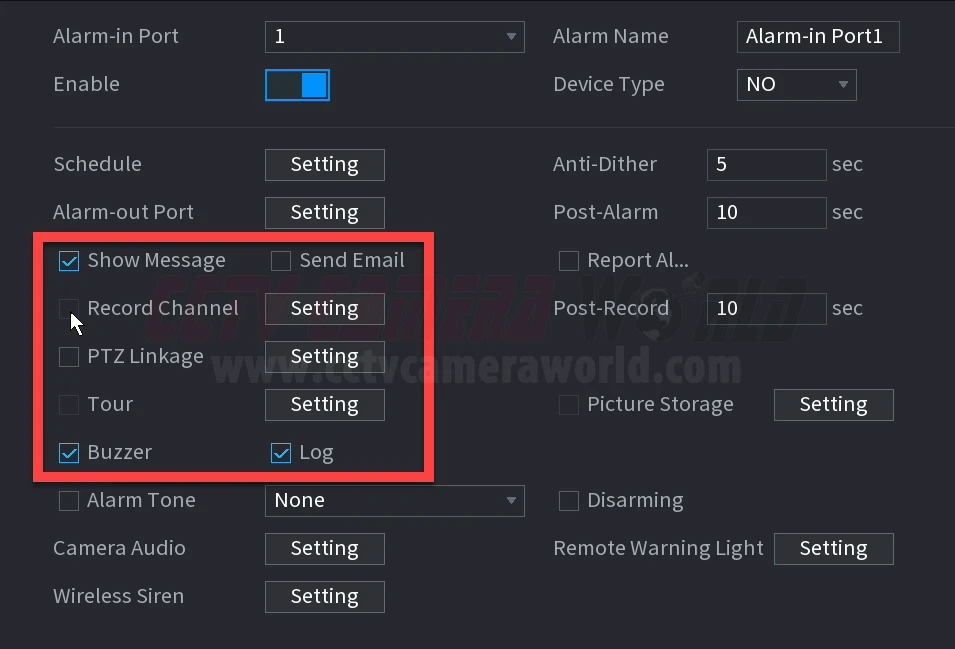
The camera or NVR can function as an alarm relay by using the Alarm Out trigger setting to activate external devices when the alarm input is triggered. This is useful for controlling visual indicators, automating processes, or activating safety mechanisms.
Examples include indicator lights, audible buzzers or sirens for feedback and safety, or machinery controls such as stopping a conveyor belt to capture a clip or snapshot.
Make sure the device’s voltage and current match the relay output’s ratings. Some devices may require a separate power source.
For some devices power can be sent through the alarm panel as shown in the image below.
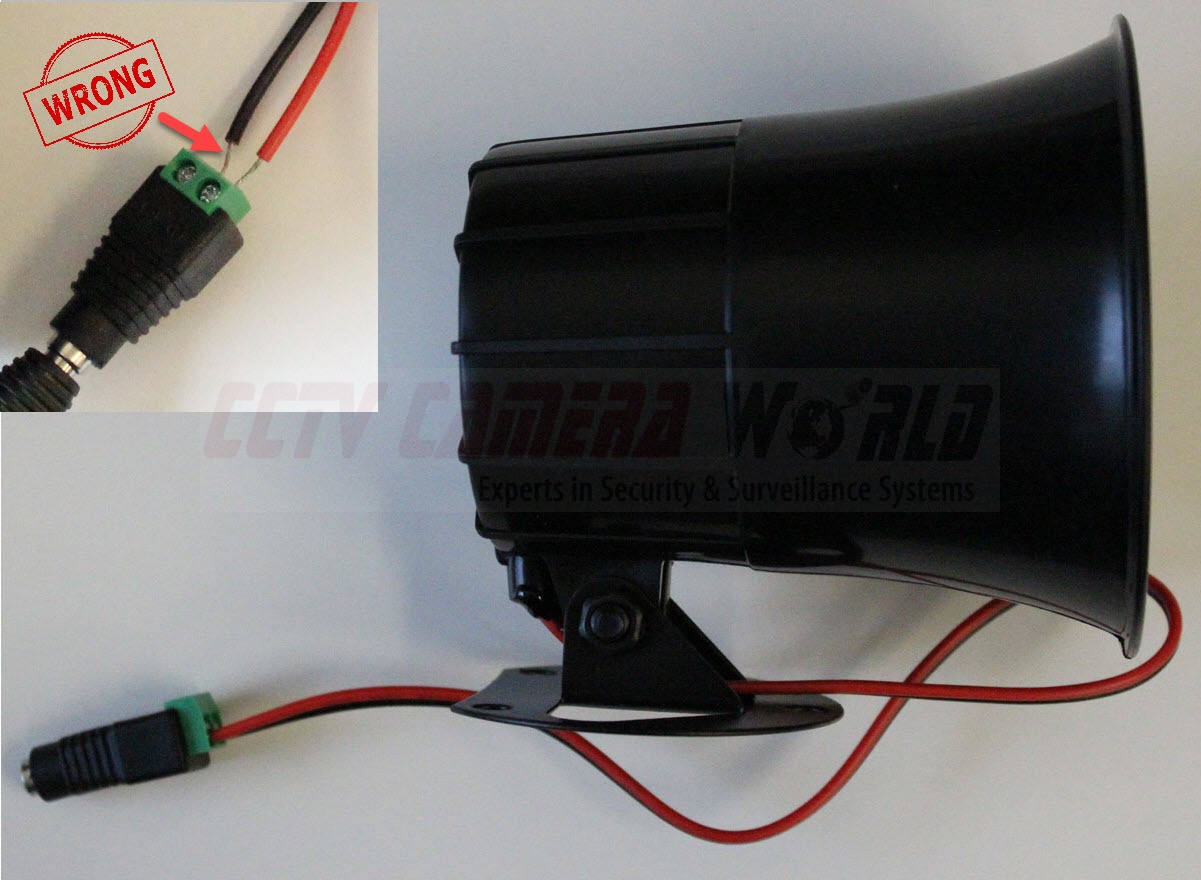
These are typically labeled “NO” (Normally Open) or “C” (Common/Closed) on the camera or NVR.
Wire your two leads according to the contact type (NO or C) that matches the intended behavior. For example, if the indicator light should turn on when the switch is active, use a Closed output. If it should be on when the switch is off, use a Normally Open output.
Confirm the wiring is tight and insulated to prevent shorting the alarm panel on the NVR or causing an electrical fire.
In the Alarm Input menu for the port you are using, enable the Alarm-out Port option. Click the Setting button to turn on the Local Alarm option and select the port your external device is wired to.
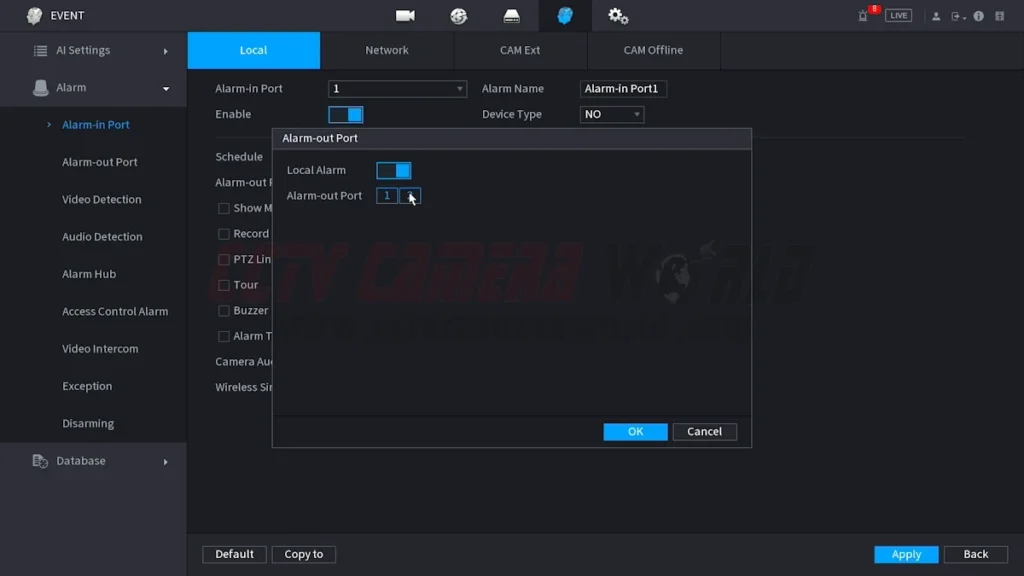
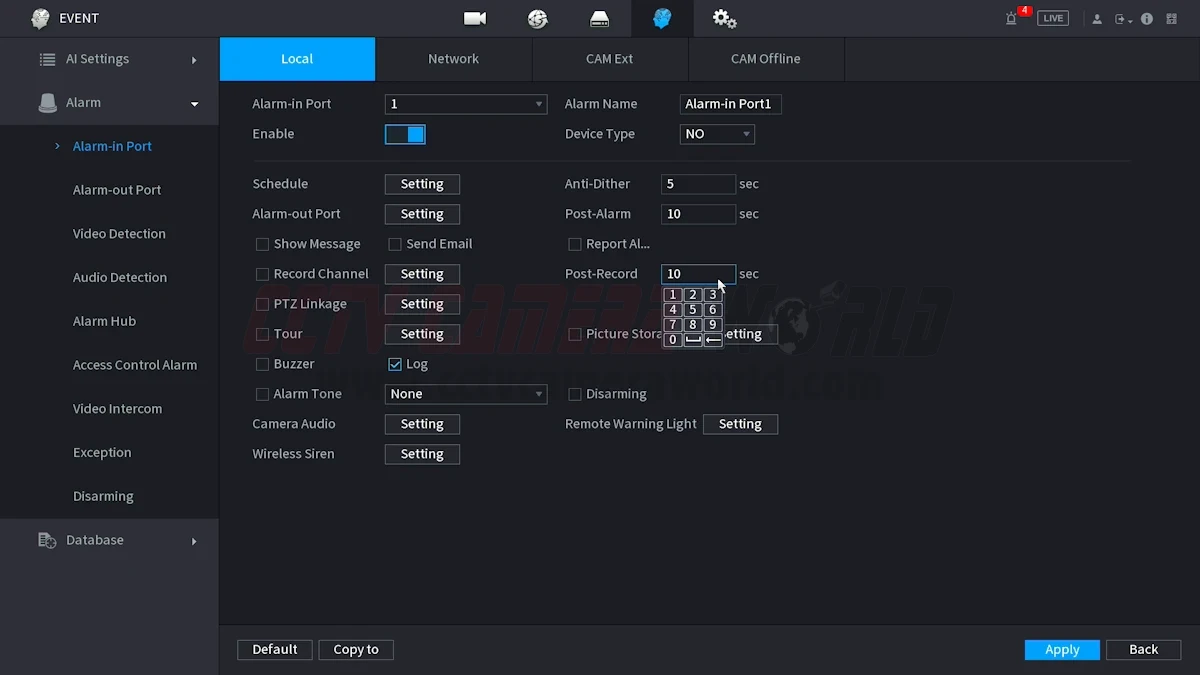
Adjust the Post-Alarm setting to configure how long the relay output should remain active.
Trigger the alarm input and confirm that the external device turns on as expected and for the desired amount of time.

NVR recorders include a built-in playback page in their web interface or through an HDMI output on NVRs. This is the fastest way to confirm that your manual trigger setup is working. If the device has a timeline or event list, filter by “Alarm” to view only the clips you created.
If you use an NVR, take advantage of the search options in the Events or Log menus. Searching by alarm events instead of scrolling through a full timeline makes it much faster to locate the exact moment the trigger was activated.
When exporting footage, add a label or tag in the file name. A date and short description such as “Order #12345 Packaging” can make retrieval much easier later.
For important projects or when clips or snapshots need archiving, export the clip or snapshot to a separate drive or secure network location. This protects your evidence or documentation if the camera’s storage is cleared or overwritten, or the camera itself is damaged.
Some systems support FTP storage, but internet outages, service interruptions, or account issues make it risky for critical operations. Local storage on an NVR hard drive, which is far more reliable for sensitive work.
Touching the positive and ground leads together will cause the alarm to stay active all the time. Double-check your wiring before powering on.
If the switch doesn’t behave as expected, the wiring and software settings for NO (Normally Open) or NC (Normally Closed) may not match. Swap the setting or rewire to correct the behavior.
If you’re using the setup to take video or stills of shipping and industrial processes and the subject is too small in the frame, fine details like text and serial numbers won’t be readable. Move the camera closer or adjust the focal length if you’re using a motorized zoom or PTZ camera.
In busy environments, cheap switches can fail quickly. Use industrial-rated switches for reliability and longer service life.
If the post-trigger duration is too short, you may miss part of the event. Test and adjust until it consistently captures the full action.
