

What is SMD (Smart Motion Detection)?

Security cameras have evolved significantly from the days of grainy footage capturing thieves at gas stations and department stores. Back in those days, motion was primarily detected through independent motion sensors within the store, which transmitted analog signals to an alarm panel. But as computers and software got better over the years, digital video recorders started to include the ability to detect motion directly from the video feed by looking for changes in pixels that set off alarms.
Despite revolutionizing and automating surveillance for many years, video-based motion detection has consistently grappled with the issue of false alerts. Due to its basic method of detecting pixel changes in video, almost anything moving within the camera's field of view—from leaves, insects, and small animals to shifting shadows from clouds—could activate motion detection alerts and recording. Although video-based detection usually offers the ability to tweak sensitivity and threshold settings, fine-tuning may not be enough.
Fortunately, if you find yourself frustrated by a constant barrage of unnecessary alerts and recordings of insignificant motion events, there is good news. Some smart security cameras from CCTV Camera World now feature Smart Motion Detection (SMD), a technology that significantly reduces false alerts. SMD leverages the latest advancements in edge-based video analytics to accurately identify the presence of humans or vehicles in the footage. This enhanced precision in detection results in fewer false motion alerts, sparing you from annoying alerts of no significance and recordings of irrelevant activity.
Don't forget to checkout the cameras that offer Smart Motion Detection. You can click on them below.
-
-
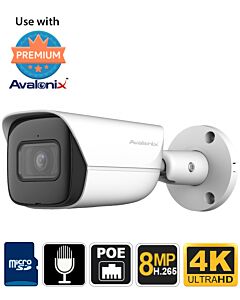
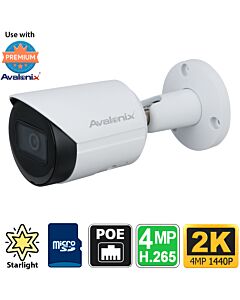
 Ultimate 4K IP Camera Dome H.265, Starlight 4K, Smart Motion DetectionSKU: IPC4K19D$299.99 $499.99 40% off
 -
-
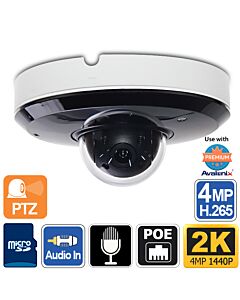 2K 4MP Mini PTZ PoE Camera with Night Vision and Built-in MicrophoneSKU: IPSDIR3X4M$389.99 $479.99 19% off
 -
-
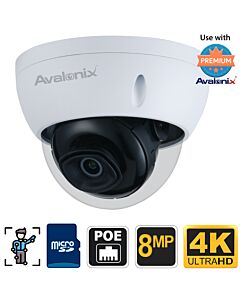
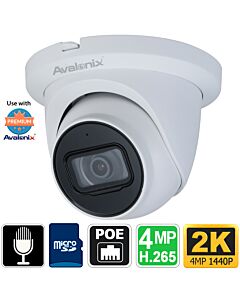 2K Turret Dome IP PoE Camera, Microphone, Starlight, Smart Motion DetectionSKU: IPD404VPA$166.99 $269.99 38% off
 -
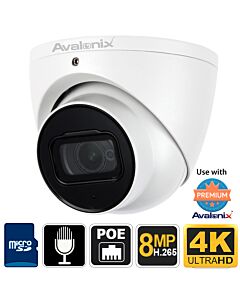
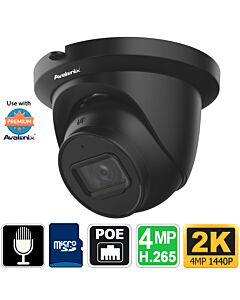 Black Turret PoE Camera with Mic, 2K 4MP, Starlight Video, SMD, AI Video DetectionSKU: IPD404VPABL$166.99 $269.99 38% off
Contents
What is SMD?

Smart Motion Detection, or SMD, is a surveillance method that uses AI-powered algorithms to carefully analyze video to find objects that look like people or cars. This state-of-the-art technique substantially cuts down on false alerts and unnecessary recording, bolstering the efficiency and dependability of your security setup.
Enhanced accuracy from this advanced technology translates to greater peace of mind and a more satisfying experience with the investment you've made in safeguarding your property. However, it’s worth noting that SMD is not perfect when it comes to filtering large animals, but it has completely eliminated false alerts from shadows and changes in lighting.
Types of Smart Motion Detection
Throughout the development of Smart Motion Detection technology, there have been remarkable advancements that have significantly improved its accuracy and efficiency. From SMD+ to the cutting-edge SMD 4.0, each iteration brings forth a wave of innovations aimed at mitigating false alerts and enhancing the precision of human and vehicle detection. In this overview, we delve into the unique features, capabilities, and strides made by each version of Smart Motion Detection, illustrating how they contribute to a more secure and reliable surveillance experience.
SMD+
Smart Motion Detection Plus, abbreviated as SMD+, offers a robust solution to the frustrating inaccuracies of plain video motion detection. SMD+ is very good at filtering out motion from the usual false triggers, such as shadows and leaves. This technology results in a staggering 98% detection accuracy for humans and vehicles. Potential false alerts with SMD+ are as low as 2% for small dogs or cats and up to 10% for larger animals such as deer, cows, or horses.
SMD 3.0
SMD 3.0 emerges as a substantial upgrade, boasting a remarkable 99% detection accuracy. It significantly improves the false detection rate for small animals, bringing it down to just above 1%, and for larger animals, reducing it to a commendable 5% or less.
SMD 4.0
SMD 4.0 takes the technology to new heights, refining the process to further minimize false detections caused by animals. Small animals have a negligible false detection rate of about 0.5%, and the false detection rate of larger animals is significantly reduced to approximately 2%. SMD 4.0 is a testament to the pursuit of perfection in motion detection technology.
How to Set Up Smart Motion Detection
Setting up Smart Motion Detection depends on the specific type and model of your security camera and NVR system. If your system includes an NVR and your camera is connected to your NVR, you can configure Smart Motion Detection via the NVR—whether it's connected to a TV or you access the NVR’s web interface. Regardless of the method, enabling and setting up SMD is a straightforward and user-friendly process.
Before you begin, it’s important to be aware that enabling Smart Motion Detection means you must disable the Smart Plan and IVS rules like digital tripwire, intrusion detection, or people counting. Also, it should go without saying that the camera and NVR you’re attempting to enable SMD on must have the feature for it to be enabled.
Enabling Smart Motion Detection in a Security Camera System
In a PoE security camera system that has an Avalonix Premium NVR (Network Video Recorder), you have two options for activating Smart Motion Detection. You can either use a computer monitor/TV along with a USB mouse or opt for a PC and navigate through the web interface. Both methods are viable and cater to different preferences and levels of expertise.
Using a monitor or TV
The easier method for our users who aren’t tech savvy is to manage the NVR connected to their HDTV or a computer monitor using a USB mouse.

- Access the main menu by right-clicking on the screen.
- Log in as the admin user, utilizing the graphical user password. Alternatively, click on "Switch User" if you prefer typing in your credentials.
- Navigate to "AI" from the main menu.
- On the AI page, select "Parameters" from the menu on the left-hand side.
- Choose the "SMD" option within the Parameters submenu.
- Identify and select the channel (e.g., "D1," "D2," etc.) for which you wish to activate SMD.
- Click on the "Enable" button to turn on SMD, ensuring it turns blue to indicate activation.
- Specify your "Effective Targets," choosing whether the camera should detect Humans, Motor Vehicles, or both.
- Adjust the "Sensitivity" settings according to your preference:
- Choose "Low" for shorter detection distances and minimized false alerts.
- Opt for "Medium" for a balanced approach between detection range and alert accuracy.
- Select "High" to maximize the detection range, albeit with a potential increase in false alerts.
- Lastly, at the bottom of the SMD page, you'll find options for scheduling and alert settings. Here, you can tailor the system to trigger specific actions when an SMD event is detected on the chosen channel.
- Be sure to click the Apply button at the bottom right-hand side to save your changes.
Using the NVR web interface
For our more technical users, the web interface is a convenient and powerful way to manage their NVR from any computer in their local computer network.

- To begin, open your preferred web browser and type in your NVR’s IP address in the address bar.
- If the IP address of your NVR is unknown to you, you can find guidance in our “Using the ConfigTool Software” tutorial. Alternatively, access the Network TCP/IP settings page directly from your NVR after logging into the mouse and monitor interface.
- Input your NVR’s username and password, then click the login button or press Enter on your keyboard.
- The NVR’s default login credentials are located on a label attached to the top of the device. If you have changed the password from the default, make sure to enter your custom password instead.
- Navigate to the AI section in the main menu.
- Select the Parameters menu found on the left side of the AI page.
- Choose the SMD option in the Parameters submenu.
- Ensure the SMD Enable checkbox is selected and displays a blue checkmark.
- Determine your "Effective Targets," deciding whether the camera should detect Humans, Motor Vehicles, or both.
- Adjust the "Sensitivity" settings to your preference:
- Select "Low" for shorter detection distances and fewer false alerts.
- Choose "Medium" for a balanced compromise between detection range and alert accuracy.
- Opt for "High" to extend the detection range, though this may result in more false alerts.
- Finally, at the bottom of the SMD page, you will find scheduling and alert setting options. Configure these settings to define the actions that should be triggered when an SMD event is detected on the selected channel.
- To save your changes, click the OK button located at the bottom right of the AI page.
Reviewing Smart Motion Detection events with Quick Search
Once Smart Motion Detection is enabled on your Avalonix Premium Series camera and NVR, the real power shows up during playback. Instead of scrubbing through hours of 24-7 recording, you can use the NVR’s Smart Motion Detection tools to filter by people or vehicles and even draw a box over a single parking space to see exactly who crossed that line. The video below demonstrates how we use an Avalonix AI PTZ and an NVR416PAI to review SMD events in a busy parking lot outside our own warehouse.

View transcript: Smart Motion Detection Quick Search demo
0:00 In this video I show what Smart Motion Detection, or SMD, looks like in the real world using an Avalonix Premium Series system. SMD is available on specific Avalonix Premium Series cameras and NVRs, and the advantage is that you can filter motion events based on human or vehicle shapes instead of any pixel change.
0:25 On our Smart Motion Detection blog page at CCTV Camera World we explain the technology in detail and list cameras that support SMD. To get the same results you see in this demo, you must pair an Avalonix Premium Series SMD capable camera with an Avalonix Premium Series SMD capable NVR. If you mix non SMD hardware in, you will not get the same AI search tools.
0:50 For this demonstration I am using an Avalonix AI PTZ camera mounted outside our warehouse and aimed at our front parking lot. The camera is connected to an NVR416PAI, which is an AI capable Avalonix Premium Series NVR.
1:10 I log into the NVR’s web interface and go to Live View. There are no plugins required, and I can pull up the camera, switch to the main stream, and watch a busy parking lot with a mix of people and vehicles moving through the scene.
1:30 Next I go to Playback and choose the channel and day I want to review. The green blocks on the timeline represent general 24-7 recorded video, which is a lot of footage to scrub through if you are searching for a specific event.
1:55 To avoid scrubbing through all that footage, I use the Quick Search feature. I double click to expand the video and then open Quick Search, which lets me tell the NVR to look only for human or motor vehicle events within that day’s recording.
2:15 When I choose Human as the target, the NVR analyzes the existing recording and filters the timeline. The long green bar is reduced down to a few blue segments that mark times when people were detected in the scene. As the cursor moves across the timeline, it automatically jumps from one human event to the next.
2:45 I can do the same thing for vehicles. By switching the target type from Human to Motor Vehicle, the NVR highlights all of the video segments where vehicles were detected in the field of view. Because this is a busy parking lot, there are a lot of vehicle events, but the system still separates them from general motion.
3:10 You will notice that the camera can even pick up people walking at the edges of the frame as long as they are large enough and clearly visible. The AI is looking for a recognizable human or vehicle form; if the subject is too small or cut off, it may not classify it.
3:30 Now imagine a scenario where you come out and find that someone hit your car while it was parked. You know the approximate parking spot, but not when it happened. Instead of guessing and scrubbing through the entire day, you can let SMD do the work.
3:45 I close the Quick Search filter and use the Draw Rule option to draw a tight rectangle over the parking space I care about. This tells the NVR to only look for events where a vehicle entered or passed through that exact area.
4:05 After drawing the box, I click Search. The NVR now filters the entire 24 hours of recording down to just a handful of orange segments. Each orange segment corresponds to a clip where a vehicle crossed into or through the rectangular region I drew.
4:25 By clicking through those clips, I can see each car that pulled into that parking spot, crossed the boundary, or exited. Instead of watching a full day of video, I only need to review a couple of short clips to find the vehicle of interest.
4:45 This kind of Smart Motion Detection review dramatically reduces the time it takes to find important motion events in a specific area, as long as the camera has a clear view and the AI can recognize a full human or vehicle shape in the frame.
5:05 In this demo I am logged in through the NVR web interface on the local network, which is the fastest and most responsive way to use these tools. You can walk up to the NVR and do a similar search directly from the recorder itself.
5:25 If you want to run these SMD searches remotely over the internet, you may need to set up port forwarding so you can reach the NVR’s web interface from outside your network. The current PC and Mac software do not support this exact Quick Search workflow yet, so the web interface or local NVR interface are the best options.
5:45 Smart Motion Detection is a powerful way to turn 24-7 recording into searchable video. When you combine an Avalonix Premium Series SMD capable camera with an Avalonix Premium Series SMD NVR and use tools like Quick Search and drawn rules, you can find people and vehicles in seconds instead of hours.
If you prefer written steps, here is a quick checklist of how to use Quick Search with Smart Motion Detection:
Steps to review Smart Motion Detection events with Quick Search
- Log in to your Avalonix Premium Series NVR (such as the NVR416PAI) through the web interface using its IP address, admin username, and password.
- Click on the Playback menu and select the channel that has Smart Motion Detection enabled, then choose the date you want to review.
- Confirm that you can see the full 24-7 recording on the timeline (usually displayed as a solid green bar for continuous recording).
- Double click the channel window if needed to expand it, then open the Quick Search or Smart Search option in the playback interface.
- Choose the target type you want to review, for example Human to see only people, or Motor Vehicle to see only vehicles.
- Click Search to let the NVR analyze the existing recording and filter the timeline down to only the clips that match your chosen target type.
- Watch how the long green timeline is reduced to shorter color coded segments, then click on those segments to jump directly between Smart Motion Detection events.
- If you want to focus on a specific area, such as a single parking spot, select the Draw Rule option and draw a rectangle over the region of interest in the video.
- Click Search again to filter the entire day down to only the clips where a human or vehicle entered or crossed that rectangle.
- Review the resulting clips to find the exact moment a person or vehicle entered the area, hit a parked car, or crossed your custom boundary.
- Repeat the process with different target types or drawing rules as needed to quickly review Smart Motion Detection events without scrubbing through hours of footage.