

How To Connect Wireless Cameras To Your PoE NVR
Wireless security camera systems involve more setup and configuration than hard-wired camera systems. CCTV Camera World's wired camera systems incorporate plug and play technology, making connection a breeze. However, for applications where running cable isn't possible, we have secure wireless systems that will save you the hassle of running cable.
Keep in mind, like any security camera application, wireless systems have their limits. We often have customers contacting us asking for a wireless camera to add onto their system or inquire about a complete wireless system. Members of the CCTV Camera World support team are proactive in explaining that an improper wireless setup will give unreliable or even non-existent video transmission. It is also our duty to inform customers that a 110V AC power source is necessary at the desired location of the wireless cameras since the cameras are continuously on.
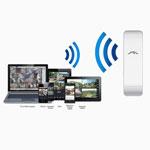
CCTV Camera World offers 4 Channel wireless systems that work great for small, single-story homes. With these systems, both the NVR and IP cameras have WiFi access points built into them. For long range wireless video transmission, you will need to use stronger wireless radios that are added on to the NVR and IP cameras separately. This setup will provide transmission up to 1000ft barring a clear line of sight, with less distance if there are obstructions.
In the description below, we will show you how to configure a Point to Point long range wireless link. We will be taking a normal hard-wired IP security camera (without a built-in access point) and connecting it to an external access point. We will do the same with an NVR, connecting an external access point to the back of the NVR. The access points in this scenario are already pre-configured, and the two radios will pair with each other automatically once they turn on. Here is a video of the setup as well:

Step 1: IP Camera Setup
- Thread the antenna onto the top of the access point that will be connected to your IP camera.
- Connect a network cable to the access point and snap on the enclosure to keep the network connection protected from water.
- Connect the other end of the network cable from the access point to the PoE side of its power injector.
- Using the LAN port of the power injector, connect to your IP camera with a network cable.
- If you are using a set of passive PoE adapters, connect a power supply to the PoE adapter with a female power jack that's connected to the LAN port of the power injector, and connect the second PoE adapter's male power plug to the IP camera's female power jack. A network cable will bridge the two passive PoE adapters, transmitting video, power, data, and PTZ functions. If you are not using PoE adapters, simply plug a power supply straight into the camera's female power jack.
- Plug the PoE power injector's power cord into a 110V AC wall outlet.
- Plug the camera power supply into a 110V AC wall outlet.
- If all connections were made correctly, the access point will light up.
Step 2: NVR Setup
- Connect a network cable to the PoE side of the power injector that will be used for the access point that's connected to your NVR.
- Connect the other end of the network cable to the PoE side of the access point's power injector.
- Using a network cable, connect the LAN side of the access point's PoE injector to the NVR. You can use either a PoE port or the network port located in the back of the NVR.
- Connect the access point's power chord to a 110V AC wall outlet.
- Power the NVR with the power supply specific to the NVR by connecting its power cord to a 110V AC wall outlet.
Step 3: Viewing Wireless IP Camera Through NVR/DVR
- Connect a monitor and mouse to your NVR.
- If all connections were made correctly, you do not have any obstructions in between the wireless radios, and the access points were pre-configured, then your camera(s) should automatically appear on the NVR.
- On the camera grid screen in the NVR, right click and select "Registration." You should see your IP camera with its IP address and a green light indicating that it's networked properly.
- If your camera has PTZ or motorized zoom functions, you will be able to control your camera remotely through the wireless NVR.
Troubleshooting
If you're confident that your connections are correct and you are still unable to view your camera(s) through your NVR, you may need to follow some additional steps:
- Log into your NVR.
- On Main Menu screen, select "Camera" on the bottom right and then select "Registration".
- Look for your device by selecting the "Device Search" button. Depending on the model of your NVR, this could be successful in finding your device.
- If the "Device Search" didn't work, select "Manual Add." Type in the proper credentials of the IP camera, including IP address, TCP port, user and password, and select "Connect", "Apply", and "OK".