

Port Forwarding ASUS RT-N66U for your NVR Recorder
Port forwarding is essential to viewing your surveillance system remotely. Without redirecting your packets you'll be stuck timing out every time you try to view your feed from a remote network. We try to make this process as simple for our end users as possible. I remember the first time I attempted to forward ports in 2005. It took me a few hours. I had a grasp on the idea, but not the concepts behind it, nor did I fully understand networking at the time. So, I sympathize with you attempting to do this on your own. Therefore, I'm making another port forwarding article in order to help anyone with this device view their cameras feed remotely.
This router is one that we recommend for our IP systems. It has a strong processor and is capable of the bandwidth needed to transmit high-quality video. It'll even handle wireless applications well. If you've already read Port Forwarding for your Security DVR and NVR then you already have the information needed from your DVR/NVR. Let's get started.
Configuring the Router
Step 1: Access Your Router
Enter the address of your router into your browsers URL bar. The default address is:
192.168.1.1
You should be prompted for a username and password.

The default username and passwords are listed above.
Step 2: Navigate to Port Forwarding
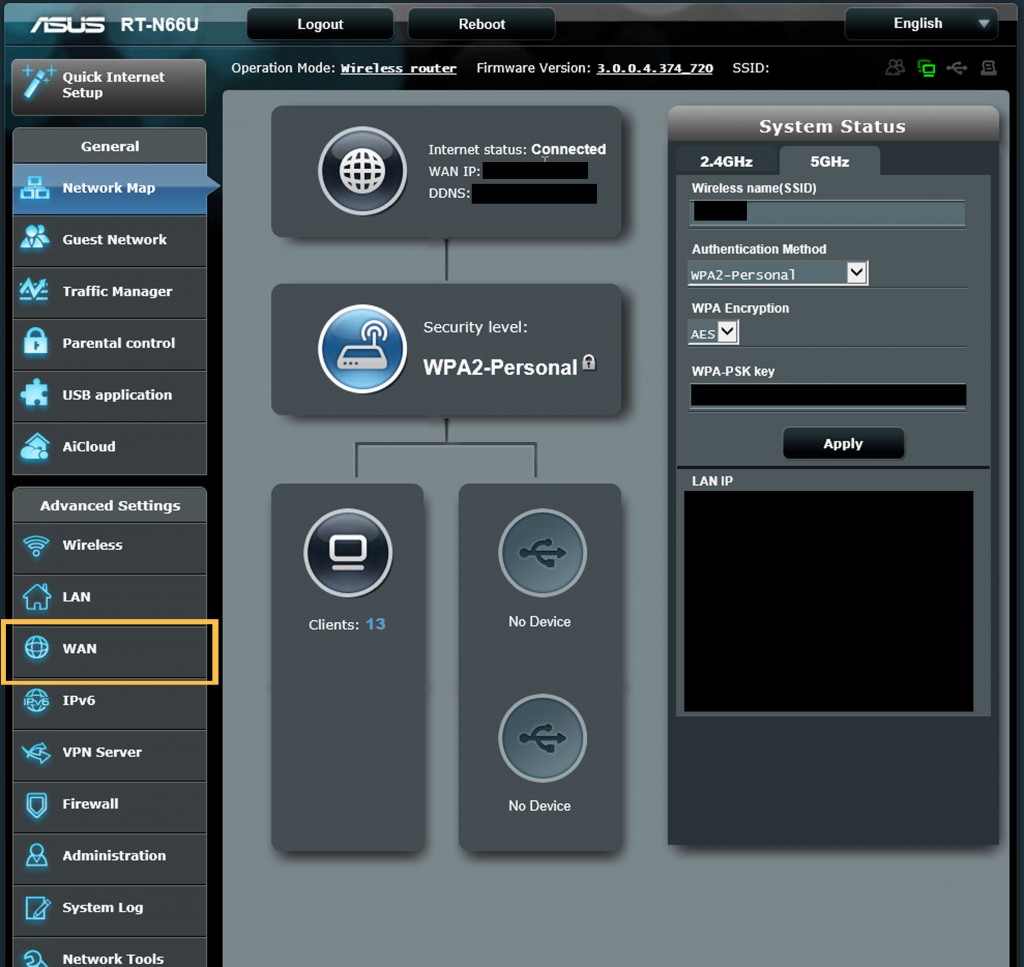
After logging into your router you should be placed at a page that looks like this. Select WAN on the left hand side.
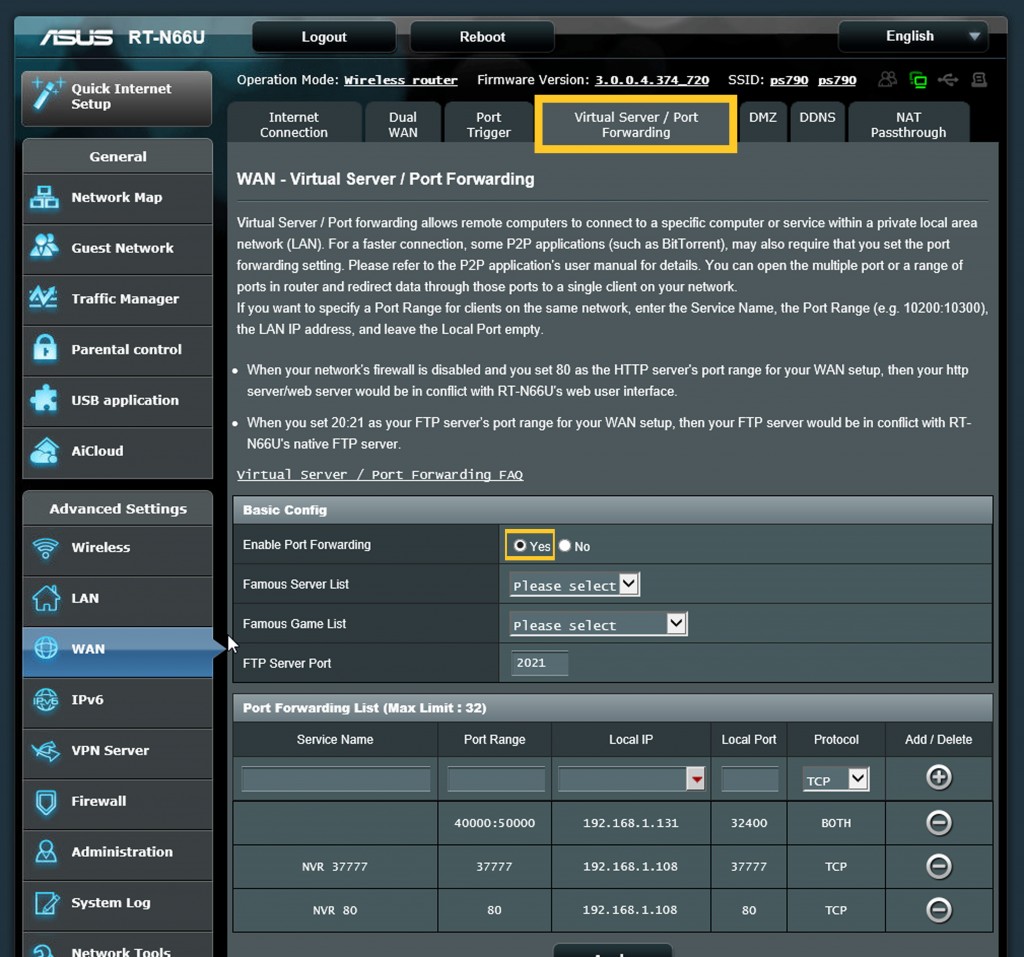
Now select the Virtual Server / Port Forwarding tab on the top. You will be brought to a page like this. Our port forwarding rules are already in place in this image.
Step 3: Create the Rules
Now that we're in the right spot it's time to create our port forwarding rules so the DVR/NVR can send the camera feed to the outside world. Make sure port forwarding is enabled. If it's not enabled and you're able to create rules, they won't take effect.
Here you will create a rule for each of the ports that you want to be opened.
- Start by giving the first rule a meaningful name.
- We chose "NVR 80," signifying the device and the port number.
- Now enter the port number underneath Port Range.
- Then enter the IP address of the NVR/DVR.
- After that enter the port number again.
- Now select the TCP dropdown box.
- Click the + symbol to the right.
- Repeat these steps for each port.
- Click apply.

The fields should look similar to this. The default IP and ports are as follows:
Default IP address: 192.168.1.108
Default Data Port: 37777
Default HTTP Port: 80
The rules are now in place. Let's move on to the next step.
Check Your Work
We want to make sure that we aren't missing something and the router is open on the ports that we created rules for.
- Go to https://www.grc.com/shieldsup
- Click on the button labeled "Proceed"
- Enter the port numbers separated by a comma in the text field
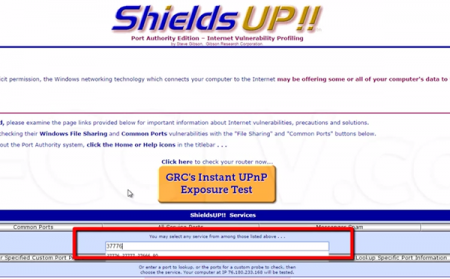
- Click on "User Specified Custom Port Probe"
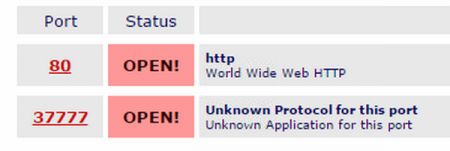
They should display as "OPEN!". If they don't, go back and take a look at the rules. If you still can't figure it out, contact your ISP for support.
In order to view your cameras remotely you'll need to have a constant pointer from the outside world back to your home network. Unless you pay for a static IP address you'll need a way to point to the network when your IP changes after the lease is up. What we use is DDNS. For instructions on configuring DDNS on your own follow this link:
Configuring DDNS for Remote DVR Viewing
If you have finished port forwarding and DDNS and need help accessing your DVR/NVR click HERE for a helpful guide.