

How To Record Pictures and Snapshots on a Security Camera

Security camera systems are commonly used to record video as a way to ensure homes, businesses, and properties are protected. Security footage can consume a lot of storage space, especially if you're recording high resolution security cameras such as 8MP 4K security cameras. Rather than storing large video files that take up lots of hard drive space, certain camera applications may only need to record video snapshots, which are still pictures from a live video stream. Many users are unaware of the full recording capabilities of their DVR or NVR, such as the snapshot recording feature. Or it could be that their video recorder doesn't support snapshot recording. Security camera recorders from CCTV Camera World support snapshot capturing of still images along with video capture. All cameras from CCTV Camera World offer the ability to record to a DVR or NVR, but certain security cameras with SD card slot will allow the user to record to a NVR as well as to an internal SD card. Recording to a SD card on the camera in addition to the NVR is a cost effective method of having a backup of recent surveillance footage in case the security video recorder is stolen or damaged. Also, such a setup offers flexibility when configuring different recording methods. For example, one can record video continuously to a DVR or NVR while recording snapshots onto an SD card located inside one of our microSD card capable security cameras.
Setup for recording still picture snapshots to an internal SD card is simple, and detailed instructions are outlined below in eight easy to follow steps. We also have a guide on how to record videos to a SD card that may be of interest.
You will need to access the camera's internal web server to configure the recording settings. If you haven't already done so, you will need to place the camera on your network by assigning it an IP address on your LAN. If you don't know how to do that, please follow our guide on how to connect security cameras to the internet.
Step 1) Connect to the camera using a web browser
You can use Internet Explorer or Chrome to connect to our network security cameras. Please review the following guides for each web browser type to follow steps to install required web plugins that are prerequisite for viewing our network cameras.
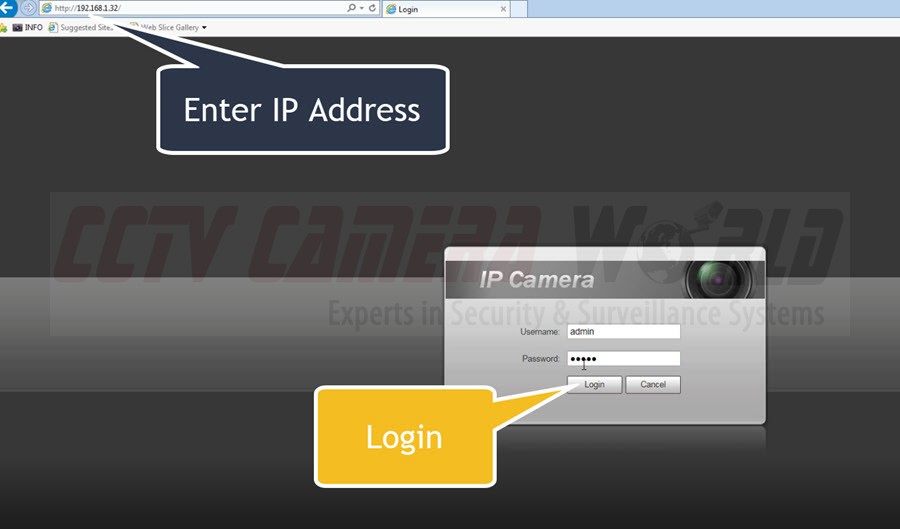
In this guide we will use Internet Explorer (IE) for web based configuration of the IP camera. Type your security camera's IP address into an IE window, and log into your camera's Web Service interface by entering its username and password.
Unless specified on a label located on the camera, the default credentials are:
- Username: admin
- Password: 10iLtxyh
- IP address: 192.168.1.109
Step 2) Configure a snapshot recording schedule
a) After logging into your security camera, you will see the camera's live view screen. Navigate to the top right of the screen and click the "Setting" tab as shown in the image below.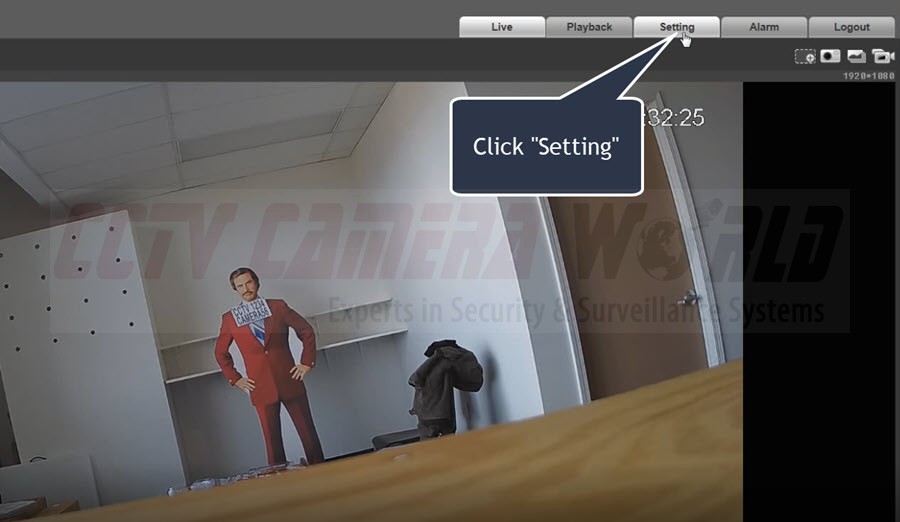
b) On the left side of the screen, find and click the "Storage" option as shown below.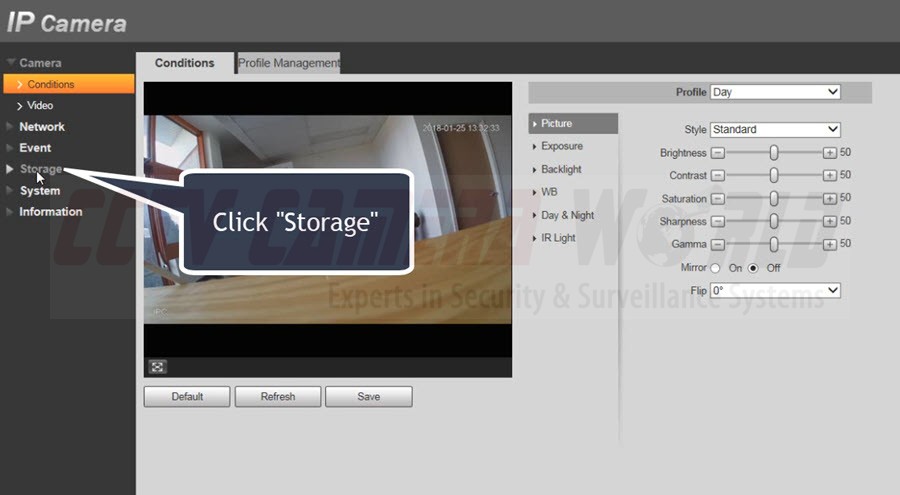
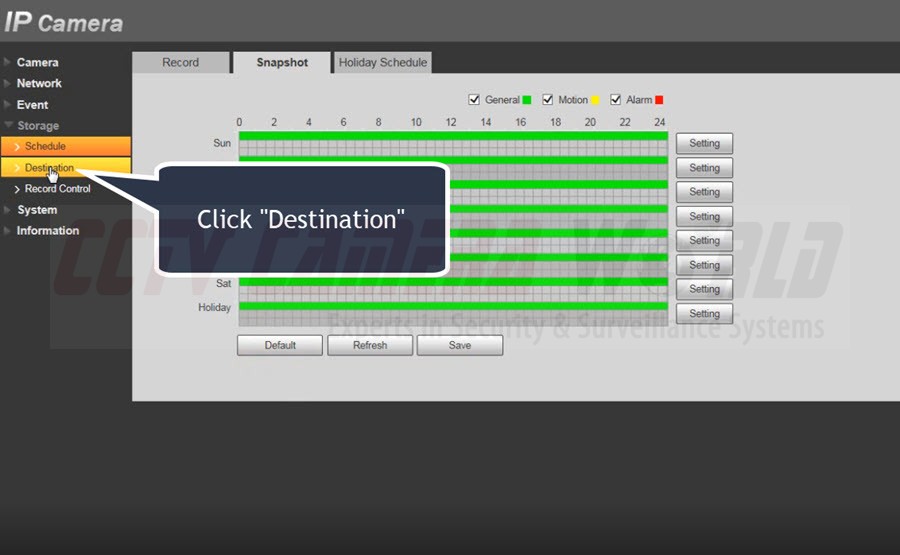
c) Under the Storage option, click "Schedule" to create recording schedules for both video and snapshots.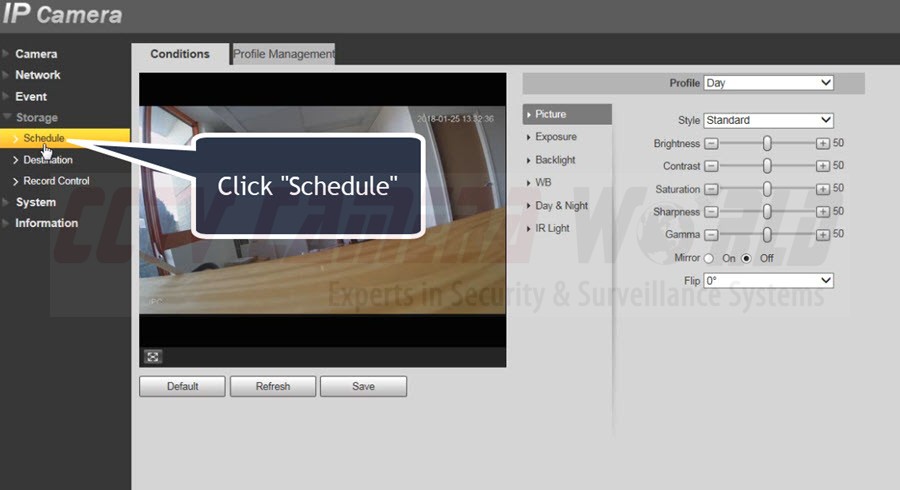
d) Here you'll find the recording schedule options for both "Record" (which is the settings tab for video recording) and a separate tab labeled "Snapshot" (which is the settings tab for still picture recording). As illustrated in the image below, leave the settings under the "Record" tab to be set to Yellow and Red timeline bars, which are for video based Motion Detection and Alarm recording on a 24/7 basis everyday of the week. We are leaving this setting in place in case we want to record video when motion is detected to minimize the amount of storage space consumed.
To configure a schedule for still picture recording, please select the "Snapshot" tab.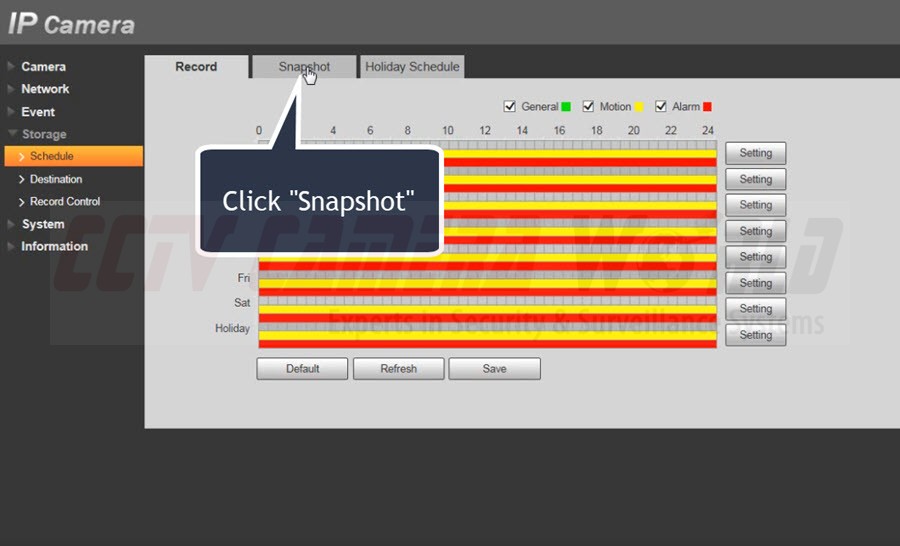
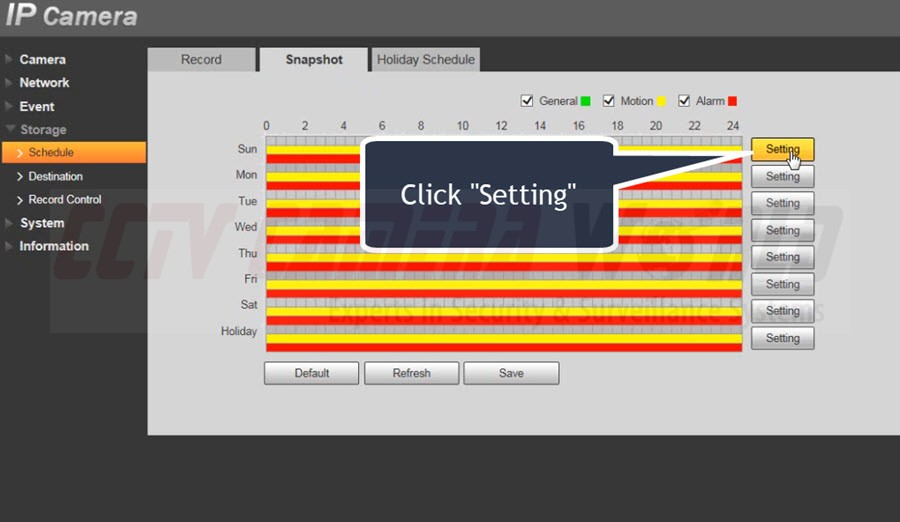
e) Scroll over to the right side of the screen and click the "Setting" tab for the day of the week you'd like to create a recording schedule for.
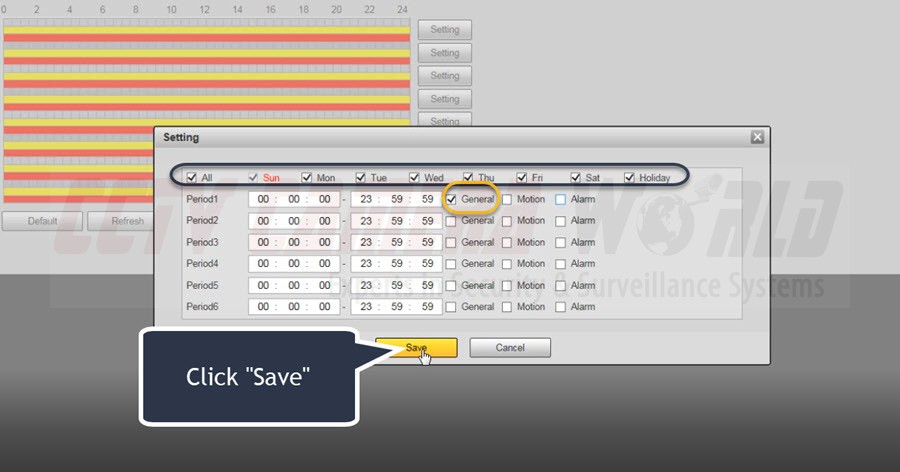
f) You can specify the day of the week for which you want to create a recording schedule by selecting the check boxes next to the corresponding day. As you can see in the image below, the "All" box was checked to configure recording for all days of the week. The "General" check box was selected to record snapshots continuously, and the "Motion" and "Alarm" check boxes were left unselected. You can also create different time periods to record throughout the day. As you can see in the image below, the snapshot recording schedule is set to 24/7.
If you would like to capture snapshots 24/7 daily, then your settings should be the same as pictured below. Click "Save" to ensure your settings are stored.
g) As you can see in the image below, the timelines are now all green to reflect continuous recording daily. Be sure to click "Save" again to store your settings. You have now configured snapshots to record continuously 24/7, and in Step 2d we set video to record daily when a motion or alarm event is detected.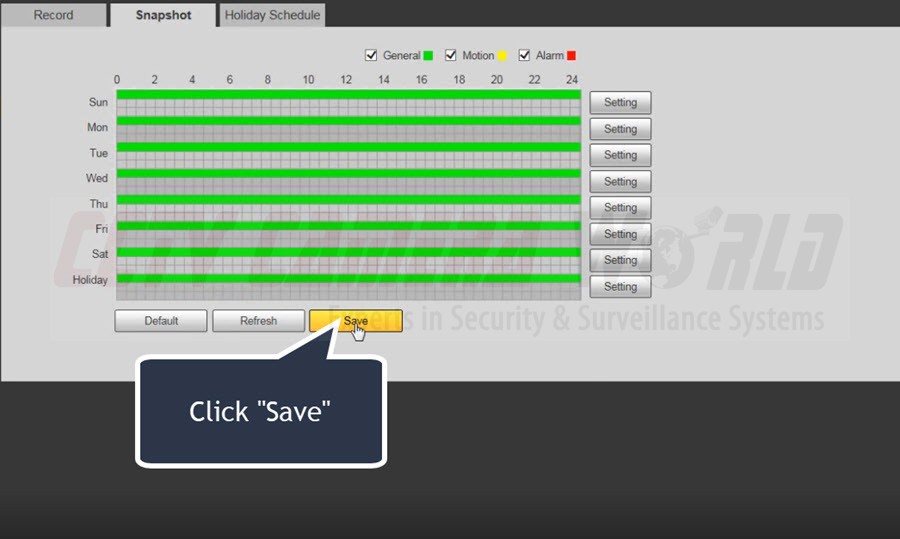
Step 3) Set recording destination
a) Scroll to the left side of the screen and select the "Destination" tab to specify where the video and snapshot recordings will be saved.
b) Here you will find "Record" on the left side of the screen (for recording video), and "Snapshot" on the right side of the screen. In order to record video or snapshots to your SD card, you will need to ensure that the appropriate boxes are checked. Local refers to the microSD card inside the IP security camera, as images are being recorded locally to the camera as opposed to a DVR or NVR. Click "Save" to store these settings.

Step 4) Confirm the SD card is recognized by the camera
Next, navigate towards the top of the screen and select the "Local" tab.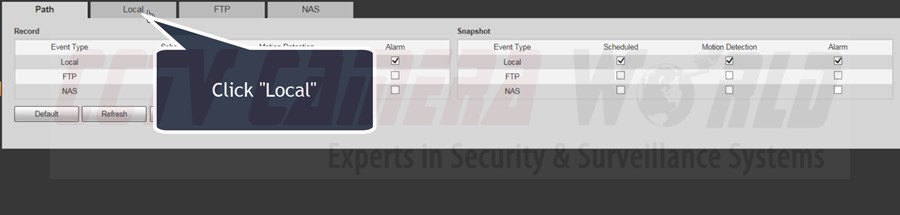
If you have a compatible microSD like a Sandisk card inserted in the camera, this screen shows that the IP camera detects the SD card located inside the camera. Before you start recording video or snapshots to the SD card, it's a good idea to first format the drive. This is done by selecting the SD card and clicking "Format" as shown in the image below.
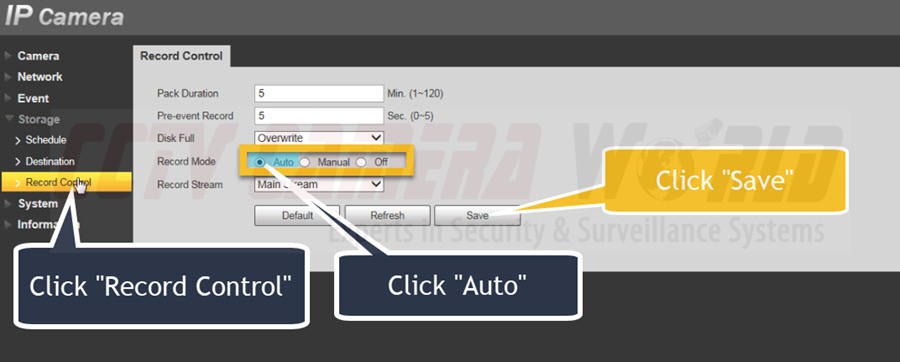
Step 5) Specify the recording method
After formatting your SD card, scroll over to the left side of the screen and select "Record Control". Here you'll be able to specify the recording mode. You want to make sure "Auto" is selected under the Record Mode, as this tells the camera to adhere to the recording schedules that have already been configured. Selecting "Manual" will tell the camera to record both video and snapshots 24/7. Be sure to click "Save" to store these settings.
Step 6) Set snapshot resolution and compression
a) On the left side of the screen, scroll over and click the "Video" tab located under Conditions.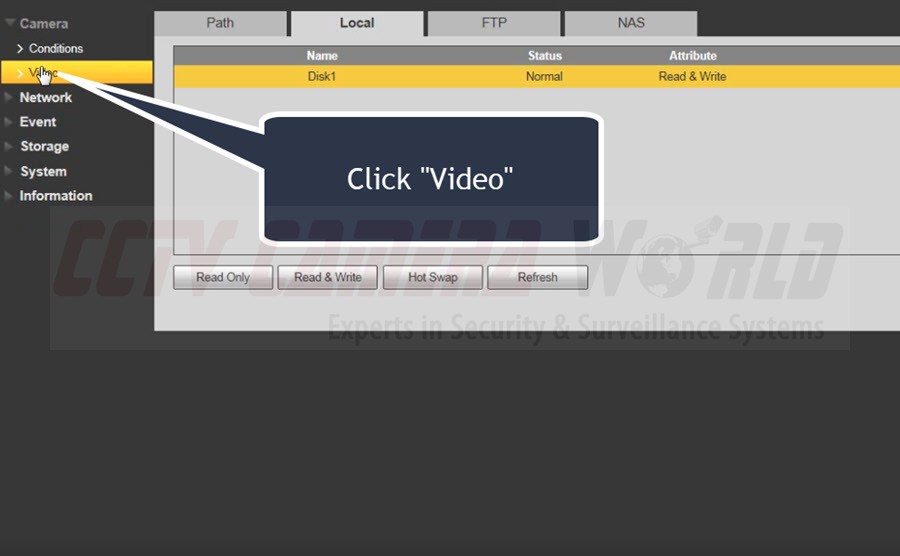
b) Here you will see the video encoding settings for the security camera. The resolution of the saved snapshot is dependent on the Main Stream resolution set in this settings page for camera encoding. In the image below, you can see that the camera's resolution was previously set to 1920x1080p (blue), and is going to be changed to 2304x1296 which is 3 megapixels. After adjusting these parameters to meet your desired picture resolution, click "Save."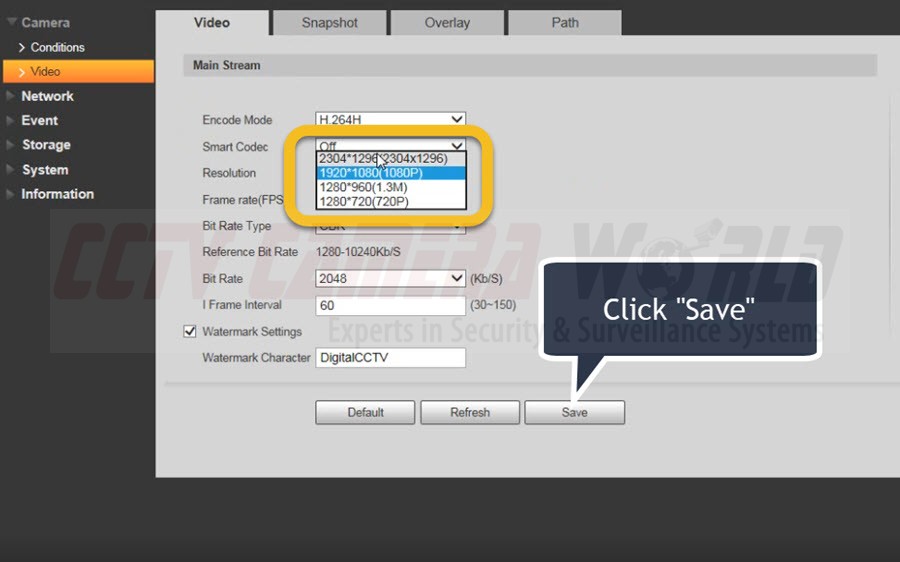
c) Next, click the "Snapshot" tab on the top of the screen.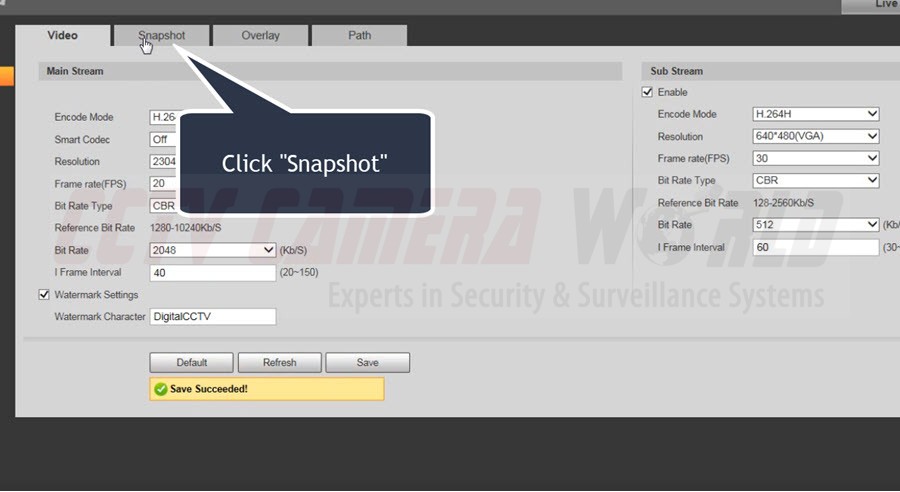
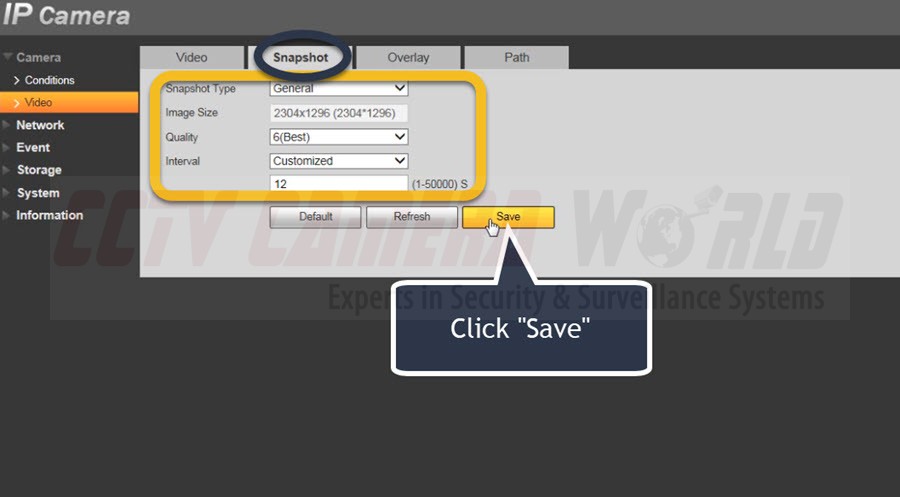
d) In the image below, you see that the snapshot encoding settings reflect the resolution that was altered in the previous step. Image Size now shows a resolution of 2304x1296. You can also change the quality of the snapshot, i.e. the compression of the still jpeg files that will be saved. The Quality parameter below shows "6(Best)." Best means the picture will be compressed the least.
You can also change the interval at which a snapshot is recorded. Here we have an interval of 12, which means that a snapshot will record every 12 seconds. For this particular camera, you can choose an interval between 1 and 50,000 seconds. Be sure to click "Save" to store your settings.
Step 7) Viewing recorded snapshots from your security camera
a) Scroll over to the right side of the screen and click the "Playback" tab to view your recorded snapshots.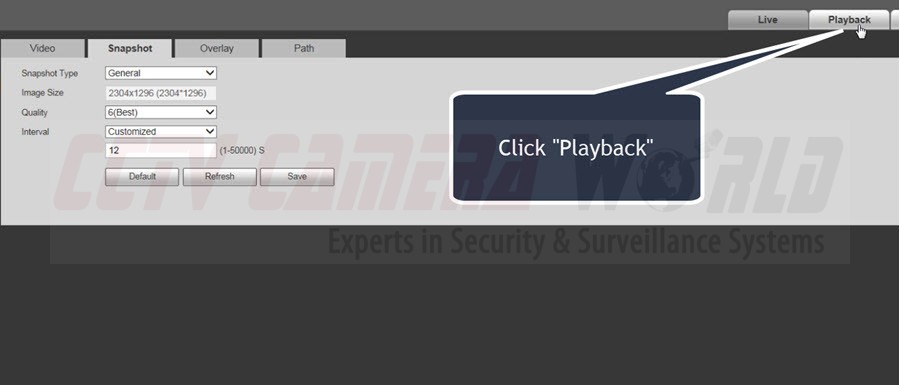
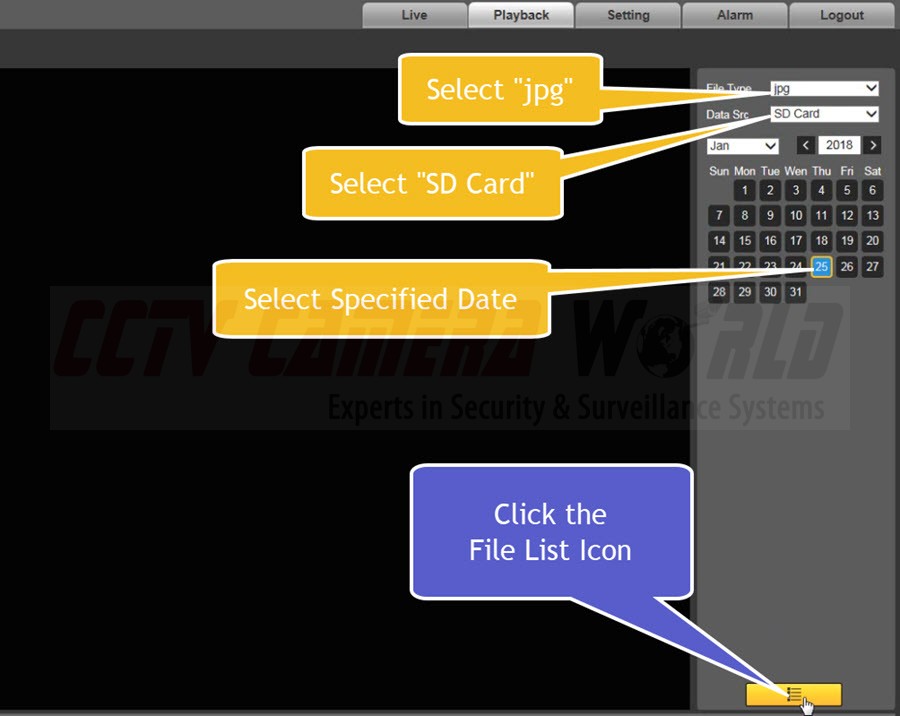
b) Once you're on the Playback screen, first select the File Type to show "jpg" and the Data Src to show "SD Card", and then specify the day from which you want to view recorded snapshots. Click the File List icon on the bottom of the screen for the snapshots from the specified day to appear.
c) As shown in the image below, the snapshots will appear on the right side of the screen. You can select the Down Arrow icon to open the selected snapshot in a new web browser tab.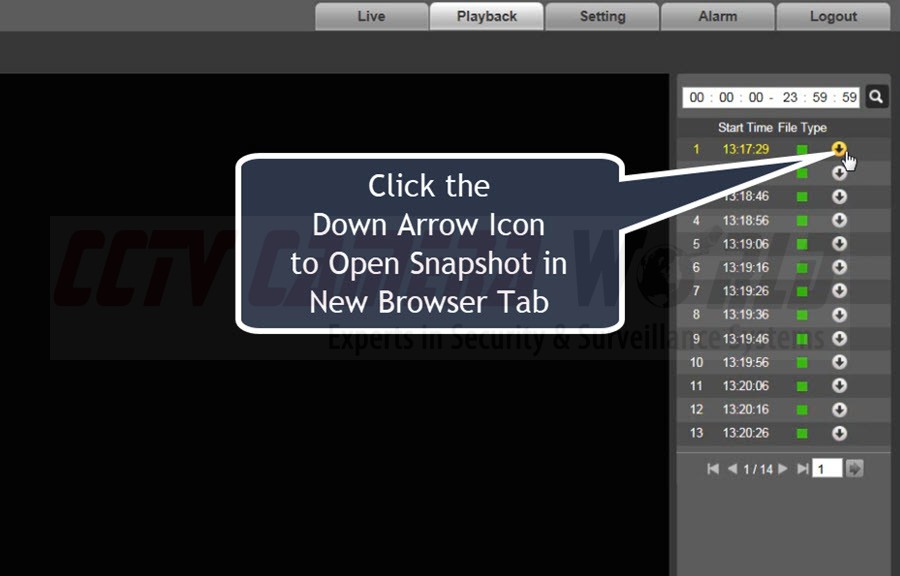
d) The image below shows the recorded snapshot in a new web browser tab.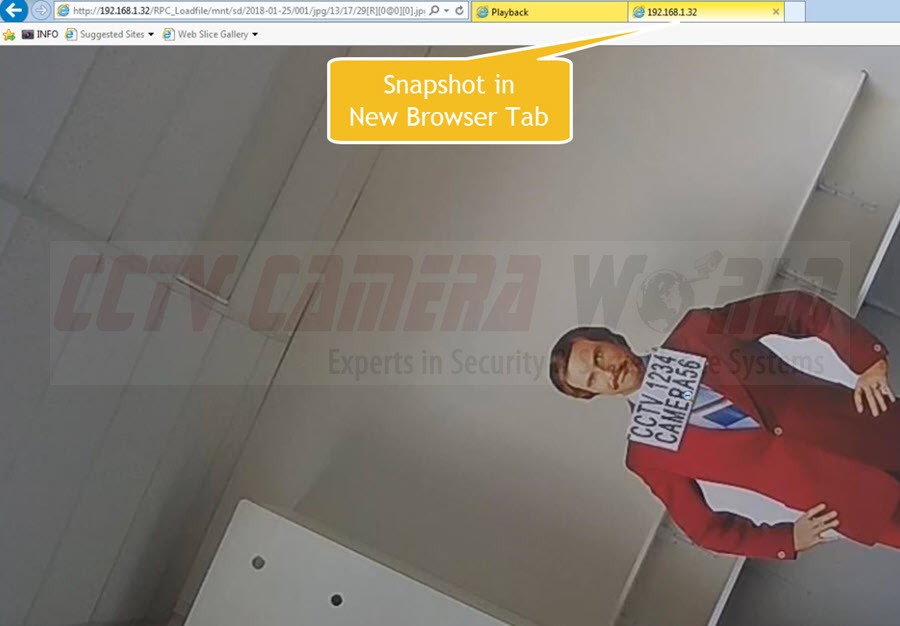
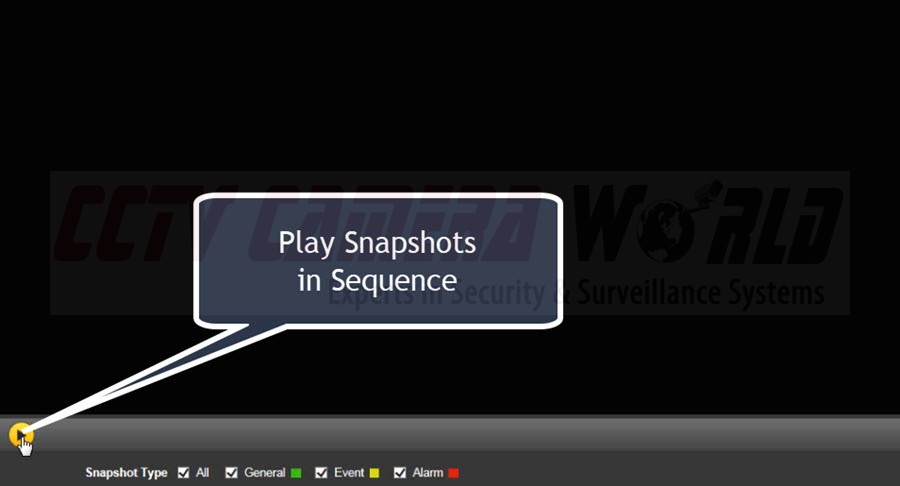
e) After navigating back to the camera's Web Service Playback screen, you can click the Play icon to play the recorded snapshots in sequence.
f) To pause the snapshot playback sequence, simply click the Pause icon in the bottom left side of the screen.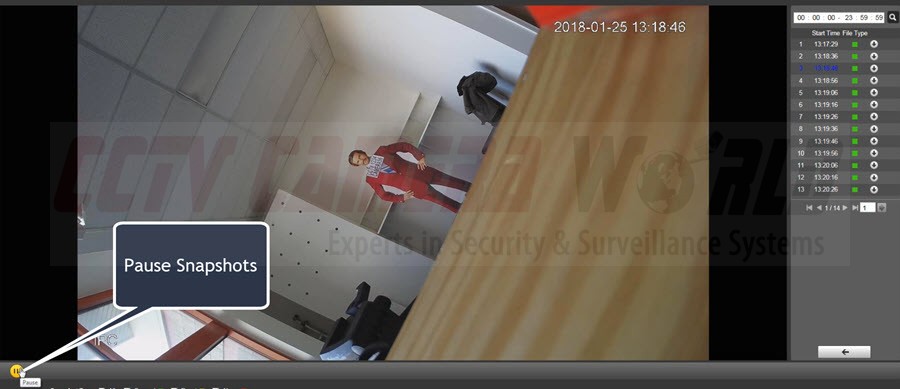
g) To pull up a specific snapshot, simply double click the desired snapshot from the file list, shown in the image below.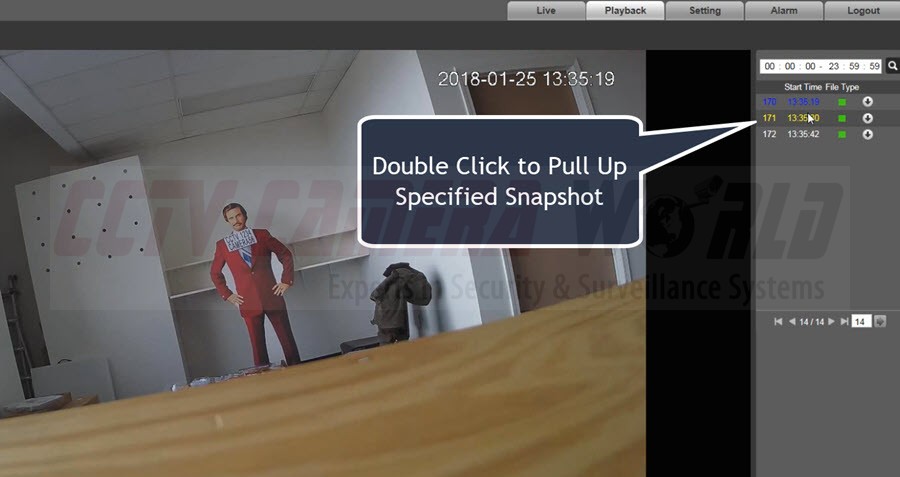
Step 8) Downloading still picture snapshots from your camera
Most security cameras with SD card are mounted in locations where it is difficult to retrieve the internal microSD memory. As shown in Step 7c above, our cameras allow easy viewing of still pictures from the camera using a web browser. You can use the CTRL + S command on your keyboard to save the images from the browser when viewing the still pictures as in Step 7c.
a) If your security camera is in a location where the SD card can be retrieved, then to extract images from the SD card, you will need an appropriate microSD card reader to offload files from the SD card onto your computer. The image below shows how the folder will appear on a Windows PC. Click the Removable Disk drive and you will see a folder labeled "NVR." Double-click the folder labeled "NVR".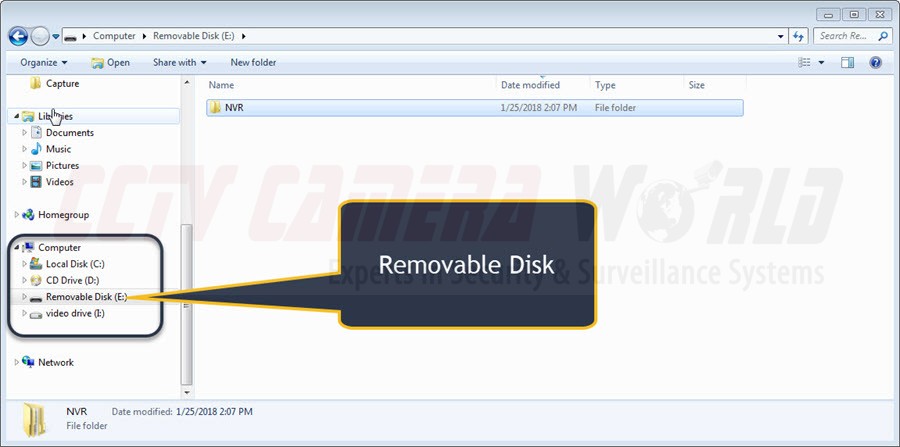
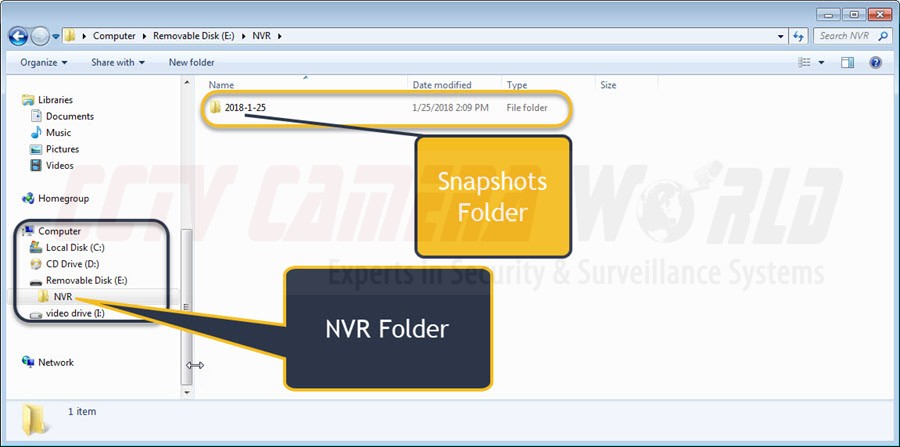
b) After double-clicking the NVR folder, you will see a folder named by the date or dates in which video or snapshots were recorded. In the image below, you see that a folder labeled "2018-1-25" was created. Double-click your folder to view video and snapshots from this date.
c) Here you will find all the recorded snapshots from the date specified in the folder name. Simply double-click a snapshot to view it. 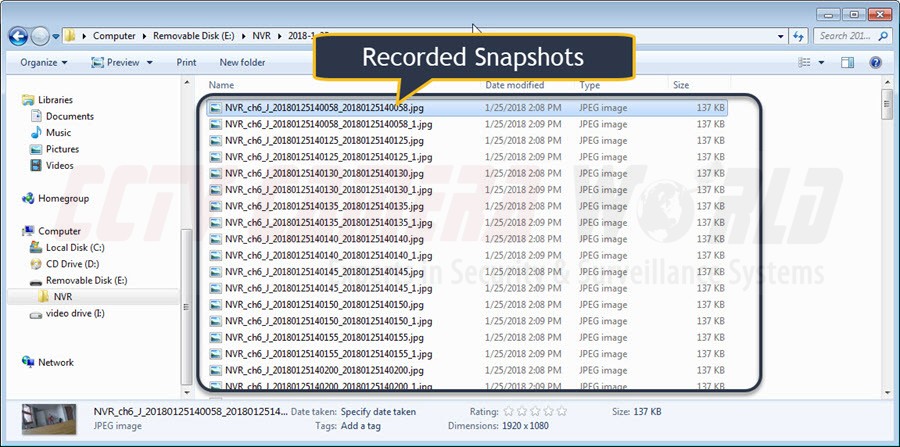
d) Below is an example of a recorded snapshot. Now you are able to move the recorded snapshots onto your computer or another storage device.