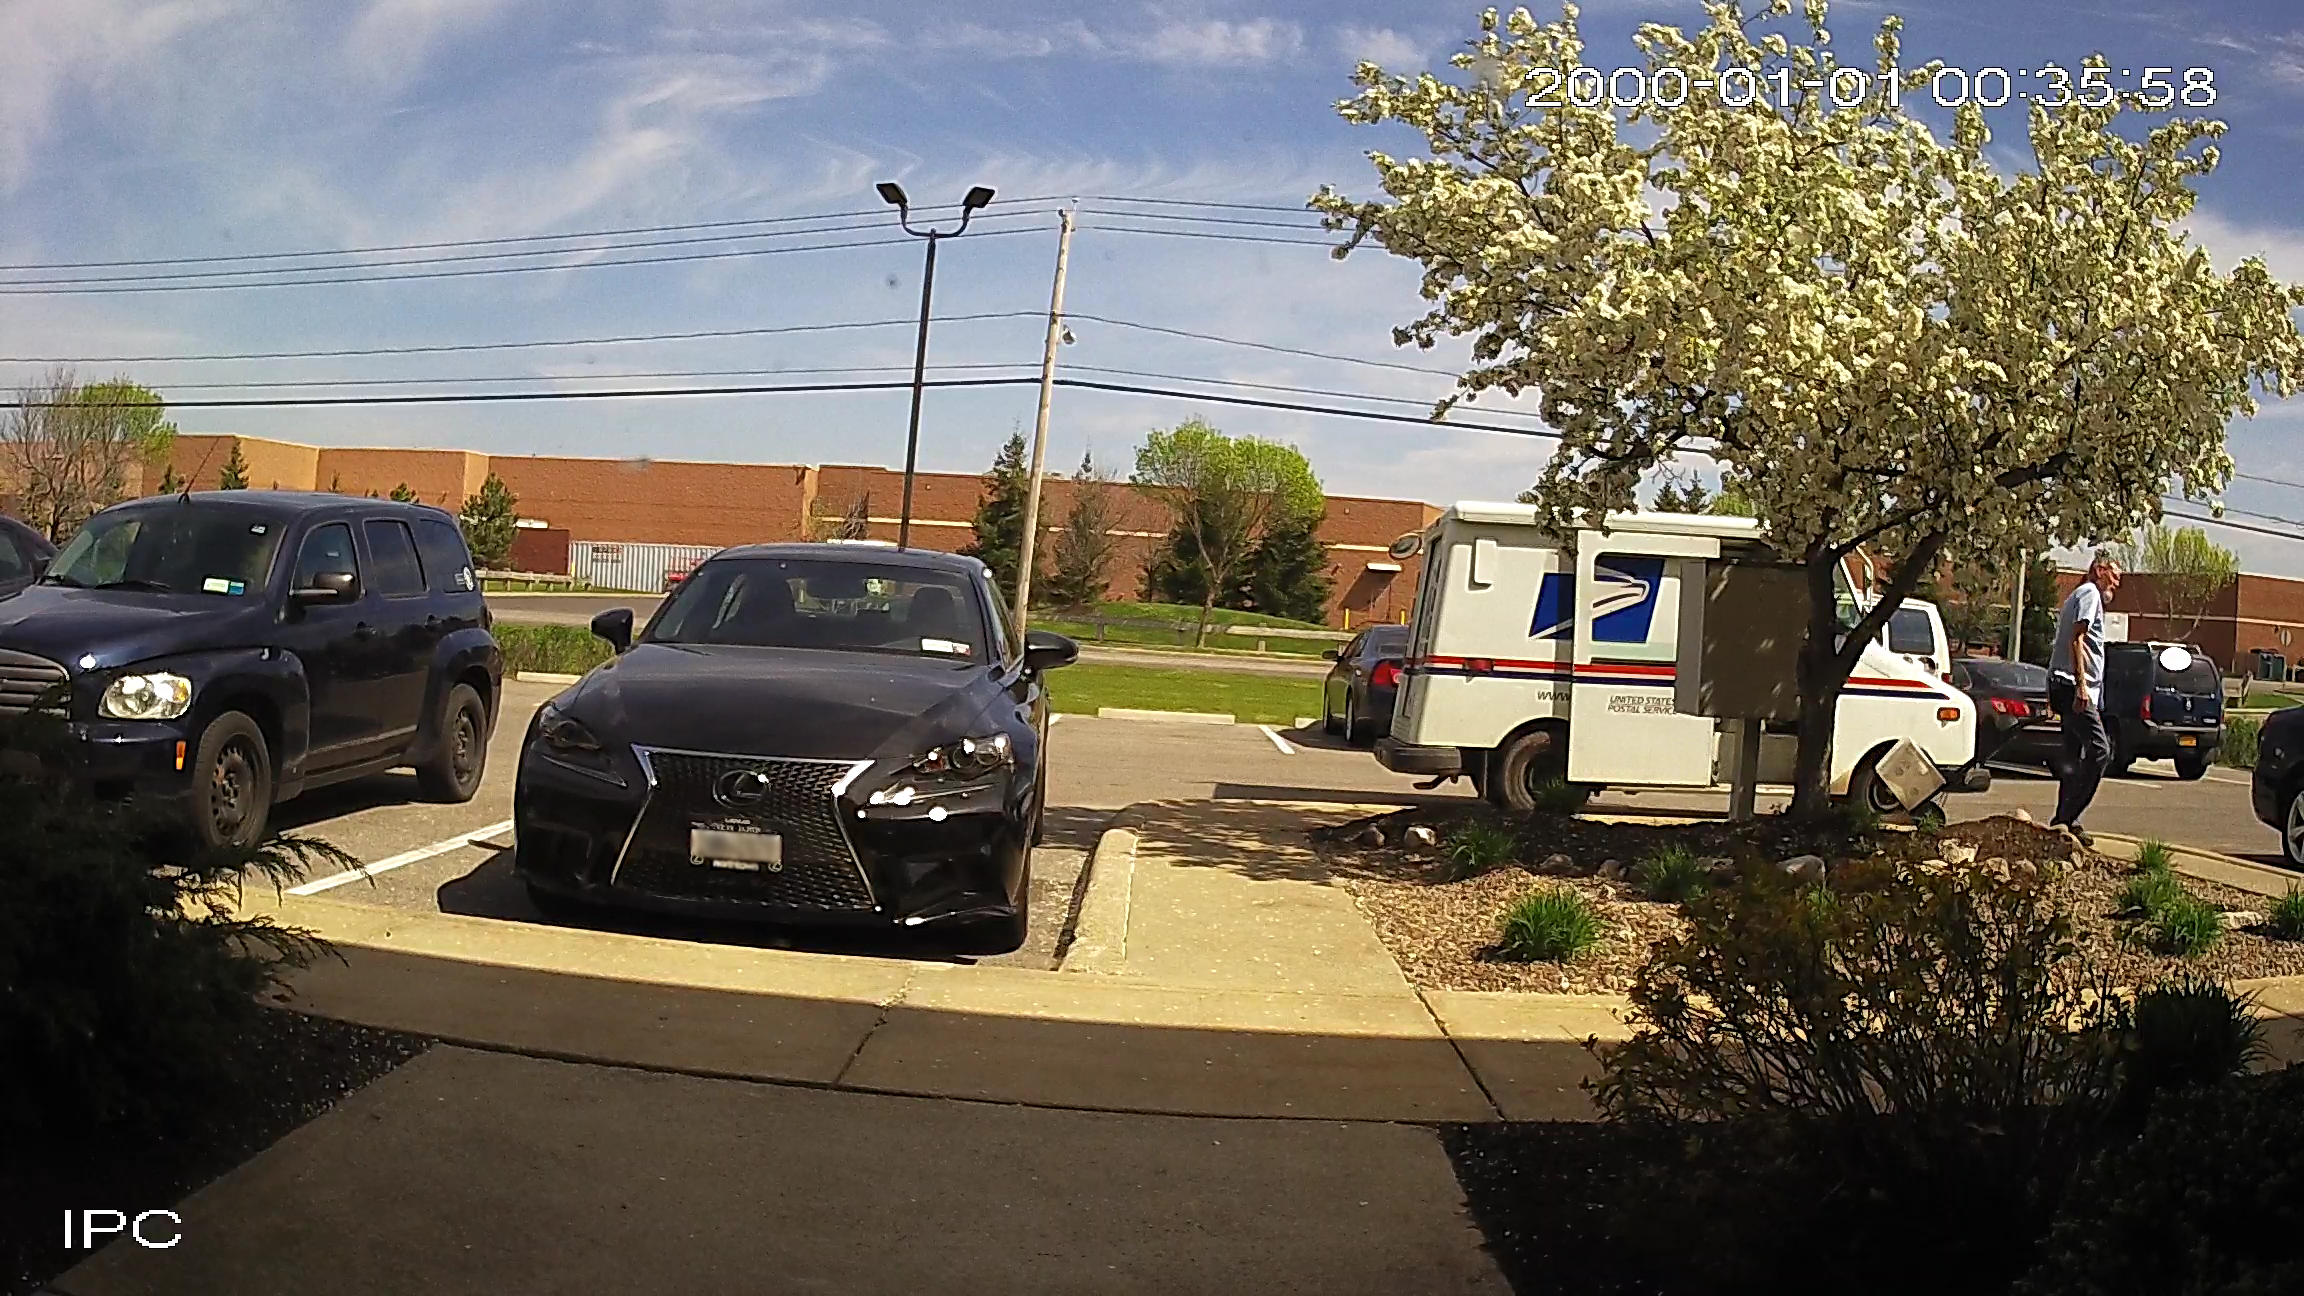
Security Camera Color Night Vision: Setting Day & Night Mode
Sometimes a camera's automatic image settings don't provide satisfactory video for capturing faces or license plates. When this happens you need to manually adjust your image settings to capture what is necessary for prosecution. With day and night time profiles on our security cameras, you can finely tune the image settings to produce vibrant and clear pictures no matter what conditions are present.
Our IP cameras can be set to a schedule for day and night mode, meaning you can control the hours of the day the camera will be in color or black and white mode and optimize their image settings for the time of day.
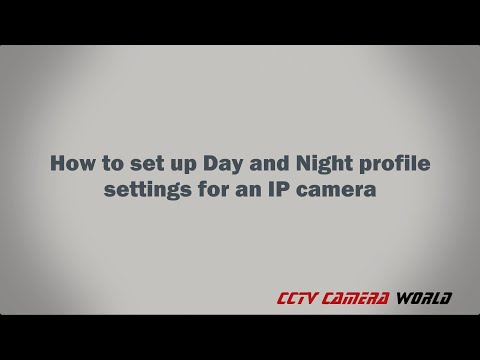
The following video shows how to access an IP camera through an NVR using the web interface. The video briefly explains various image settings and then explains how to set up profiles and schedules for day and night mode.

Note: The written guide below covers how to connect to an IP camera, and may have some more information about profiles. Feel free to supplement the video with the guide below if you need some further explanation. However, it was written in 2016 and may not apply to newer camera models.
Step 1: Connect the Camera to Your Network
If you already know how to pull up the camera's web interface, then skip to Step 3. In order to log into the camera, it must be connected to your local network using a PoE switch. If you don't have a PoE switch then you will need to power the camera using one of the following:
Step 2: Accessing Your IP Camera from the Web
When using the IP camera's built-in web server to access the settings you must use a browser that is compatible with ActiveX. Using Google Chrome, Microsoft Edge, Mozilla Firefox or Safari will not give you access to the camera. You can use Internet Explorer 11. There are a few steps that you'll have to take with the browser in order have the ActiveX controls fully functional. You can follow this guide here: Enabling ActiveX to View Your IP Cameras and DVR Over the Web
If you have your IP camera connected to your NVR directly you can also access the camera's web interface through your NVR without any complicated networking.

Before moving on to on Step 3 make sure your computer is connected to the same network as the IP camera.
Step 3: Configuring the Camera for Scheduled Day/Night Mode
There are a few points to cover for this configuration:
- Default the camera if any settings are already incorrect
- Make sure that the time is set on your camera
- Configure Day/Night schedule
- Configure day settings and night settings
- Test your settings
Let's get started.
1)Open IE11 and enter the address of your camera into the URL bar at the top of the page.

If you're prompted to install plugins please follow the link posted above in step 2 for Enabling ActiveX to View Your IP Cameras and DVR Over the Web.
Enter your credentials and click login.
2) Click on the "Setting" or "Setup" tab in the top right corner of the screen.
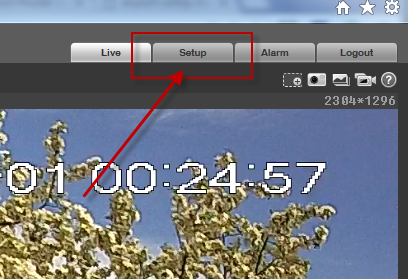
You've now landed in the settings portion of your IP camera's web server. Follow the guides below to configure the camera.
Configuring Date and Time On Your IP Camera
If your time isn't set right, then setting a schedule would be pointless. The camera will be looking to its internal clock to keep its schedule.
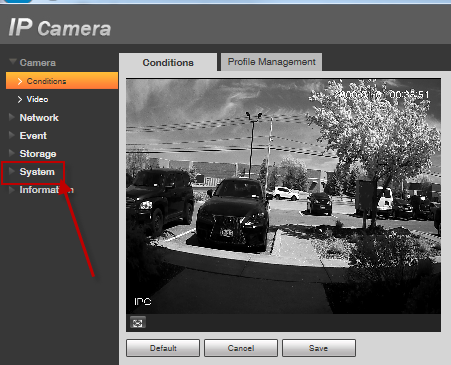
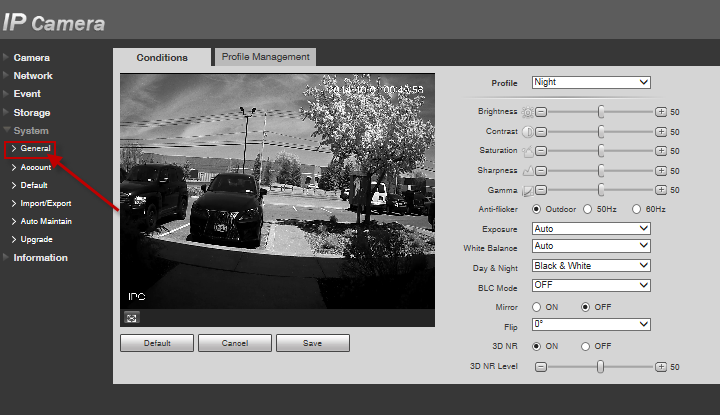
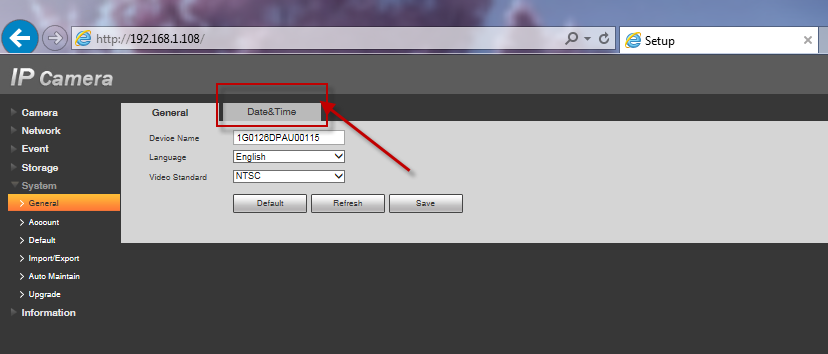
1) Click on the System drop-down on the left side of the screen.
2) Click General under the system drop-down menu.
3) Click on the Date&Time tab in the middle of the screen.
4) Now we've landed in the settings for "Date & Time." Configure the time in the following order:
- Set your time zone - Eastern is GMT -05:00
- Set Daylight Savings Time - Click on DST Enable - then click the Week radio button - follow the second picture below for the days and times that daylight savings starts and ends.
- Click Sync PC - this will sync it's date and time to the current settings
- Click Save
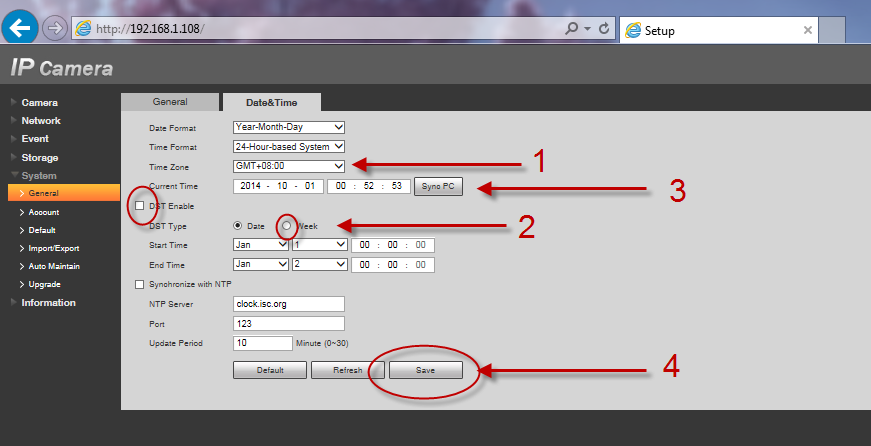
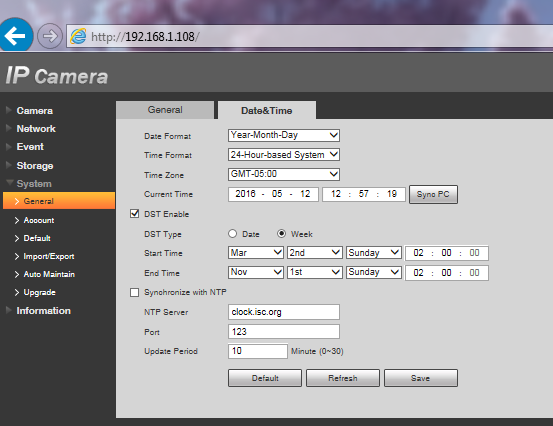
Optionally you may sync with an NTP Server. It is recommended that you do so as over time the camera starts to lose time. Just check the box, select your NTP server, make sure the camera has access to the Internet.
How to Configure A Day/Night Schedule Manually
Finally, what we've set out to accomplish. Setting the schedule.
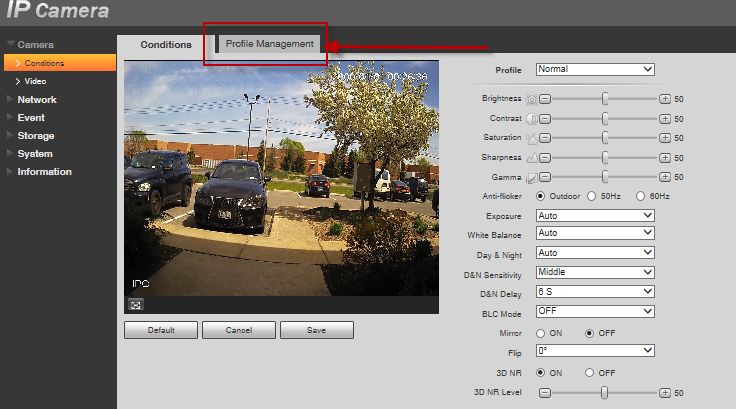
1) Click on the Camera drop-down on the left side. Then click Conditions.
2) Click on the Profile Management tab in the middle of the page.
3) Your profile should be set to Normal. If it's not that might be the cause of errors. Try going back to conditions and clicking default before moving ahead.
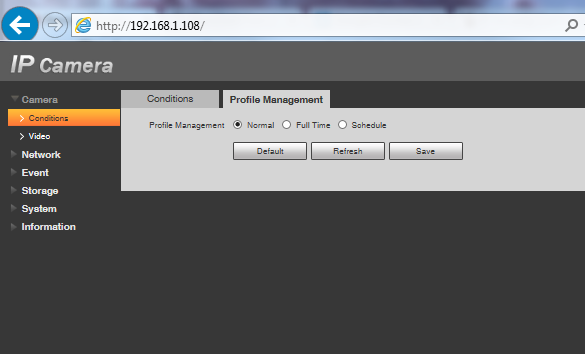
Now select the Schedule Radio Button.
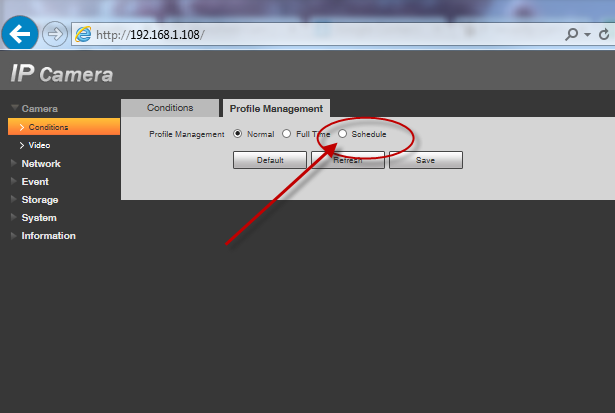
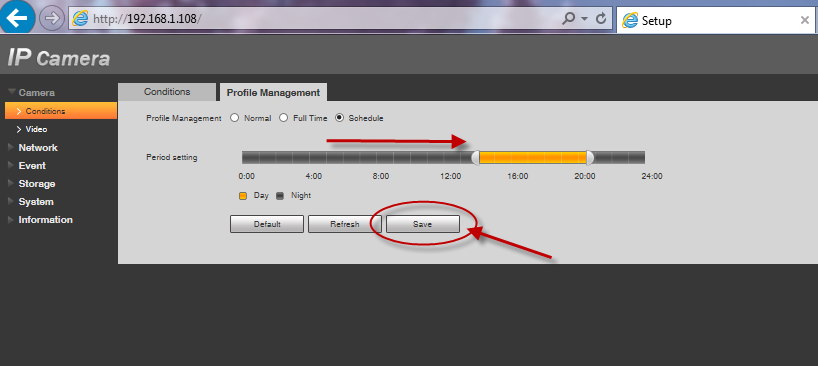
4) Your window should change to something similar to the image below.
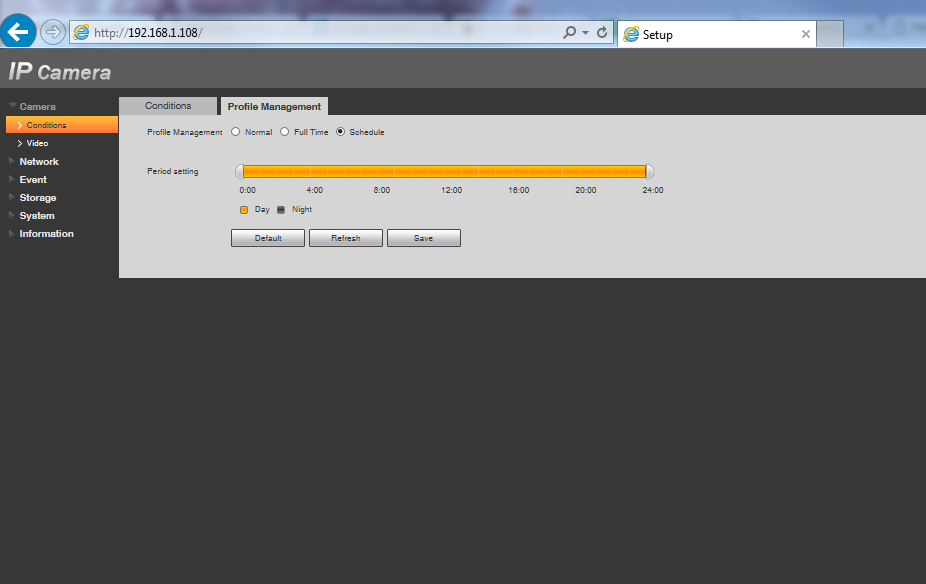
By default, the schedule will populate the day profile across 24 hours.
5) Click and hold on the end tab and drag it into the time your sunrise occurs.
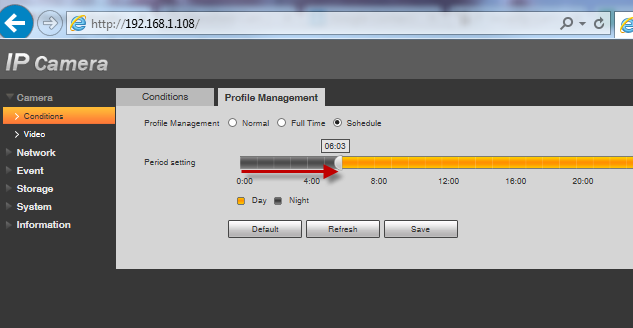
6) Click and hold on the other end tab and drag it into the time your sunset occurs.
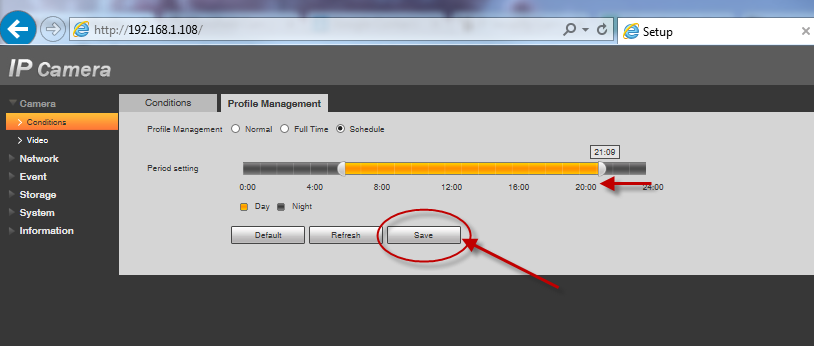
Then click save.
You now have your time block configured for Daylight. Let's move on to configuring the profile for Day and Night.
How to Configure the Day and Night Profile
Since we've now added the camera to the network, defaulted the camera, set the date and time, and have given it a schedule lets take the last step and configure the profile for day and night.
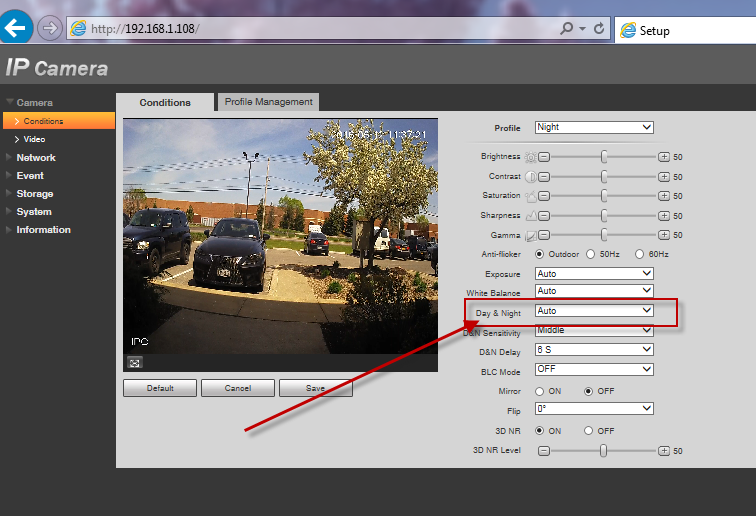
1) Click on the Conditions tab at the left side of the page.
If your plugins are installed you will see a window with the cameras feed in it to the left and a set of controls to the right.
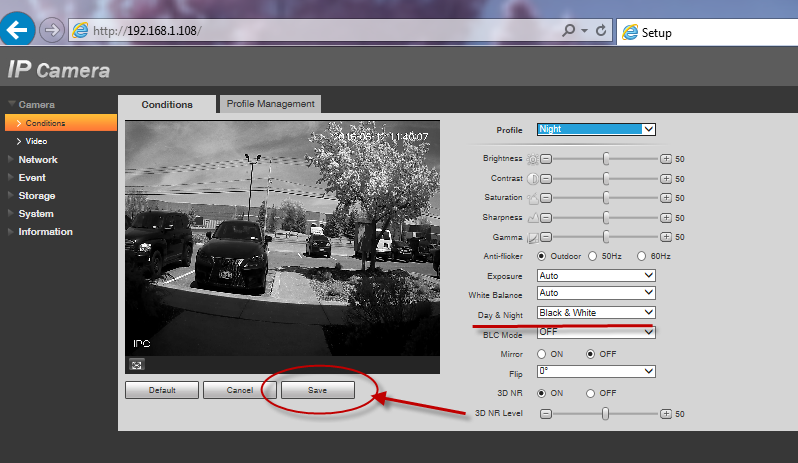
2) Click on the drop-down tab that says "Normal" and select Night.
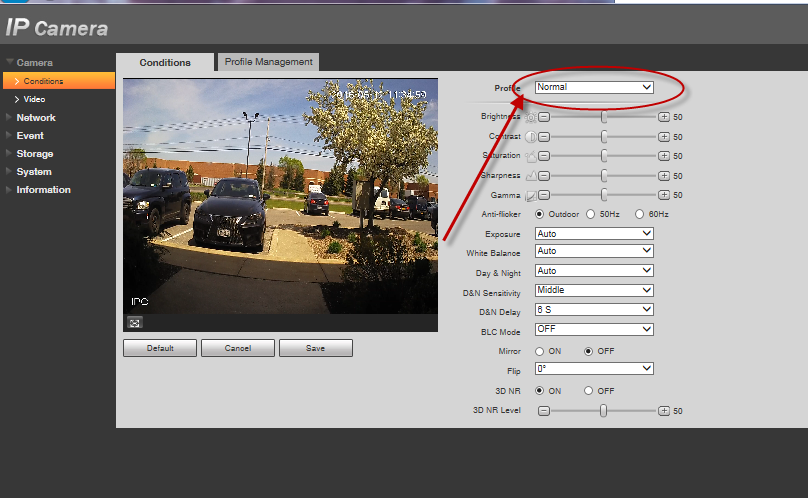
3) On the right-hand side select the drop-down box for Day & Night and choose Black and White.
You should notice the image to the left has changed to black and white, once it does click save.
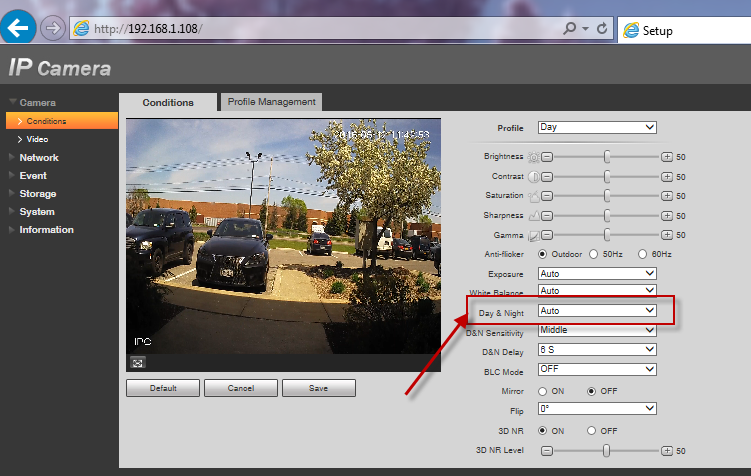
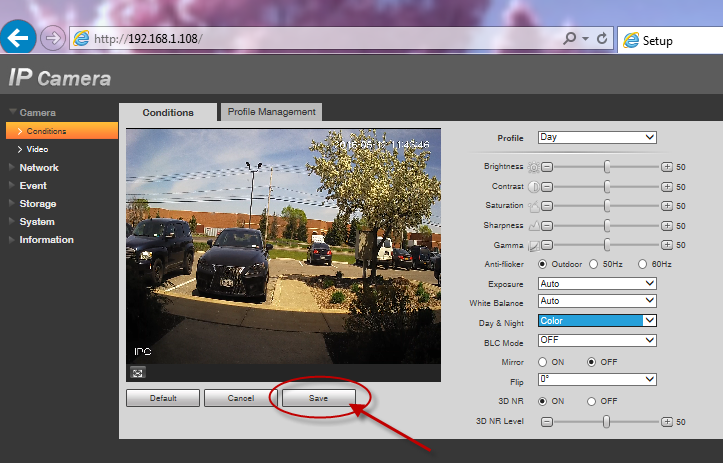
4) Click on the profile drop-down at the top again and select Day this time.
Then click on the Day & Night dropdown and change it to "Color."
5) Click "Save" at the bottom of the page.
The configuration is now complete! Let's test the schedule to make sure the profile settings are accurate and the schedule actually works.
Testing the Schedule for Day & Night Switching
Always double check your work. It will save time troubleshooting later.
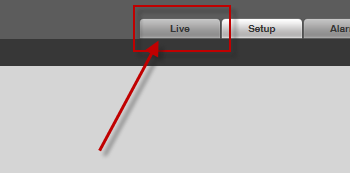
1) Go back to the Profile Managment tab under Setting > Camera > Conditions and drag one of the end tabs to make the camera goes into night mode, and save.
2) Click on live view at the top of the page.
You should see the image in black and white.
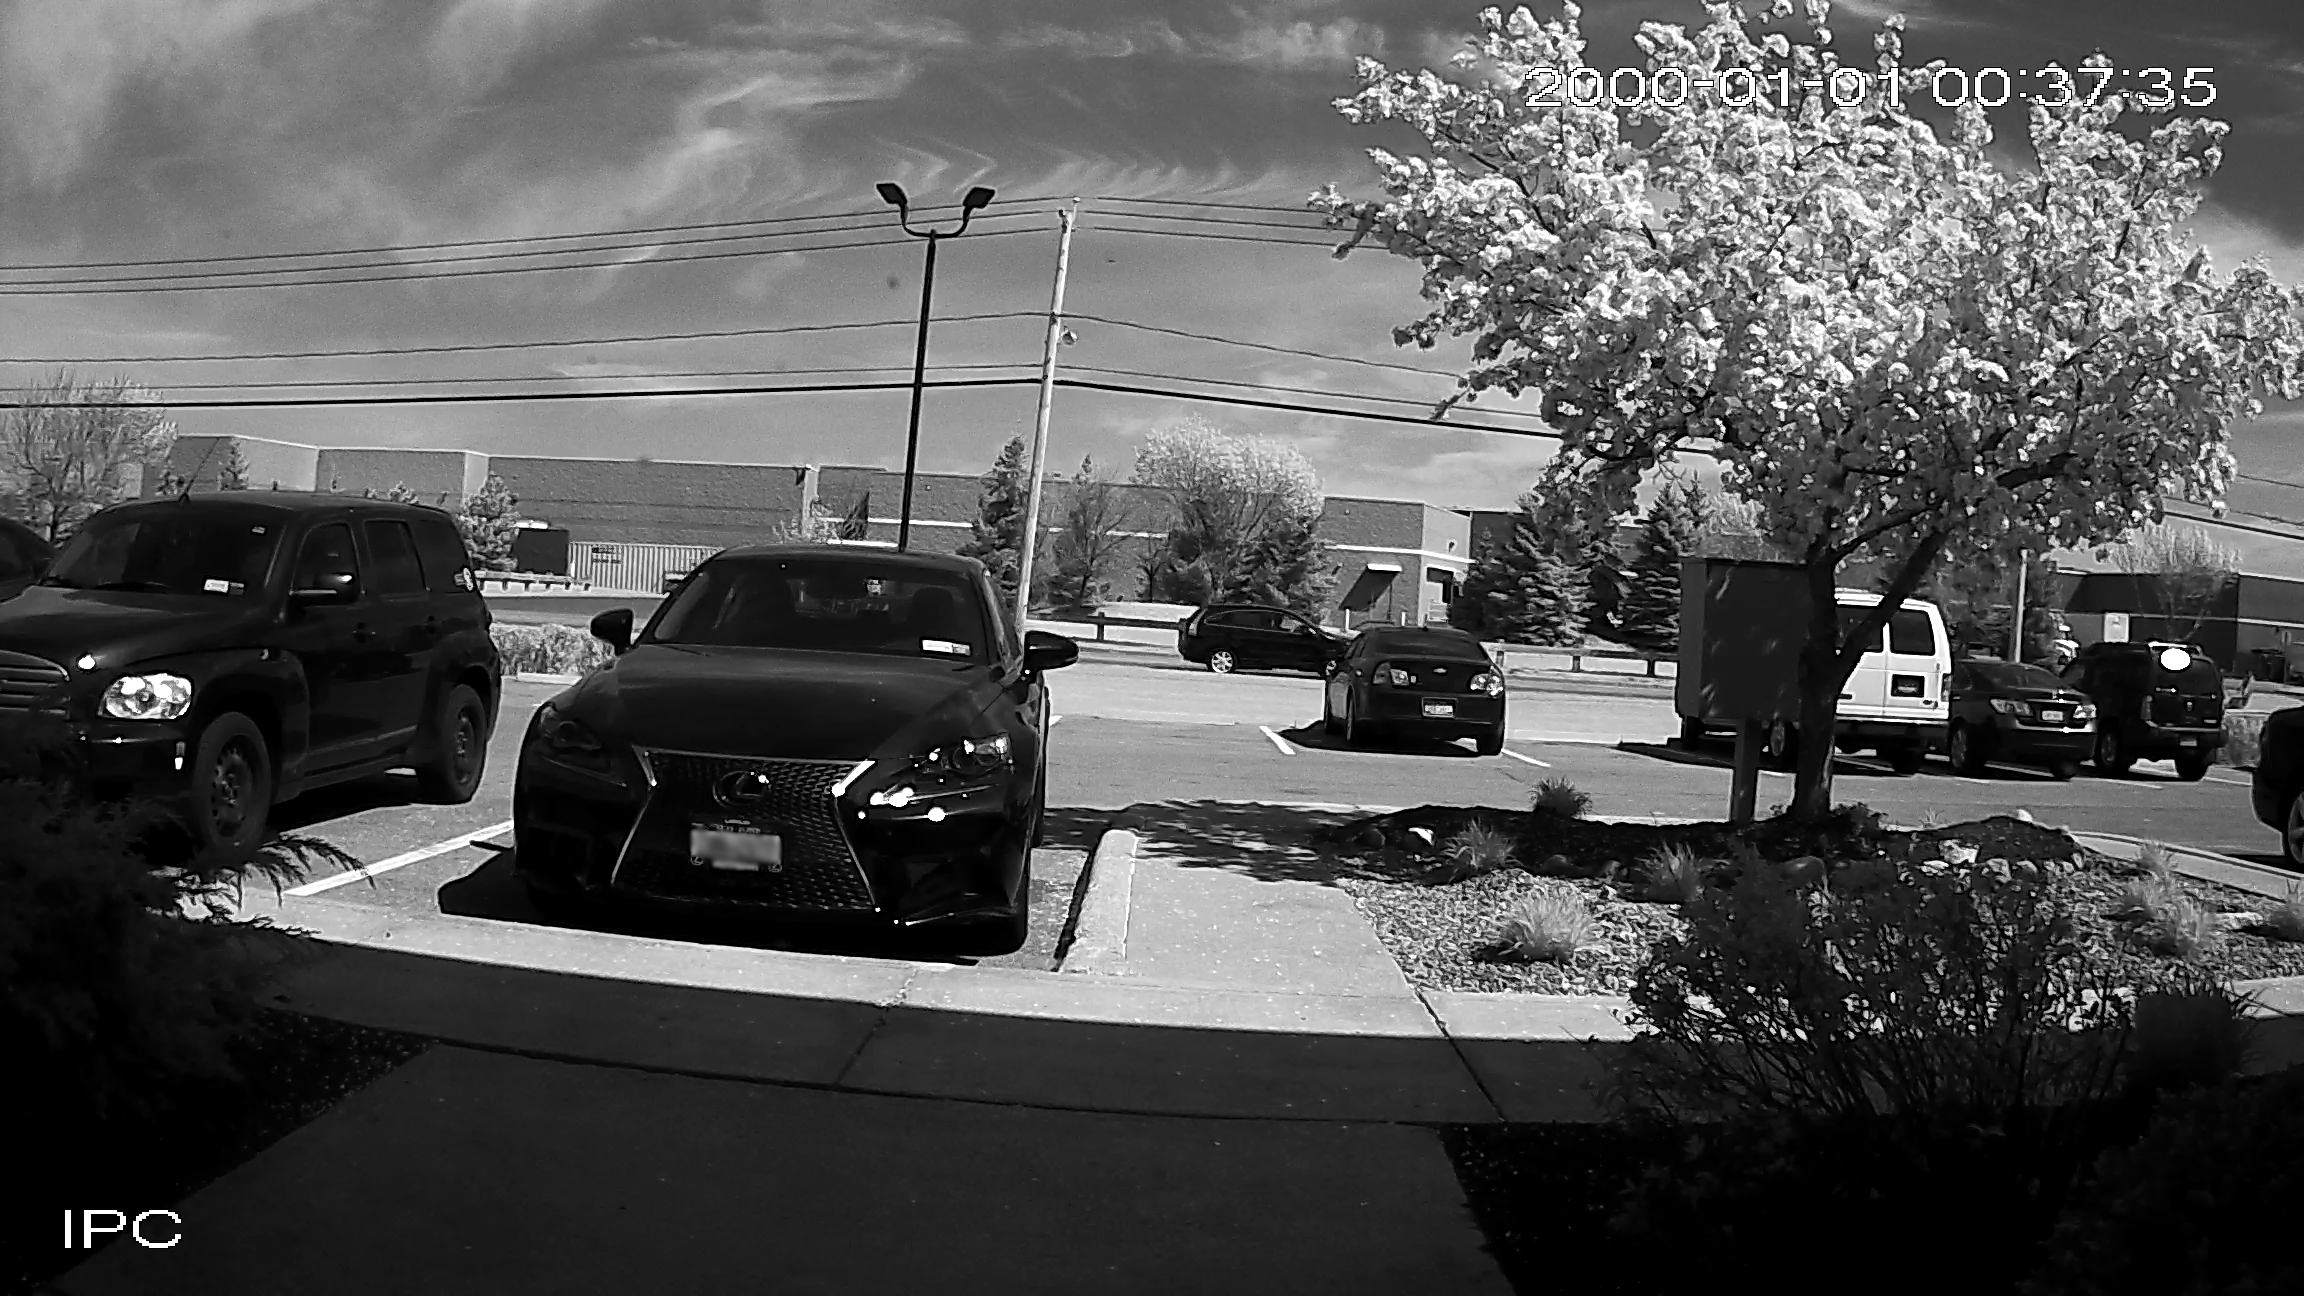
Ok, night works.
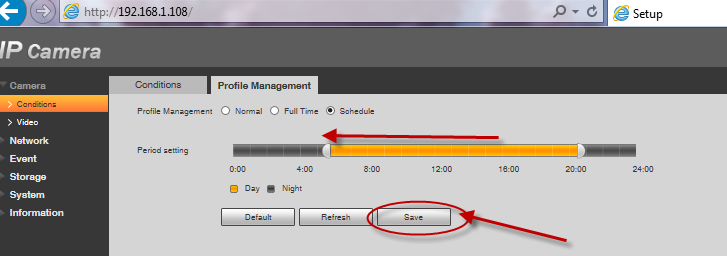
3) Go back to the Profile management tab by navigating to Setting > Camera > Conditions > Profile Management. If you need help getting there refer to the images above. Drag the end tab back to its location (sunrise or sunset) and click save.
4) Click on live view again to test the Day setting.
Your feed should appear with color.