How to Add a Microphone to a PTZ Camera for Live Streaming
How to Add a Microphone to a PTZ Camera for Live Streaming
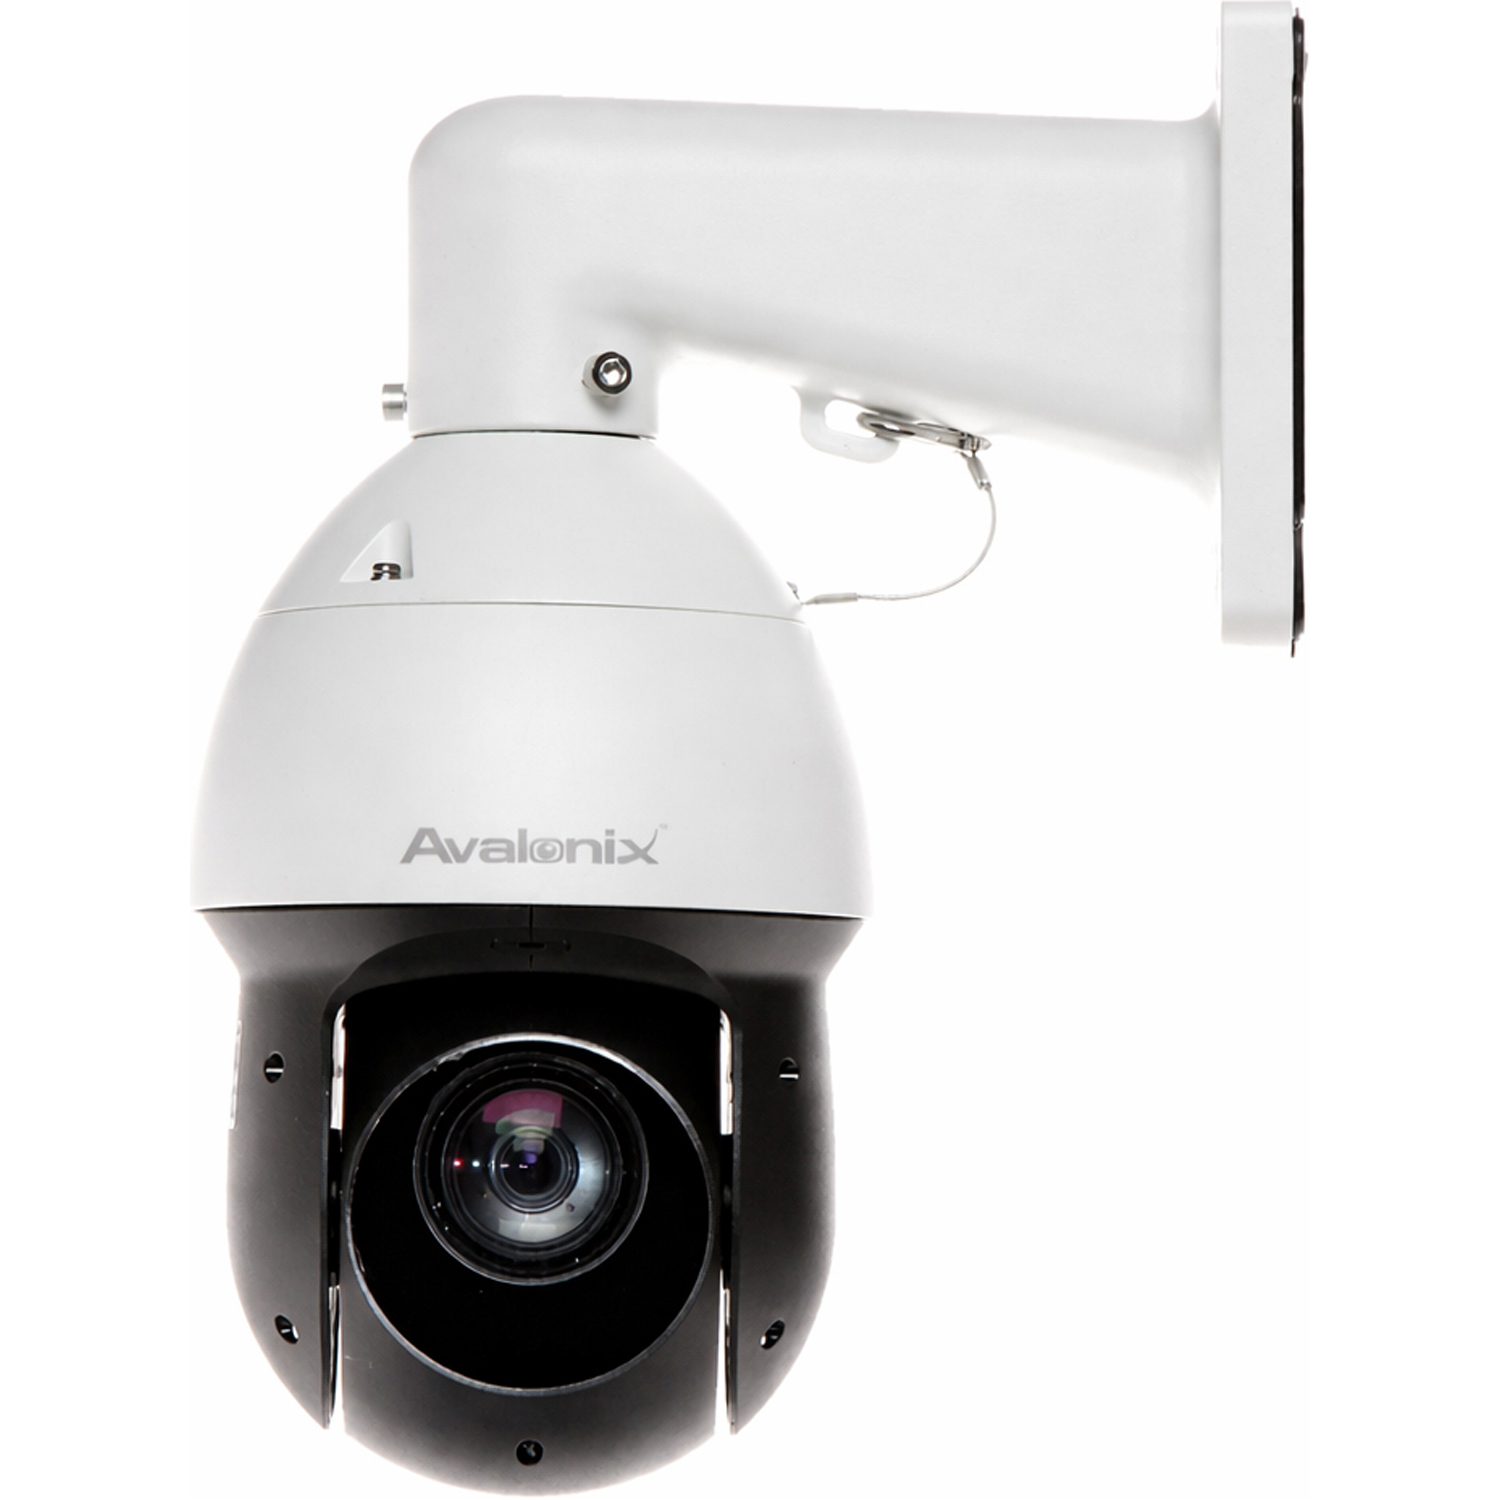
Want to add a microphone to a PTZ camera for live streaming? In this hands-on video, Ray from CCTV Camera World connects an outdoor security camera microphone to the Avalonix LIVECAMPTZ and shows the wiring, microphone gain, power setup, and actual audio coming through the camera.
The LIVECAMPTZ does not have a built-in microphone, but it does have an external audio input. The microphone used in this video has an RCA audio connection, while the camera uses a two-lead audio input. An RCA audio balun is what lets the two connect.
The Short Version
A PTZ or IP camera can use an external microphone when the camera has a compatible audio input. If the microphone has an RCA output and the camera has a two-lead Audio In connection, an RCA audio balun converts the microphone's RCA signal into the two wires needed for Audio In and ground.
The balun does not power the microphone, so the microphone still needs a suitable power source. Clean wiring, the correct ground connection, enough power for the camera, reasonable microphone gain, and protection from weather all matter. The same RCA-to-two-wire method shown with the LIVECAMPTZ can also be used with compatible cameras such as the IRPTZ4KAD 4K PTZ and LP4MZ832 high-frame-rate bullet camera, which also have external audio connections.
Need Help Adding Audio to a Camera?
Call CCTV Camera World at (716) 229-0080 or use our contact form. We can help determine whether your camera supports an external microphone and what audio adapter, power supply, and installation accessories you need.
Products Used in This Video
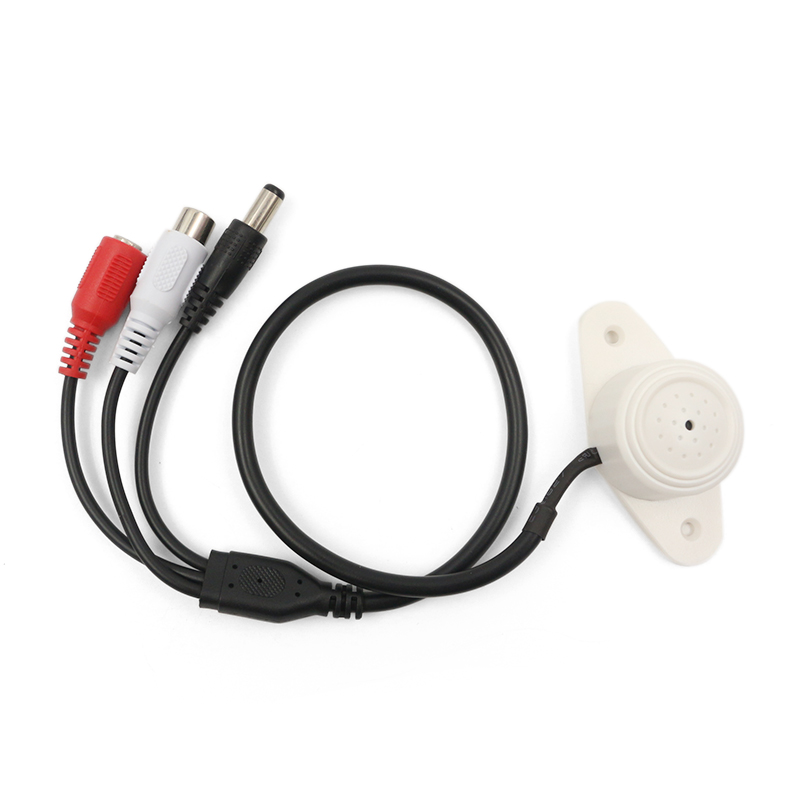
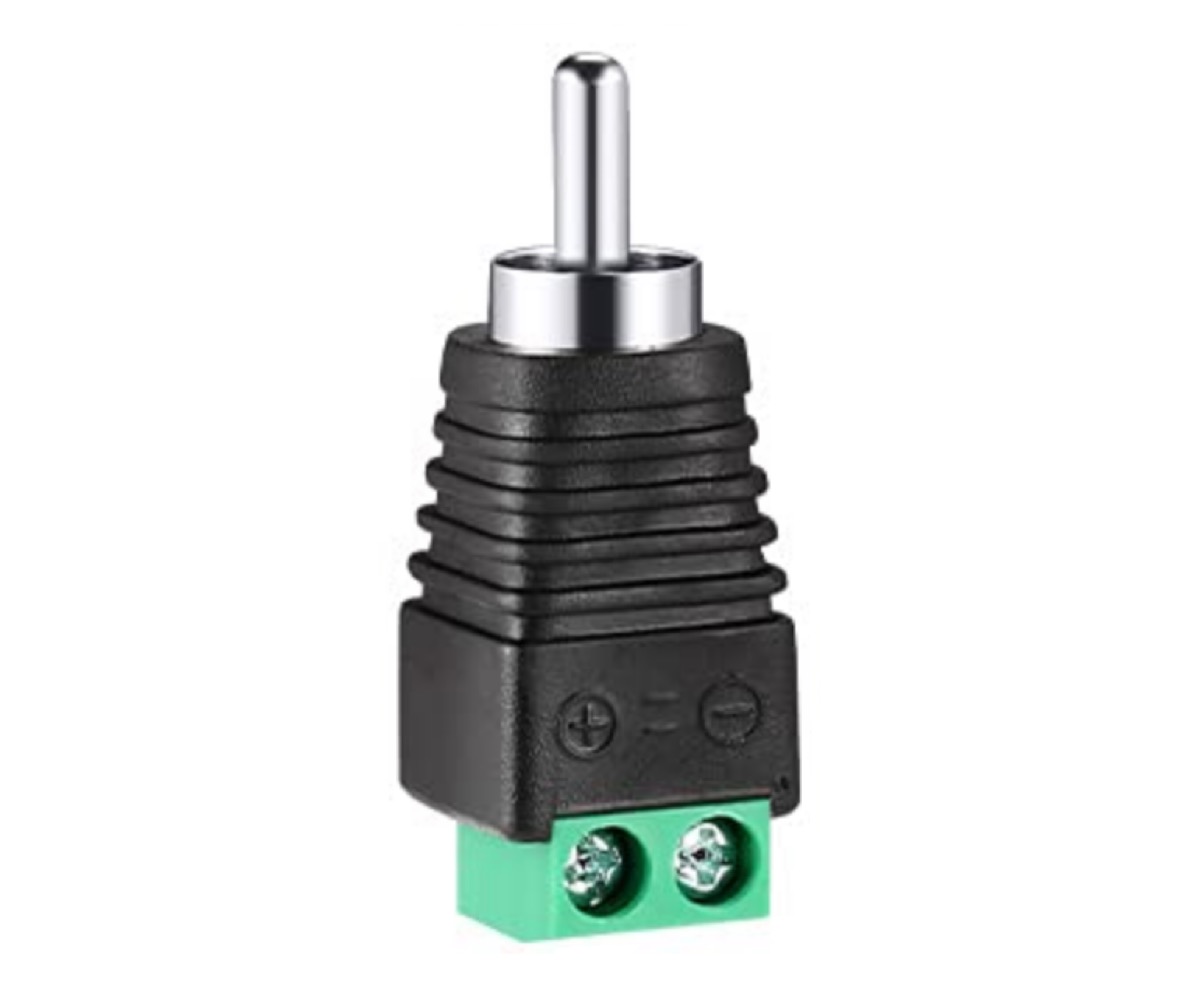
There are only three main pieces involved in the audio side of this setup: the live streaming PTZ camera, the powered outdoor microphone, and the audio balun that adapts the microphone's RCA output to the camera's two-wire audio input.
The microphone used in the demonstration. It has adjustable gain and an RCA audio output and is made for protected indoor or outdoor camera installations.
Converts the microphone's RCA audio connection to the two-lead audio wiring used by compatible cameras. It carries the audio signal only and does not power the microphone.
The outdoor microphone has an RCA audio output. That works directly with equipment that has an RCA audio input, but many professional PTZ cameras use individual wires for external audio instead.
The RCA audio balun gives you a simple way to go from one connection to the other. The RCA side connects to the microphone and the two leads on the other side connect to the camera's Audio In and ground.
There is not much to the connection itself, but it does need to be done cleanly. Do not leave a bunch of exposed copper hanging out of the terminals. A loose strand touching another wire can cause humming, static, intermittent sound, or no useful audio at all.
Audio In and Ground on the LIVECAMPTZ
On the LIVECAMPTZ in this video, the white wire is Audio In and the black wire is common or ground. Ray connects the positive audio lead from the balun to the white wire and the other lead to ground.
Those colors should not be treated as a rule for every camera. If you are doing the same thing with another PTZ or IP camera, look at the markings on its pigtail or check the camera specifications first.
Ray also shows what happens when the wrong connection is used for ground. Instead of useful microphone audio, you mostly hear a hum. If you just installed a microphone and that is all you hear, check the physical wiring before spending much time changing software settings.
The Microphone Still Needs Power
The audio balun is passive. It gets the audio signal from the microphone into the camera, but it does not provide power to the microphone.
In the video, Ray demonstrates a test arrangement where power is passed through the microphone before reaching the camera. He tested that arrangement while moving the PTZ and while the infrared LEDs were operating, and it worked on the bench.
For a permanent LIVECAMPTZ installation, we recommend powering the microphone separately. The PoE splitter supplied with the LIVECAMPTZ is intended to power the camera itself. A PTZ can draw more power when the motors move or the infrared LEDs turn on, so adding another powered accessory to that same limited power source can lead to instability.
If the camera starts rebooting when you pan, tilt, zoom, or turn on the infrared lights, available power is one of the first things to check.
What Happens on a Long Ethernet Run?
Ray performs this test over approximately 150 feet of solid-copper Cat5e cable. At that distance, the quality of the cable and the amount of power available at the far end matter more than they do on a short bench cable.
Use good solid-copper Cat5e or Cat6 for this kind of installation. Copper-clad aluminum cable has more resistance and is a poor choice when you are trying to deliver reliable power to a PTZ camera over a longer distance.
If you are planning a larger installation, you can browse our professional PTZ cameras and live streaming cameras. Power requirements are not the same from one model to another, so check the individual camera before choosing a PoE injector, switch, splitter, or power supply.
Adjusting the Microphone Gain
The outdoor microphone has a small gain adjustment on the back. Ray uses a small flat-head screwdriver to turn it up or down.
More gain is not automatically better. Start lower, listen to normal speech in the area, and increase it until the sound is where you want it. Turning the gain too high can make background noise more noticeable and can also make feedback worse when a monitoring speaker is nearby.
Why Does the Microphone Squeal or Echo?
You can hear some feedback during the live test because the microphone and the speaker Ray is using to listen to the camera are close to each other.
The microphone hears the speaker, sends that sound through the camera, and the speaker plays it again. Move the speaker farther from the microphone, turn the listening volume down, or reduce microphone gain. It does not necessarily mean anything is wrong with the microphone or the camera.
Troubleshooting External PTZ Camera Audio
Problem
What to Check
No audio
Confirm the camera has an external audio input, the correct audio source is enabled, and Audio In and ground are wired correctly.
Constant hum
Check the ground connection, look for loose copper strands, and make sure you are using the correct camera wires.
Audio is too quiet
Increase microphone gain gradually and confirm the camera is using its external line-level audio input.
Audio sounds distorted
Reduce microphone gain and check the camera's audio input settings.
Squealing or feedback
Move the monitoring speaker farther from the microphone or reduce the microphone and speaker levels.
PTZ randomly restarts
Check the camera power source, Ethernet cable quality, cable length, and whether another accessory is drawing from the same power source.
Works on the bench but not after installation
Check cable quality, voltage drop, connector quality, and the microphone's separate power source.
The Same Microphone Setup Works With Other Cameras
The useful part of this demonstration is not limited to one model. The same basic RCA-to-two-wire microphone setup can be used with other compatible cameras that provide an external audio input.
LIVECAMPTZ 1080P 16X Live Streaming PTZ
The Avalonix LIVECAMPTZ is the camera shown in this video. It combines a two-wire external audio connection with direct RTMP streaming, 1080P video, 16X optical zoom, PTZ control, and long-range infrared night vision.
For a live stream, putting the microphone at the camera can make a lot more sense than depending on a microphone attached to a computer somewhere else. Once audio is configured correctly, the camera can send the video and external microphone audio together in the stream.
IRPTZ4KAD 4K 25X Live Streaming PTZ Camera
If you need 4K resolution, the same general microphone setup can be used with the Avalonix IRPTZ4KAD 4K PTZ camera. This model has a two-lead external audio input and output and also supports RTMP live streaming.
The IRPTZ4KAD adds 4K video, 25X optical zoom, auto tracking, active deterrence, infrared night vision, and white-light illumination. An RCA-output microphone can be connected to the camera's line input with the proper audio balun, while the microphone receives its own suitable power.
An RCA-output security camera microphone can therefore be connected using the same type of RCA audio balun shown in this video. The microphone still needs a compatible power source, and you should verify the Audio In and ground wires before making the connection.
The LP4MZ832 is designed for a different job than the PTZ models. It records 4MP video at up to 60 frames per second, which makes it useful where fast movement matters, including machinery, production lines, vehicle areas, sporting applications, and other scenes where smoother high-frame-rate video can help during playback.
Using External Audio for a YouTube Live Stream
With a compatible live streaming camera, the microphone can be installed near the camera instead of beside the computer that was originally used to configure the stream.
The camera then sends its video and audio together through RTMP. That can be useful for churches, sports fields, construction sites, outdoor events, wildlife cameras, farms, marinas, scenic views, campuses, and other installations where the camera may be hundreds of feet away from the person managing it.
The outdoor microphone should be mounted facing downward or underneath a protected surface. It is weather resistant for a protected installation, but it should not be mounted where rain can run directly into it.
The RCA audio balun, two-wire connections, Ethernet connector, and power connections need protection too. Put them inside a suitable junction box, camera mount, soffit, or another weather-resistant enclosure. A little moisture inside one connector can create strange problems later that are not always easy to trace back to water.
Video Chapters
00:00 Adding a Microphone to a Live Streaming PTZ Camera
00:34 How the Microphone Connects to the PTZ
01:42 PTZ Camera, PoE Splitter and Microphone Wiring
02:10 Outdoor Microphone and Gain Control
02:28 Audio Input, Ground and RCA Wiring
03:10 Power Problems and Camera Restart Troubleshooting
03:50 150-Foot Cat5e and PoE Injector Test
04:25 Live PTZ Camera Audio Test
04:45 Adjusting Microphone Gain
04:55 Using External Audio with Other Cameras
05:28 Weatherproofing the Microphone Connections
Video Transcript
Open the timestamped transcript below for a cleaned version of Ray's microphone wiring and live audio demonstration.
View transcript: How to Add a Microphone to a PTZ Camera for Live Streaming
00:00 - Introduction
Ray from CCTV Camera World introduces the LIVECAMPTZ and explains that the video will show how to add an external microphone to the live streaming PTZ camera.
00:14 - How the LIVECAMPTZ is powered
The LIVECAMPTZ is a 12VDC camera. CCTV Camera World supplies PoE hardware that lets power and network data travel over an Ethernet cable and then separates the connections again near the camera.
00:34 - Adding the microphone
Ray begins explaining how the microphone can be wired into the camera setup. He also points out that cable length and available power become more important as an Ethernet run gets longer.
00:40 - Power considerations on longer cable runs
Longer cable runs can cause a drop in available power. Ray explains that a microphone can be powered separately with a suitable 12VDC source rather than depending on the same power path as the PTZ camera.
00:54 - Other microphone power options
A separate PoE connection and splitter can be used for microphone power, or a two-conductor power wire can be run to provide 12VDC directly to the microphone.
01:05 - Cable quality matters
Ray discusses using solid-copper Cat5e or Cat6 cable. Better cable becomes especially important when a PTZ camera is being powered over a longer Ethernet run.
01:15 - Microphone power draw
The microphone in the test draws relatively little current. Ray had already tested the setup while moving the PTZ and operating its infrared LEDs before recording the demonstration.
01:42 - Camera, PoE splitter and microphone connections
Ray shows the complete camera pigtail and explains which connections are carrying Ethernet data and which are carrying power. The microphone is installed near the camera rather than requiring a separate long audio cable back to the network equipment.
02:10 - Outdoor microphone and gain adjustment
The microphone is intended for use in a protected outdoor location. Ray shows the gain control on the back and explains that it can be adjusted to change the microphone level.
02:28 - Audio wiring
Ray shows the two-wire audio connection on the camera. The microphone uses an RCA connector, so an RCA audio balun is used between the microphone and the camera's individual audio wires.
02:34 - White Audio In wire and black ground wire
For this LIVECAMPTZ, the white wire is Audio In and the black wire is the common or ground connection. The audio signal and ground must be connected to the correct conductors.
02:46 - Avoiding hum
Loose wire or incorrect connections can create a noticeable hum. Ray recommends keeping the connections neat and making sure exposed conductors cannot touch each other.
02:57 - Connecting the RCA audio balun
The RCA side of the balun connects to the microphone. The other side connects to the two camera audio wires, giving the microphone a clean path into the camera's external audio input.
03:10 - What happens when there is not enough power
Ray explains that a camera that starts restarting by itself may not be receiving enough available power. PTZ movement and infrared illumination can increase the camera's power demand.
03:27 - Separating microphone and camera power
If there is a power problem, the microphone and camera should not rely on the same limited power connection. A separate microphone power source can eliminate that additional load from the PTZ camera circuit.
03:50 - 150-foot Cat5e test
The camera is running over approximately 150 feet of solid-copper Cat5e. Ray shows the PoE injector and the network connection going back to the router or switch.
04:13 - Streaming the camera to YouTube
Ray refers to the separate CCTV Camera World tutorial that shows how the LIVECAMPTZ can be configured to send its video directly to YouTube Live.
04:25 - Live microphone audio
Ray opens the live camera view with the microphone connected. Even without the microphone gain turned very high, the audio is already loud enough to hear clearly.
04:37 - Speaker and microphone feedback
The test produces feedback because the monitoring speaker is located too close to the microphone. Moving the speaker farther away or lowering the gain reduces the problem.
04:45 - Adjusting microphone gain
The microphone gain can be changed with a small flat-head screwdriver. This lets the installer fine-tune the microphone after it is placed in its final location.
04:55 - Using the same method with other cameras
Ray explains that the same general two-wire audio method can be used with other PTZ cameras and security cameras that have compatible external audio inputs. Always check the individual camera's Audio In and ground markings before making the connection.
05:28 - Protecting the connections from weather
The audio adapter, wiring, Ethernet connection, and power connections should be protected inside a suitable junction box or other weather-resistant enclosure.
05:41 - Mounting the microphone
The microphone should not be exposed directly to water. Ray recommends mounting it beneath a protected surface and facing it downward so water runs away from the microphone.
05:54 - Conclusion
Ray closes the video after demonstrating the complete external microphone setup and live audio result.
Want to Hear How Far the Microphone Can Pick Up Speech?
This video is mainly about connecting the microphone. We have a separate real-world test if you want to hear what the microphone sounds like at different distances.
In Can a Security Camera Microphone Hear You at 75 Feet?, Ray starts about 75 feet from the microphone inside our warehouse and walks closer while recording several samples. You can hear the actual result instead of relying only on a claimed microphone pickup distance.
More Ways to Add Audio to Security Cameras
The connection shown here is common on professional cameras, but it is not the only way external camera audio can be wired.
This page is based on an actual camera and microphone test performed by Ray at CCTV Camera World. The video shows the real LIVECAMPTZ pigtail, outdoor microphone, RCA audio balun, power connections, 150-foot Cat5e run, microphone gain adjustment, and live sound coming through the camera.
We make these demonstrations because a specification that simply says "Audio In" does not tell you much about what the installation actually looks like. Seeing the connectors, hearing what a bad connection sounds like, and listening to the microphone through the camera usually answers more questions than a spec table can.
Audio Recording and Local Laws
Audio recording laws vary by state, country, property type, and situation. Before recording or remotely monitoring audio, make sure the installation complies with the laws that apply where the camera and microphone are being used.
Frequently Asked Questions
Can I add a microphone to a PTZ camera?
Yes, if the PTZ camera has a compatible external audio input. The exact connector varies by camera, so check the pigtail or specifications before choosing the microphone and adapter.
Can I add a microphone to the Avalonix LIVECAMPTZ?
Yes. The LIVECAMPTZ has an external audio input. The video shows an outdoor microphone with RCA output connected to the camera's two-wire Audio In and ground connections using an RCA audio balun.
Does the RCA audio balun power the microphone?
No. The RCA audio balun carries the audio signal only. The microphone still needs an appropriate power source.
Should I power the microphone from the LIVECAMPTZ PoE splitter?
For a permanent installation, we recommend powering the microphone separately. The PoE splitter supplied with the LIVECAMPTZ is intended to power the camera itself, and the camera can draw more power when the PTZ motors or infrared LEDs are operating.
Why do I hear a hum after connecting the microphone?
Start by checking the Audio In and ground connections. An incorrect ground, loose copper strands, or exposed conductors touching another wire can cause a steady hum or unusable audio.
Why does the PTZ camera restart after I connect a microphone?
The camera may not be receiving enough available power, particularly when the PTZ motors or infrared LEDs are operating. Power the microphone separately and check the camera power source, Ethernet cable quality, and cable length.
Can I use an external microphone while streaming to YouTube?
Yes. A camera that supports both external audio and RTMP streaming can include microphone audio with its live video stream after the camera's audio settings are configured correctly.
Can I connect a microphone to the IRPTZ4KAD 4K PTZ camera?
Yes. The IRPTZ4KAD has a two-lead external audio input and output. An RCA-output microphone can be connected to the Audio In connection using the appropriate RCA audio balun, with the microphone powered separately.
Can I connect a microphone to the LP4MZ832 high-frame-rate bullet camera?
Yes. The LP4MZ832 supports external microphone and speaker connections through its two-lead audio wiring. An RCA-output security camera microphone can be connected using an RCA audio balun, with a suitable separate power source for the microphone.
How should an outdoor security camera microphone be mounted?
Mount the microphone facing downward or beneath a protected surface so water cannot collect inside it. Protect the audio balun, wiring, power connections, and camera pigtail inside a suitable weather-resistant enclosure.