

How to Record a Barking Dog Problem
It’s no surprise that we get a lot of customers looking to record a particular nuisance that is common in rural, urban, and suburban areas alike. That nuisance is a dog barking at odd hours of the night and the dog’s owner doing nothing to keep their pet quiet. Customers who are on the receiving end of a dog barking at odd hours contact us expressing frustration that when bringing the issue up to authorities their claims are often met with dismissal. Animal control and the police usually require a well documented history of a dog barking to consider it a submissible complaint. In this article we’ll show how the audio detection feature in our IP cameras and security camera systems can help to build a history of the dog being a problem.
A documented history will require evidence with date and time stamps to verify that the dog is a problem and causing a disturbance while the pet owner does nothing to rectify the issue. You can use our IP cameras or PoE cameras that have a built-in microphone or external microphone connection to record video and audio when noise is sensed.
While our IP cameras are not made specifically for detecting barking dogs they have a video and audio recording method based on audio detection. Using the included threshold and sensitivity settings one can finely tune the audio detection settings to trigger recording when a dog barks. Audio detection provides documentation of the dog's bark for authorities to take action against the dog’s owner.
It is important to note that the audio detection feature is not exclusive to a dog barking. The instructions provided herein can be used to set up an audio activated recording method using our security cameras regardless of whether it is a barking dog, other animal making sounds, or even a noisy neighbor annoying you with a blow horn.
What's needed?
- IP cameras with audio, either having a built-in microphone or an external microphone hookup for Line-in audio. In this article we use the 2K Starlight Turret Dome IP Camera with Microphone, (sku IPD404VPA).
-
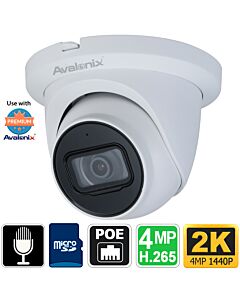 2K Turret Dome IP PoE Camera, Microphone, Starlight, Smart Motion DetectionSKU: IPD404VPA$166.99 $269.99 38% off
 -

- MicroSD internal memory which can be purchased with the camera above. Or for long term storage, and easy plug and play setup an NVR like the one above.
- PoE injector or PoE switch to power the camera and connect it to your computer network for easy video retrieval
- Network cabling that is either CAT5e or CAT6
- Windows PC is recommended for ease of use and compatibility with the web interface of the cameras and PC software
- Set up the camera on your computer network by following our Standalone Security Camera Guide. If you would like us to setup the camera for you, optional networking assistance can be purchased.
What does the setup look like?
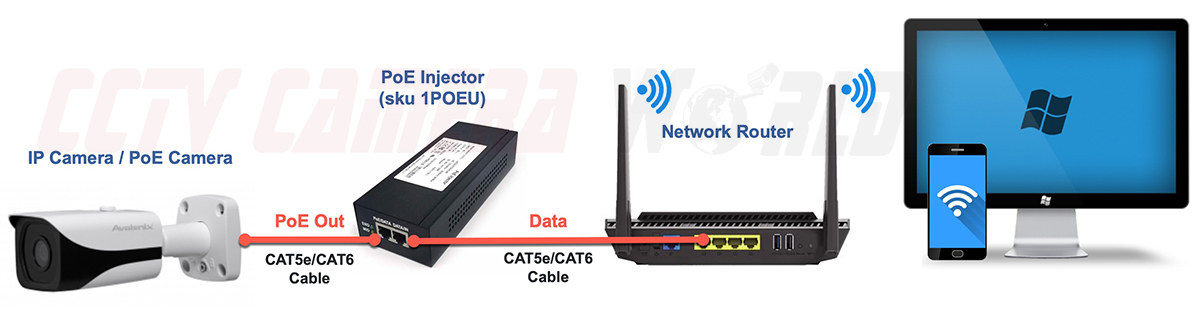
Briefly, the picture below provides an overview of how any one of our IP cameras or PoE cameras can be connected to a computer network for wired or wireless viewing from a PC, smartphone or tablet. If you're new to security cameras, the below picture should convey how easy it is to get a security camera with audio detection set up for your use.
How to set up Audio Detection based recording
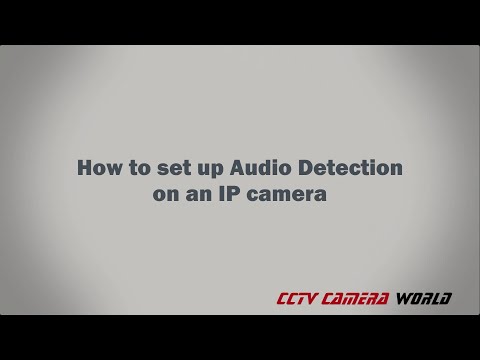
Once the camera is set up and accessible on your computer network using a PC computer, the camera can be accessed to configure the audio detection method. Below we have both a video and written guide on how to configure recording using the web interface of our IP cameras. The interface looks similar in almost all of our models.
- Access the web interface of the security camera. Follow our Standalone Security Camera Guide if you’re unsure how to use an IP security camera on a computer network.
- Navigate to the Settings tab at the top right of the web interface
- Ensure that Audio encoding is enabled by going to the Camera>Audio settings and checking the “Enable” button for the Main Stream and Sub Stream.
- Set the Audio-in type to the correct input: “Mic” is for the built-in microphone and “LineIn” is for the external microphone hook-up. These settings are dependent on the camera specifications. Not all cameras with a Mic have the optional Audio Line-in option. Modify the volume as needed and feel free to try the noise filter setting.
- To enable Audio Detection navigate to the Event tab and then Audio Detection tab.
- Check the “Intensity Change” option by clicking the checkbox. After selecting the checkbox, the Sensitivity and Intensity window will start to show activity based on the audio the camera is listening to.
- Finely tune the threshold and sensitivity settings based on the ambient noises where the camera is placed and the noises that you are trying to capture.
There are no perfect settings as Audio Detection can trigger based on any noise, however with a trial and error approach you can narrow each setting to a specific threshold and sensitivity to not trigger on all noises.
Threshold is the amount of baseline noise required to start triggering an Audio Detection Event.
Sensitivity is a secondary check for how loud the noise is before actually firing the event.
A low sensitivity and high threshold will require very loud noises to trigger a detection event. A low threshold and high sensitivity will trigger recording on almost any noise that the camera picks up.
The graphical representation shown in the web interface provides a better representation of how loud of a noise will trigger a detection event. Again, finely tuning with a trial and error approach is the easiest way to verify the settings will meet your requirements for audio detection. You may have to adjust the settings later based on how your current settings perform.
- The Period setting tells the camera when to use it’s audio detection feature. For example if you don’t want the camera to detect audio during the day you can set a night schedule between 6PM and 6AM, or the opposite 6AM to 6PM for a daytime schedule.
- The Record setting tells the camera to record based on it’s Storage schedule and destination settings in the Storage settings of the camera. To record video locally, the camera will need a microSD card installed. The snapshot setting will save snapshots based on the Storage schedule and settings if snapshots are enabled on the camera.
- Send Email will send an alert to the email address that is set up on the camera. For the email alert option, an email account is required. Your internet service provider also has to allow outbound mail on port 25 or 587.
If you experience difficulty with any of the steps above feel free to reach out by email to our support team. If you’re experiencing difficulty setting up email alerts or using a third party device or service, a paid support session can be purchased here.
Audio Detection based Security Camera System
Using the above steps it is possible to set up one or several IP security cameras to record to an internal microSD card. The recording from the internal memory of the camera can be accessed using the web interface of the camera or our Central Monitoring Software as explained in our guide on how to use IP cameras as standalone. However, if you would like video storage times greater than 5 days, we suggest using one of our NVR recorders to build a complete security camera system that can record based on video events or audio detection events.
The great thing about our NVR systems and IP camera systems is that they allow easy access into the web interface of the camera while the camera is connected to the PoE ports on the back of the NVR. We show how easy it is to access our cameras connected to our PoE NVRs in this guide.
Regardless of whether you are looking for a system with one camera or 128, we have the hardware required to address your needs. Feel free to contact us by starting a support thread here. We usually reply back to emails within 1 hour during business hours.
You can also manage audio detection settings for our IP cameras from our NVR recorders without having to access each camera individually. The process takes a few clicks as explained in our guide about How to Setup Audio Detection with your Security Camera System.