


High Frame Rate PoE Camera for Manufacturing | 60-120 FPS Test
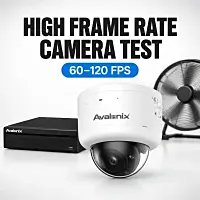
We get calls from businesses that need a camera to do more than just watch a production area. They need to be able to go back after something goes wrong and see what actually happened on a production line or piece of machinery.
That can be difficult with a normal 30 FPS security camera when everything happens in a fraction of a second. I wanted to show what a higher frame rate camera actually gives you, so I set up our Avalonix HS4M212D High Frame Rate PoE Camera about 38 inches from a box fan and recorded it at 30, 60, 90 and 120 frames per second.
The fan is obviously not a production line, but it gives me something fast and repeatable to work with. More importantly, I can go back into the recording and step through the video one frame at a time to show why having more frames can matter when you're trying to figure out where a process failed.

Video Transcript
Read the full video transcript
0:00
Thanks for tuning in to another video by CCTV Camera World. My name is Ray. I am the manager, and I'll be showing you today another overview of our newest 60 FPS high-speed capture dome camera by Avalonix.
Avalonix makes home and business security cameras that we carry here at CCTV Camera World. We specialize in both home and business. But in this case, this camera, while many may think it's a professional camera, it is both for professional and even home users looking for high-speed capture.
You could use this even for license plate capture. But in this scenario, I'm going to be showing you how this dome camera that captures 60 FPS at 4 megapixel, 90 FPS even at 4 megapixel, and 120 FPS at 1080P. I'm going to show you how to use it in an industrial setting.
So we frequently get phone calls for capturing moving machinery that's moving at a fast pace for production lines and trying to pinpoint what happened that production failed. How do you capture that?
Industrial high-speed cameras cost a lot. They go into the thousands. So we have this Avalonix high-speed capture camera that can do a high frame rate at a much lower cost. And all you have to do is use it with an Avalonix NVR to record video. And I'll be showing you that in practice.
And let me get you over to the camera and do some show and tell.
1:29 - HS4M212D Camera and Box Fan Test Setup
So here is this camera. It is a 4 megapixel vandal-proof dome, motorized zoom lens. You can find the specs on cctvcameraworld.com. The SKU number is HS4M212D.
I have it sitting about 38 inches away from a box fan, and I'm going to show you what that high-speed capture does in reality.
And I'm going to turn the fan on at the lowest speed, which is still pretty fast, high RPM.
So if I capture it with my iPhone, this is what the fan looks like. Again, this is at around 38 inches away from the camera.
So a lot of the requests we get are people trying to capture at a close distance. I have the camera. It's a PoE camera. It just takes one Ethernet cable to connect it to my switch. I can connect it to my NVR too if I wanted.
And I have it going over the network to one of our 32 channel NVRs. That's the AI series NVR from Avalonix. And I can view it on my monitor here that's connected with an HDMI cable directly to the recorder. And I have a mouse as well.
2:38 - Starting at 30 FPS
So when I'm looking at it on here, as you can see, right now I can't see the individual blades or anything like that. But if I go in and log into this NVR, I go under camera settings and go to Encode, I can change the FPS.
Right now it's at 30 FPS. So if you want to know what's the difference between a 30 and a 60 FPS, that's what I'm going to show you right now.
So that's at 30 FPS. This iPhone is also capturing at 30 FPS.
And from this point on now, I actually set my iPhone to record at 60 FPS. And let's see what the iPhone sees at 60.
Okay. And this is still 30 FPS.
3:28 - Switching the Camera to 60 FPS
Now let me change the video to 60 FPS on the camera. And I'm at 4 megapixel.
I'm just going to go down. It gives me all the way to 90, but I'm just going to show you what it looks like at 60. And hit Apply.
There is a small difference. Maybe the iPhone finds it hard to see, but it's definitely doing 60 FPS.
3:52 - Frame-by-Frame Playback on the NVR
If I go and play back video, I get more frames to play back at. So if I go under Playback and I click somewhere here, go to 30 minutes, zoom window here, and then just click on here.
If I pause the video, I can play it frame by frame. And you can see as I click, the seconds number has not changed. It's still letting me click through it.
So if you've got a fast but not super-fast assembly line or setup, it's going to give you that 60 FPS to browse through a lot of frames to look at.
You can see the fan kind of moving, the blades, and you can see each of those circulations. You can see many of them per second. So you see more frames per second.
If I were to count this, it just turned 20. So I clicked one, two, three, four, five, six, seven, eight, nine, ten, eleven, twelve, thirteen, fourteen, fifteen, sixteen, seventeen, eighteen, nineteen, twenty, twenty-one, twenty-two, twenty-three, twenty-four, twenty-five, twenty-six, twenty-seven, twenty-eight, twenty-nine, thirty, thirty-one, thirty-two, thirty-three, thirty-four, thirty-five, thirty-six, thirty-seven, thirty-eight, thirty-nine, forty, forty-one, forty-two, forty-three, forty-four, forty-five, forty-six, forty-seven, forty-eight, forty-nine, fifty, fifty-one, fifty-two, fifty-three, fifty-four, fifty-five, fifty-six, fifty-seven, fifty-eight, fifty-nine, sixty.
So I had about 60 frames, exactly 60 frames, and I was able to do that. So if people think this is not true 60, it was. I actually on video did 60 clicks on this button right there. It didn't turn the next second. So I'm getting that true 60 frames per second.
5:33 - 90 FPS and 120 FPS Recording
But if you find that this video is not good enough for you at 60, you could put this camera at 90 and 120 frames per second with the correct NVR.
I'll show you what it can do visually, but you need a very powerful NVR to be able to capture that 90 or 120 frames per second.
And in fact, to access that 90 and 120 frames per second, I can't even do that through here because this NVR with this particular firmware caps out at 64 frames per second.
So if I go and click it, it just caps out at 64. It won't let me go higher. So in order to go higher, I have to go to my computer to set it.
And on the computer, it also lets you do some other things such as shutter rate control.
So before I get into higher FPS, let me show you this camera. This is the one we're looking at. This is the stated price at the moment when we made this video.
But here's the feed from the camera. I can also watch it from a web browser, and I can also watch it from our PC software. So if I go into my PC software, I can drag it in from the NVR right there.
6:42 - Accessing Higher Frame Rates from the Camera
So now let me show you what going higher frames per second does. So I have to get into the web interface of the camera. You do need a computer for this. It's not a standalone operation to access those higher frame rate settings.
I go to Encode and then I change this to 90 FPS. And mind you, that's a lot of frames at 4 megapixel. This is 1440P.
And I have to make sure that I'm also matching my bit rate here. I'm going to give the camera and NVR a break. I'm going to do H.264, which is less intensive, an encoding strategy of General, 90 frames per second, and I'm going to set this bit rate to the highest I've got possible, which is about 10 megs here, and then hit Apply.
As soon as I did that, my video actually changed on the camera.
And I want you to keep watching while I go back to 60 FPS. I'm going to tell you when I'm doing it. I'm hitting the Apply button now on the camera at 60 FPS now.
7:44 - Comparing 60 FPS and 90 FPS
That's 60 FPS. Okay, it takes a few seconds to apply. And then now I'm going to do 90 FPS.
See that difference? There's a slight difference. You can see the fan blades much better.
8:03 - Testing 120 FPS at 1080P
So now here on my laptop, I'm going to change this to 1080P and 120 frames per second. And I'm going to hit Apply. Watch what happens.
So here back on the NVR, I hit Apply now on my camera settings. It kind of zooms in when I do 120.
So the camera has limitations in terms of how much of a screen area or visual area it can do at 120. And it kind of zooms in and gives me this view.
So if you have a tight spot you're looking at, it'll still work because the camera has a pretty wide angle.
And I am now changing it to 10 megabits per second video. That's the highest bit rate.
Now watch the difference between 120. This is 120. And now I'm going to show you what 90 frames per second looks like.
So again, this is 120 frames per second. And now this is 90 frames per second coming at it. And that's 90.
So you see that feels a lot less smooth compared to the 120.
And then I got 60 FPS coming at you. Hit Apply.
It takes a few seconds. And that's 60. And that kind of seems too fast. You can't see any of those blades.
So this is at 1080P. For most commercial purposes, 1080P is fine.
9:15 - Video Delay at Higher Frame Rates
Now I'm going to just show you the delay. Like if I wave my hand, how quick is it? So I'm going to wave my hand now.
So there's about a three-second delay. So now, one Mississippi, two Mississippi, three Mississippi delay.
So as you go higher in FPS, what does happen is there is a longer and longer delay. I've seen at 90 FPS or 120 FPS about a five-second delay.
So this is at 60 FPS. So I would say the sweet spot is to keep the camera at 60 FPS.
9:46 - Using Shutter Speed to Capture Fast Motion
Now let's say you wanted to see things even slow down more. So I'm going to show you how.
I'm going to go into the camera's image settings and I am going to go on Exposure and set it to Manual Exposure and set the shutter rate. I've shown this in other videos that we have at CCTV Camera World how to do that.
So as I change the shutter rate, you'll see the fan getting slower and slower.
Now this camera has a very, very good imaging sensor. It's a 1/1.8-inch sensor. It stays in color until you really, really push the shutter to be really fast.
That's when the picture gets dark and that's when you want to have your IRs turn on.
But at 1/500, I am able to see those blades pretty much individually spinning. And this is at slow speed.
10:36 - Testing the Fan at Faster Speeds
And now I'm going to turn the fan faster and faster. This is medium speed.
And this is highest speed.
Only at the higher speed do I see it kind of break down and get challenging, but I can always alter my shutter rate and compensate that.
So not only does this camera give you the frames per second, it also gives you the shutter rate control that you need.
If you look at the camera, you'll see its IRs on. The iPhone can pick those up.
So we can go back in here. It automatically turns its IRs on when I make the shutter rate too fast.
So let's go to 1/250. And if it still doesn't like what it sees and you want to force it into color, you can go in here and force it to Day mode and hit Apply.
And go in here and set it to Color mode and it will stay in Color mode.
But the best picture you do get with the shutter rate control, you do have to go back into black and white. I put it in color, it went back to shutter rate being Auto.
So let's see if I can do that. I will turn it back to 1/250, hit Apply, and make sure under Day and Night it's set to Color and hit Apply.
And I can see the fan's moving now. I can see the individual blades.
Now what about if I were to take that exposure and make it even faster, over 1/1000?
This does get a lot darker. But if you have illumination, very bright illumination at what you're looking at, it would still be able to pick it up.
So depending on what your settings are, what you need, I say for most applications 1/250. And you let us know whether you want it in color or Auto.
Auto, keep in mind, will change to black and white. If you don't have an application that really needs the color, we can do that and set it to Auto and the IRs will turn on when it needs to.
Or we can just manually set it to Color like this right now.
12:39 - Lighting, IR and Color Mode
Okay. Now 1/250 is getting me color with my image settings. But of course if I turn off the light, what happens is it gets too dark.
The camera is going to sense that and in a few seconds automatically turn on its infrared LEDs like it did here to illuminate the area.
Now if you're looking at metal, you may get reflection. With my box fan that's plastic in the front, I'm not getting really any reflection.
But let's say if you were looking at some sort of metal surface, it's possible you will get reflection because infrared is a source of light.
And when I turn the lights back on, the camera still stays in black and white mode and decides when it wants to go back into color.
Many times once it likes that black and white, it'll stay with the infrared for a while. Possibly you might need to power cycle it.
13:28 - Using the Camera for Industrial Monitoring
But here's a good realistic overview of what to expect when you're doing high-speed capture for an industrial application with a 120 FPS or 90 FPS or 60 FPS security camera that you can get from CCTV Camera World.
I hope you found this demonstration useful. If you have questions, feel free to leave us a comment below or contact us at CCTV Camera World. We're happy to answer all your questions.
Again, what I used was the Avalonix 4 megapixel security camera. It's a PoE camera. Model number again is the HS4M212D, along with the 32 channel AI NVR by Avalonix.
Thanks for watching. If you're watching on YouTube, don't forget to like, comment, and subscribe.
The Camera and NVR I Used
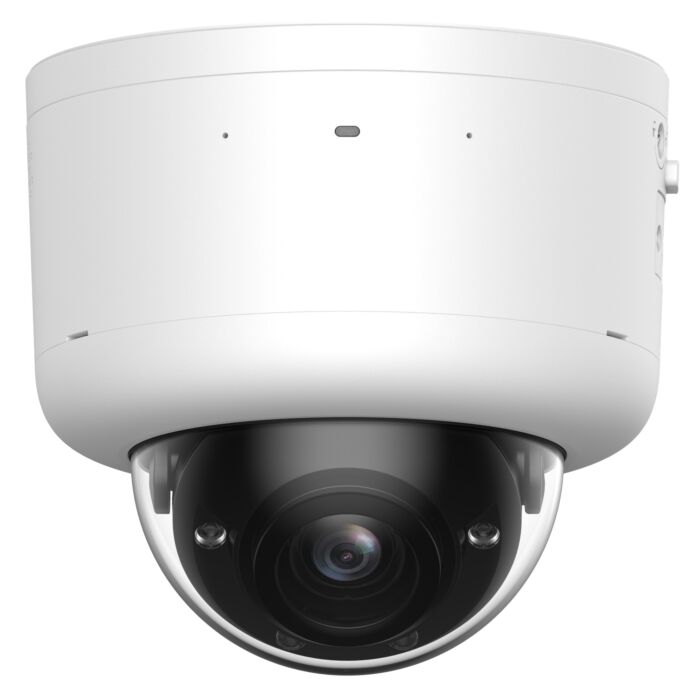
Camera Used in This Test
High Speed Capture 2K PoE Dome Camera, 60fps, 90fps, 120fps, ANPR, AI Detection, HS4M212D
SKU: HS4M212D
This is the 4MP high frame rate PoE dome camera I used for the production line test. It supports 60 FPS at 4MP, up to 90 FPS at 4MP, and up to 120 FPS at 1080P.
Special Price
$1,299.99
Regular Price
$1,599.99
19% off
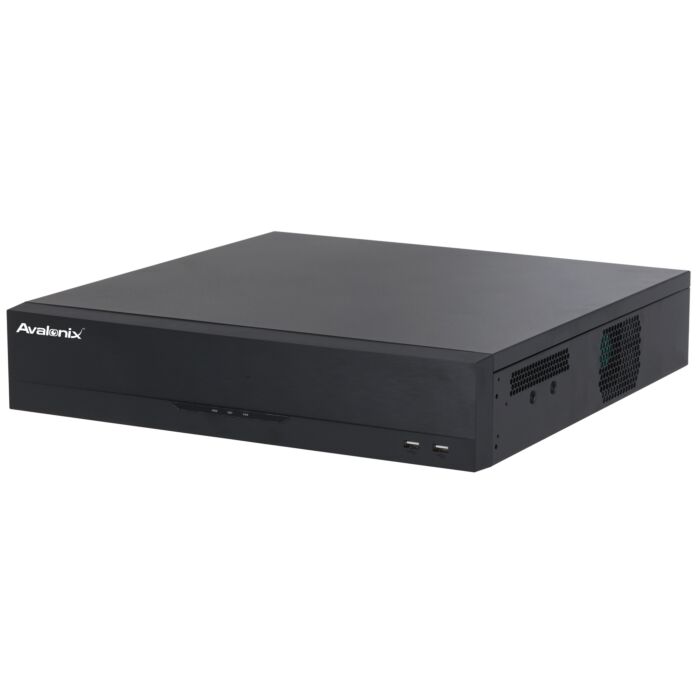
NVR Used in This Test
32 Channel PoE NVR, 16 PoE Ports, 8 HDD Bays, Up to 16MP
SKU: NVR8324PAI
This is the 32-channel Avalonix PoE NVR I used to record the camera, view it locally, and step through the 60 FPS recording frame by frame.
Special Price
$1,799.99
Regular Price
$2,599.99
31% off
Why I Made This Test
I made this video because this is a question we actually get from customers. Someone has a production line, conveyor, machine, or another process that moves quickly. Something goes wrong, but by the time anyone notices it, the event is already over.
The goal is not necessarily to watch everything in slow motion all day. What matters is having enough recorded information to go back afterward and see where the problem started.
That's where frame rate can make a difference.
What 60 FPS Gives You Compared to 30 FPS
A normal 30 FPS camera gives you 30 recorded frames during one second. At 60 FPS, you have twice as many frames from that same second to work with.
You can see this directly in the video. I paused the recording on the NVR and clicked through the frames one at a time. I was able to go through about 60 individual frames before the timestamp moved into the next second.
For me, that's a much better way to explain the benefit than just saying that 60 FPS looks smoother. If I'm trying to find the exact point where something moved out of position or a process failed, I have more individual moments to inspect.
Do You Need 90 or 120 FPS?
Not always.
The HS4M212D can go up to 90 FPS at 4MP and 120 FPS at 1080P, so I wanted to show those settings too. You can see a difference as I move higher, especially with the fan blades, but there are tradeoffs.
Higher frame rates put more demand on the camera, network, and recorder. In the setup I used for this video, the local NVR interface topped out at 64 FPS with that firmware. I had to log directly into the camera from a computer to set 90 and 120 FPS.
I also noticed more delay at the higher frame rates. At 60 FPS I was seeing around a three-second delay in this setup, while 90 and 120 FPS could be closer to five seconds.
That's one reason I said in the video that 60 FPS is a good sweet spot to start with. If 60 gives you enough frames to figure out what happened, there may be no reason to push everything higher.
Shutter Speed Matters Just as Much
This is probably the part of the test that matters most if you're actually trying to see a fast-moving part.
Frame rate tells you how many frames you get every second. It doesn't automatically mean every frame is going to freeze fast movement clearly.
I went into the camera's exposure settings and started changing the shutter speed. At around 1/500 second, I could make out the individual fan blades much better. I then changed the fan from low to medium and high speed to see where it started getting difficult again.
If I need to capture something moving even faster, I can increase the shutter speed further. The tradeoff is light. The faster I make the shutter, the darker the image becomes.
Lighting Is Important for Fast-Moving Machinery
If you're planning a camera specifically for a production line, don't overlook the lighting around the machine.
In the video I pushed the shutter above 1/1000 second and the image got noticeably darker. With enough light on the area being monitored, I have more room to use a fast shutter and still get a usable image.
The camera can use infrared when the scene becomes too dark, but that may not always be what you want around machinery. Metal and other reflective surfaces can reflect IR light back toward the camera.
If I'm designing this for a fixed production area, I'd rather know what I'm trying to capture, how fast it's moving, and what the lighting looks like before deciding on the final settings.
The NVR and Network Have to Keep Up Too
I recorded this test with the Avalonix 32 Channel PoE NVR. The camera was running over my network to the recorder, and I had the NVR connected to a monitor by HDMI for local viewing and playback.
At 60 FPS, I could make the changes directly from the recorder and use the NVR for frame-by-frame playback.
Once you start talking about 90 FPS at 4MP or 120 FPS at 1080P, you also have to think about recording bandwidth, bit rate, and what the particular NVR can handle. Just because a camera supports a certain frame rate doesn't mean every recorder is going to record that setting.
Where I Would Use This Type of Camera
The obvious use for this test is production monitoring. A camera like this can be useful for assembly lines, packaging equipment, conveyors, work cells, moving machinery, and other places where you may need to go back and figure out what happened during a very short period of time.
It can also be used for other high-motion applications. Sports and training areas are another possibility, for example. But for this test I wanted to concentrate on manufacturing because we regularly get calls from people looking for a way to record fast-moving production equipment without moving into a completely different type of specialized high-speed camera system.
Need Help With a Production Line Camera?
If you're trying to record a production line or piece of machinery, the useful information for us is what you're trying to see, how fast it's moving, how far the camera will be from it, and what the lighting is like around it.
Give us that information and we can help you figure out whether 60 FPS is enough, whether you need to go higher, what shutter speed makes sense, and what recorder you should use with it.
You can contact CCTV Camera World or call us at 716-229-0080 during business hours.