

Wireless Vs. Wirefree Security Cameras
Security cameras have come a long way from needing CCTV box enclosures with large power supplies and bulky cables going back to a recorder. Now, consumers can take advantage of various wireless technologies for easier installation. With a wide range of options, choosing the right type of wireless security camera for your surveillance system is a daunting task. One key factor to consider when making this decision is whether to opt for a wireless or wire-free security camera. It’s also worth knowing what other optional equipment you might need to set up your own wireless security camera system, like a wireless access point.
Wireless vs. Wire-free Security Cameras
Wireless and Wire-free security cameras serve similar purposes, but there are key differences between the two that impact their performance, reliability, and whether they’re a good fit for your system. To make the best decision for your home or business, it is essential to understand each type.
To get a crash course about the differences between Wireless WiFi Security Cameras that we sell at CCTV Camera World, and how they compare to Wire-Free cameras on the market, please watch the video below in its entirety.

Wireless Security Cameras
A wireless security camera is a type of surveillance camera that sends video over a wireless connection to a WiFi router or a WiFi NVR. This gets rid of the need to hardwire the camera to a security camera recorder. Wireless technology makes installation easier and more flexible. However, it's important to note that wireless cameras still require a power source, typically through a wired connection with a 12VDC power adapter connected to a hardwired 110V AC electrical outlet.
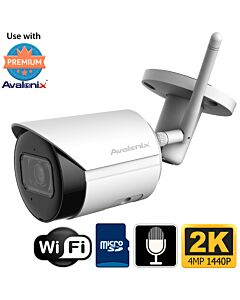
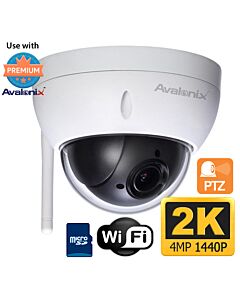
Below are example of wireless (WiFi) cameras that we offer which can be deployed using the method described below.
-
-
-
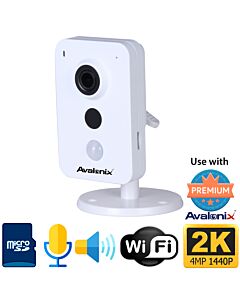 Wireless WiFi Two-Way Audio Camera, Indoor, Speaker, MicrophoneSKU: IP4MPWA$149.99 $299.99 50% off
 -
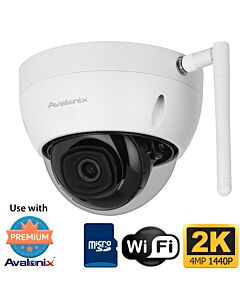
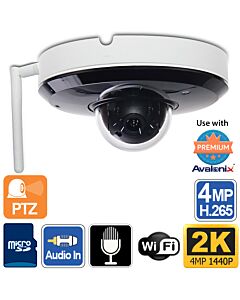 WiFi Mini PTZ Camera with Night Vision and Built-in MicrophoneSKU: IPD3X4MWIFI$399.99 $499.99 20% off
 -
Wire-free Security Cameras
Wire-free security cameras operate without any wires for both power and data transmission. Wire-free cameras rely on battery or solar power for their energy needs and use wireless communication to send the video and audio signals to a WiFi router or receiver. Due to the fact that there are no wires, these cameras give you the most freedom when it comes to installation and placement. However, this flexibility comes at a great cost in terms of upkeep and reliability.
What’s the difference?
The key difference between wireless and wire-free security cameras is how they are powered. Wireless cameras need a power source that is wired to them, while wire-free cameras use batteries or solar panels to harness energy from the sun. This difference has a big effect on how reliable, worthy, and effective the surveillance system is. Since wireless cameras get their power from a dedicated source, they have better signal strength and more consistent video streaming. On the other hand, wire-free cameras use power that is not reliable, which compromises their performance and effectiveness as a surveillance tool.
When deciding between wired and wire-free security cameras, it's important to think about the needs of the surveillance area and the features you want from the camera system. For example, a wireless security camera will be the best choice when connecting to a nearby power source is not a problem and continuous video streaming is important. In places where it's not possible or desirable to run power cables, a wire-free camera might be a good choice.
When to Use Wireless Security Cameras
Wireless security cameras offer several advantages over wire-free systems, making them the preferred choice in almost all scenarios. By knowing the benefits of wireless security cameras, you can make sure that your needs for surveillance are effectively met.
Advantages of Wireless Cameras
- Constant power supply - The main benefit of using wireless security cameras over wire-free is the continuous power supply. Wireless cameras get their power from a wired connection, while wire-free cameras get their power from batteries or the sun.
- No need to change batteries - Continuous power means that you don't have to change the batteries often or rely on the sun for wireless cameras to work. With the power requirements in mind, wireless cameras are a good choice for long-term surveillance, especially in areas where it's important to keep an eye on things all the time.
- No need to worry about solar power - Wireless cameras will also not have power problems when the sun isn't out for a long time or where solar power isn't an option. This makes them a far more reliable choice for locations with limited access to sunlight or during seasons with shorter daylight hours.
- Better wireless gain and signal strength - Also, because they use a dedicated power source, wireless cameras typically have better wireless gain and signal strength. That means the cameras can be further away from the source of WiFi than wire-free ones. They can also record and transmit smoother video and have more reliable connectivity, which is necessary for effective surveillance.
- Continuous, uninterrupted video streaming - Wireless security cameras are especially good for large properties or commercial spaces that need to be watched all the time. In these places, the constant power supply, stronger wireless signal, and continuous video streaming of the wireless cameras make surveillance more effective.
- Better resolution and stronger night vision - Since there are no power limitations with wireless cameras, they also have higher resolution image sensors and longer infrared night vision which are essential for clear security footage. Strong night vision requires power consuming infrared LEDs that can only be had with a camera that has a dedicated power supply.
- Better motion activated recording - Cameras with continuous power are always on and looking out for motion. Not only can they record motion when it happens, they can also record the events leading up to the motion, we call this Pre-recording. With these cameras you can have a complete video recording of a few seconds before the motion event occurred, the event itself, and even a few seconds after.
In conclusion, when choosing a security camera system, it's important to think about what type of cameras the location needs and how important it is to have consistent, reliable video recording. Wireless security cameras are often the best choice because they are always powered, have a stronger signal, have a higher resolution, have longer night vision, and can stream video continuously. Let’s not forget that they also have better motion detection. Wireless cameras are an ideal choice for places like businesses or residential properties where there isn't much sunlight at every corner or where it may be difficult or impossible to change the batteries for wire-free cameras.
The Drawbacks of Wire-free Security Cameras
Wire-free security cameras have the benefit of not having any cords, but they also have a number of problems that make them less useful for surveillance. CCTV Camera World does not recommend using wire-free cameras for protecting homes or businesses that have critical security needs, so we do not sell any wire-free options.
- Most are low quality - The most significant drawback of wire-free security cameras is the abundance of low-quality products that’s available on platforms like Amazon and eBay; they are essentially garbage products. These cameras are sold as cheap, easy-to-install alternatives to professional-grade systems, but they don't have the reliability and performance needed for effective surveillance. These cheap cameras have short battery lives, few features, and poor video quality, which makes them unfit for professional-level surveillance where usable security footage is needed.
- Subpar performance for real security - The fact that wire-free security cameras run on batteries or solar power also means their performance is inconsistent. Cameras that run on batteries need to have their batteries changed every so often, which is inconvenient and could leave gaps in your surveillance coverage. Solar-powered cameras, on the other hand, depend on sunlight for their energy needs, meaning there is a possibility they stop working during cloudy days, at night, or in locations with limited sunlight.
- Limitations for commercial settings - Another concern with wire-free security cameras is their limitations in business settings. It is very important to have constant and reliable surveillance in commercial and other high-security settings. Businesses should not use wire-free cameras because they don't have a dedicated power source, have bad motion-activated performance, and depend on apps on a smartphone for management.
- Slow access to video streams - Many wire-free camera phone apps use cloud servers, which have had problems with reliability, speed, and security. Processing video through the cloud can take minutes, and those minutes are invaluable when something is happening at your home or business.
- Subscription fees - Last but not least are the subscription fees and the need for a mobile app to use wire-free cameras. Most, if not all, wire-free cameras are sold at low margins. The brands that sell these cameras make up for that loss in profit by charging subscription fees for video storage. While the fees may seem low up front, ranging from $1 to $5 per camera per month, after a year or two you will end up paying more than you would have for a professional wireless camera without recurring fees.
In the end, if you're thinking about getting a wire-free security camera system, it's important to know about the problems with this kind of technology. While wire-free cameras are convenient because they are easy to set up and don't need cables to work, they have problems with power, reliability, performance, and recurring costs. By carefully considering these problems, you can decide if a wire-free security camera system is the best choice for your surveillance needs.
Advantages of Using an Access Point for Wireless Security Cameras
Using an access point radio with our wireless security cameras improves performance and reliability in big ways. Access points act as extensions to existing networks for adding wireless devices.
- Longer distances for WiFi - The most important advantage of using an access point radio is the ability to install wireless cameras at a greater distance from the central location. This is particularly useful in large properties, commercial spaces, or areas with difficult access where running long cables is impractical or impossible. By utilizing an access point radio, you can position your wireless security cameras strategically throughout your property to ensure comprehensive coverage. Keep in mind that the cameras require a power source where they’re being installed.
- Better WiFi performance - Improved signal strength and connectivity are additional benefits offered by an access point radio. Wireless security cameras can suffer from signal loss or interference due to distance, obstructions, and other environmental factors like competing WiFi networks. An access point radio helps to mitigate these issues by providing a more stable connection between the camera and the monitoring system. This results in more reliable video streaming, faster response times, and overall improved performance of your security camera system.
- System design flexibility - Another advantage of using an access point radio is its versatility and compatibility with various camera system configurations. WiFi access points support a wide range of wireless cameras from CCTV Camera World, making it easier to integrate them into your existing surveillance setup or to build a new customized system. This flexibility ensures that your security system is adaptable and scalable as your surveillance needs change over time.
- Point-to-Point network bridge - On the same topic of flexibility, WiFi access points can be paired with one another to create a wireless bridge between two buildings or two separate networks. This is especially useful if you want to install an IP security camera system at another building on your property but don’t want to have to trench a cable between them. A wireless bridge can also be used by rural customers to add internet to their barns and we have a full writeup about this type of setup in our Barn Security Camera System guide. A wireless bridge also allows you to use 4K security cameras at a remote location where 4MP WiFi cameras might not suffice.
Adding an access point radio to your wireless security camera system provides many benefits, such as longer mounting distances for your cameras and better signal strength and connectivity. It also lets you improve your existing system, or we can help you design a new custom wireless security camera system.
In the section below, we show how to use a TP-Link Access Point which is commonly available from marketplaces to set up a strong WiFi link to one of our WiFi security cameras.
Setting Up a TP-Link Access Point With an Avalonix WiFi Security Camera
Watch the video below to understand how you can configure a TP-Link access point and connect one of our WiFi security cameras. This is an advanced tutorial that requires some knowledge of computer networking. You can buy a Paid Networking Support Session if you want us to help you set up a wireless access point for your system.

Instructions
If you’re the type of person who prefers to read a list of steps, we've created the following instructions:
You will need the following equipment:
- Several Ethernet cables
- Windows computer with at least 1 Ethernet port - preferably 2 Ethernet ports
- TP-Link Pharos series access point
- TP-Link PoE injector that is included with the access point
- Avalonix WiFi security camera
- Your router
Part 1 - Configuring the TP-Link Access Point
The first steps are to open, turn on, and connect the TP-Link access point to your Windows PC so you can initialize and set up the radio.
- Open the TP-Link radio box and retrieve the access point and it’s PoE injector
- Using an Ethernet cable connect the PoE side of the injector to the access point
- Using another Ethernet cable connect the LAN side of the injector to an Ethernet port in your PC
- Configure your Windows Ethernet port to a compatible IP address for the access point. For example 192.168.0.50. You can do this by:
- Go to the Control Panel in your version of Windows
- Go to the Network Connections
- Right click the “Ethernet 1” or “Ethernet 2” network connection. This will be the Ethernet port you have the access point connected to. Then click Properties
- Find Internet Protocol Version 4 (TCP/IPv4) in the list and click it to highlight it
- Click Properties on the menu below the list
- Click the “Use the following IP address” option
- Enter 192.168.0.50
- Clicking on the Subnet mask will automatically fill 255.255.255.0, you can leave that as the subnet
- You can leave the Default gateway, Preferred DNS, and Alternate DNS empty
- Click OK to save the changes
- Click Close to get out of the Properties
- The Ethernet adapter should now say Unidentified Network in the Network Connections page
- Open any web browser and type in the default IP address for the TP-Link radio - 192.168.0.254You may get a security “Your connection is not private” warning or certificate error. You can either click through the Advanced menu and proceed to 192.168.0.254.Or you can type “thisisunsafe” on your keyboard.
- After you get to the TP-Link login page type in the following default credentials Username: adminPassword: admin
- Click the checkbox for the “I agree to these terms of use”
- Click Login
- The next page requires you to make a new user account or password. It’s simpler to continue using the admin user, so enter admin for the “New User Name”Then enter in a new password that you want to set for the admin user on your radio. In the video, we use our Avalonix factory default password. You can use whatever password you would likeClick Finish to automatically login to the access point
- Click NETWORK on the main menu at the top
- Change the “IP Address:” to an IP address that is compatible with your computer network. In our video, the main network is a standard 192.168.1.xxx network. To keep it simple, we set the access point IP address to 192.168.1.254
- Enter the IP address for the router in the “Gateway IP” section. In our video the IP address for the router is 192.168.1.1
- Enter the Primary DNS for your network. Typically the Primary DNS will be your router's IP address. You can use Google’s DNS 8.8.8.8 or CloudFlare’s DNS 1.1.1.1.
- For the Secondary DNS use 8.8.8.8 or 1.1.1.1 from the step above
- Click Apply to save the IP Address, Gateway IP, Primary DNS, and Secondary DNSYour web browser will automatically attempt to access the new IP address you just configured
- If you don’t have two Ethernet ports on your computer, now is the time to go back into your Windows Network Connection settings and set your Ethernet 1 back to “Obtain an IP address automatically” or the IP address that was previously configuredReconnect the original Ethernet cable coming from your router back into your computer’s Ethernet port - If you have a laptop with a wireless connection to your router you can ignore thisMove the Ethernet cable that was plugged into your computer’s Ethernet port into your routerBoth your computer and the injector should be connected to your router now
- Enter the IP address you configured for the radio into the web browser. If you are following our example it will be 192.168.1.254.You may get another “Your connection is not private” error and to get through it you can either type “thisisunsafe” or click Advanced and “Proceed to 192.168.1.254 (unsafe)”Login to the access point using the username and password that you just configured
- Navigate to the WIRELESS menu in the access point’s web interface
- The important thing that must be done in the WIRELESS page is to set the Security Mode and configure the password for the WiFi Click the Security Mode drop-down menuThe most up-to-date security mode you can choose is WPA-PSK, which allows you to create a password for the WiFi network.Leave the Version and Encryption settings as “Auto” unless you are an experienced network technician who knows what they are configuringEnter a “PSK Password” for the access point WiFi network, and remember the password, as you’ll have to enter it into the camera, as explained in Part 2 below.Click the Apply button at the bottom right of the page, and then the Save button at the top right of the page to save the WiFi SSID, Security Mode, and PSK Password you just created
- The TP-Link access point is now configured for your network and is acting as an extension to your computer network. Before you go and mount the TP-Link access point we recommend following Part 2 below to pair your WiFi security camera to the SSID of the access point.
Power the injector on by plugging it into a power outlet
Here is where you can customize the Wireless network that is transmitted from the access point
In our video, we leave the SSID as the default TP-Link one. When you try to connect a device to the WiFi that the access point is emitting, the SSID is what appears on laptops, phones, and cameras.
Part 2 - Connecting the Avalonix Wireless Camera to the TP-Link Access Point WiFi
The second part of this process involves powering the camera on and joining the camera to the TP-Link WiFi network that you just created.
Note: The WiFi camera must first be connected to your router using an Ethernet cable so you can access the camera’s web interface and join it to the WiFi network as explained below.
- Power the camera using a 12V DC power adapter, preferably the 12V 1 Amp that is typically purchased with the camera
- Connect the camera using an Ethernet cable to your router. This is a temporary connection so you can join the camera to a WiFi network.
- Using a web browser, enter the Wired IP address for the camera into the address bar. The Wired IP address can be found on a label on the top of the camera's box. This will take you to the camera’s web interface.If our shipping department didn’t pre-configure the wired IP address for the camera, it may be DHCP (automatic), 192.168.1.108, or 192.168.1.109. If it is DHCP (automatic), you will need to use the ConfigTool software or find the camera in your router’s “connected devices” page.
- Login to the camera using the credentials that are also found on the label on the top of the box.
- Click the Setting tab at the top right of the web interface. Click the Network menu option and then the WiFi submenu option.
- Double click on the WiFi SSID that you created in Part 1
- A small input box will appear that has the Signal Quality, Authentication Mode, and an Input Password field. Type in the WiFi password that you created for the TP-Link WiFi in Part 1
- Click on Connection or Connect. After a few moments the camera will connect to the TP-Link WiFi and list the SSID, WiFi IP Address of the camera, Subnet Mask, and Gateway for your network
After you have configured the TP-Link radio and paired the WiFi camera with it, you can install the access point and camera in their final locations.